Well, it’s been quite a while since our last kitchen update, but we’ve been pretty busy, and also a little slow to write this post. In case you’ve forgotten what we did up until this point, like I did, you can see our last posts in this series here:
- Kitchen Renovation, Part 1
- Kitchen Renovation, Part 2
Last time, we had just finished the first week of renovations, and we were close to finishing, but still had a bunch of little projects remaining. We basically went down the list of things which had the biggest impact on the kitchen, while also considering how much time it would take, since we were no longer on vacation.
First, I installed the garbage can slide outs, so we could hide the garbage and recycling in the cabinets.
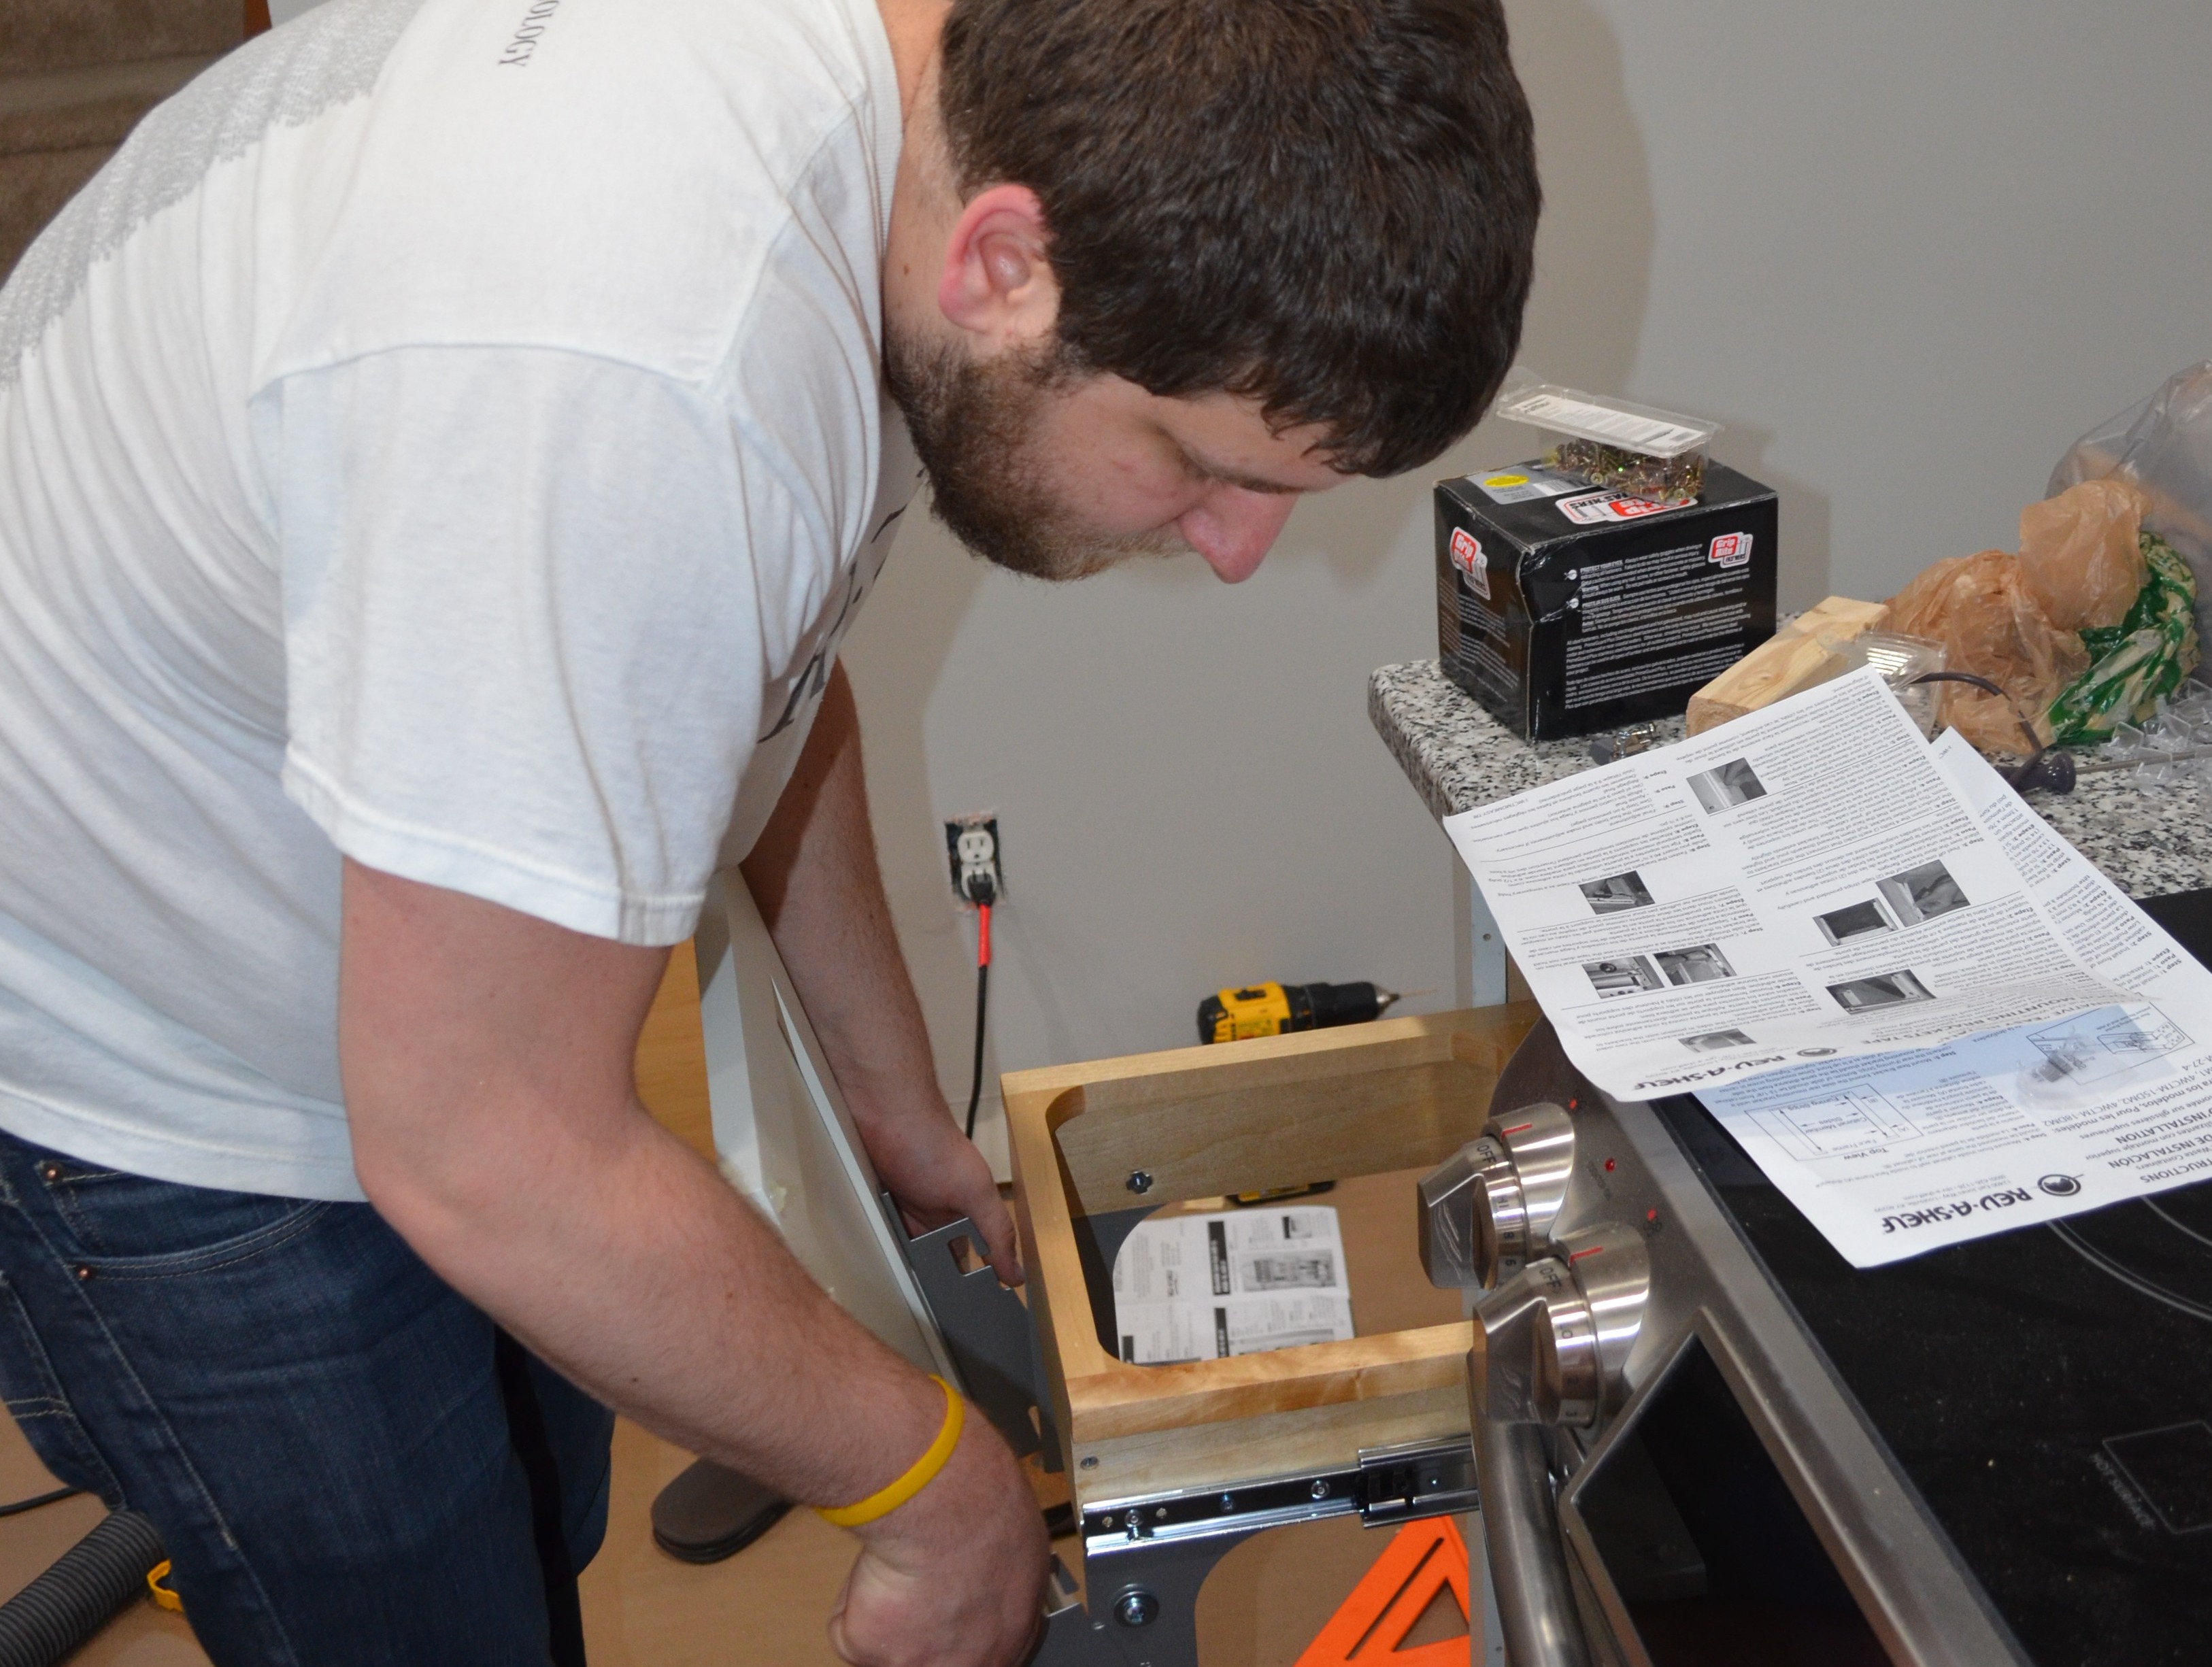
Installing the slide out garbage cans.
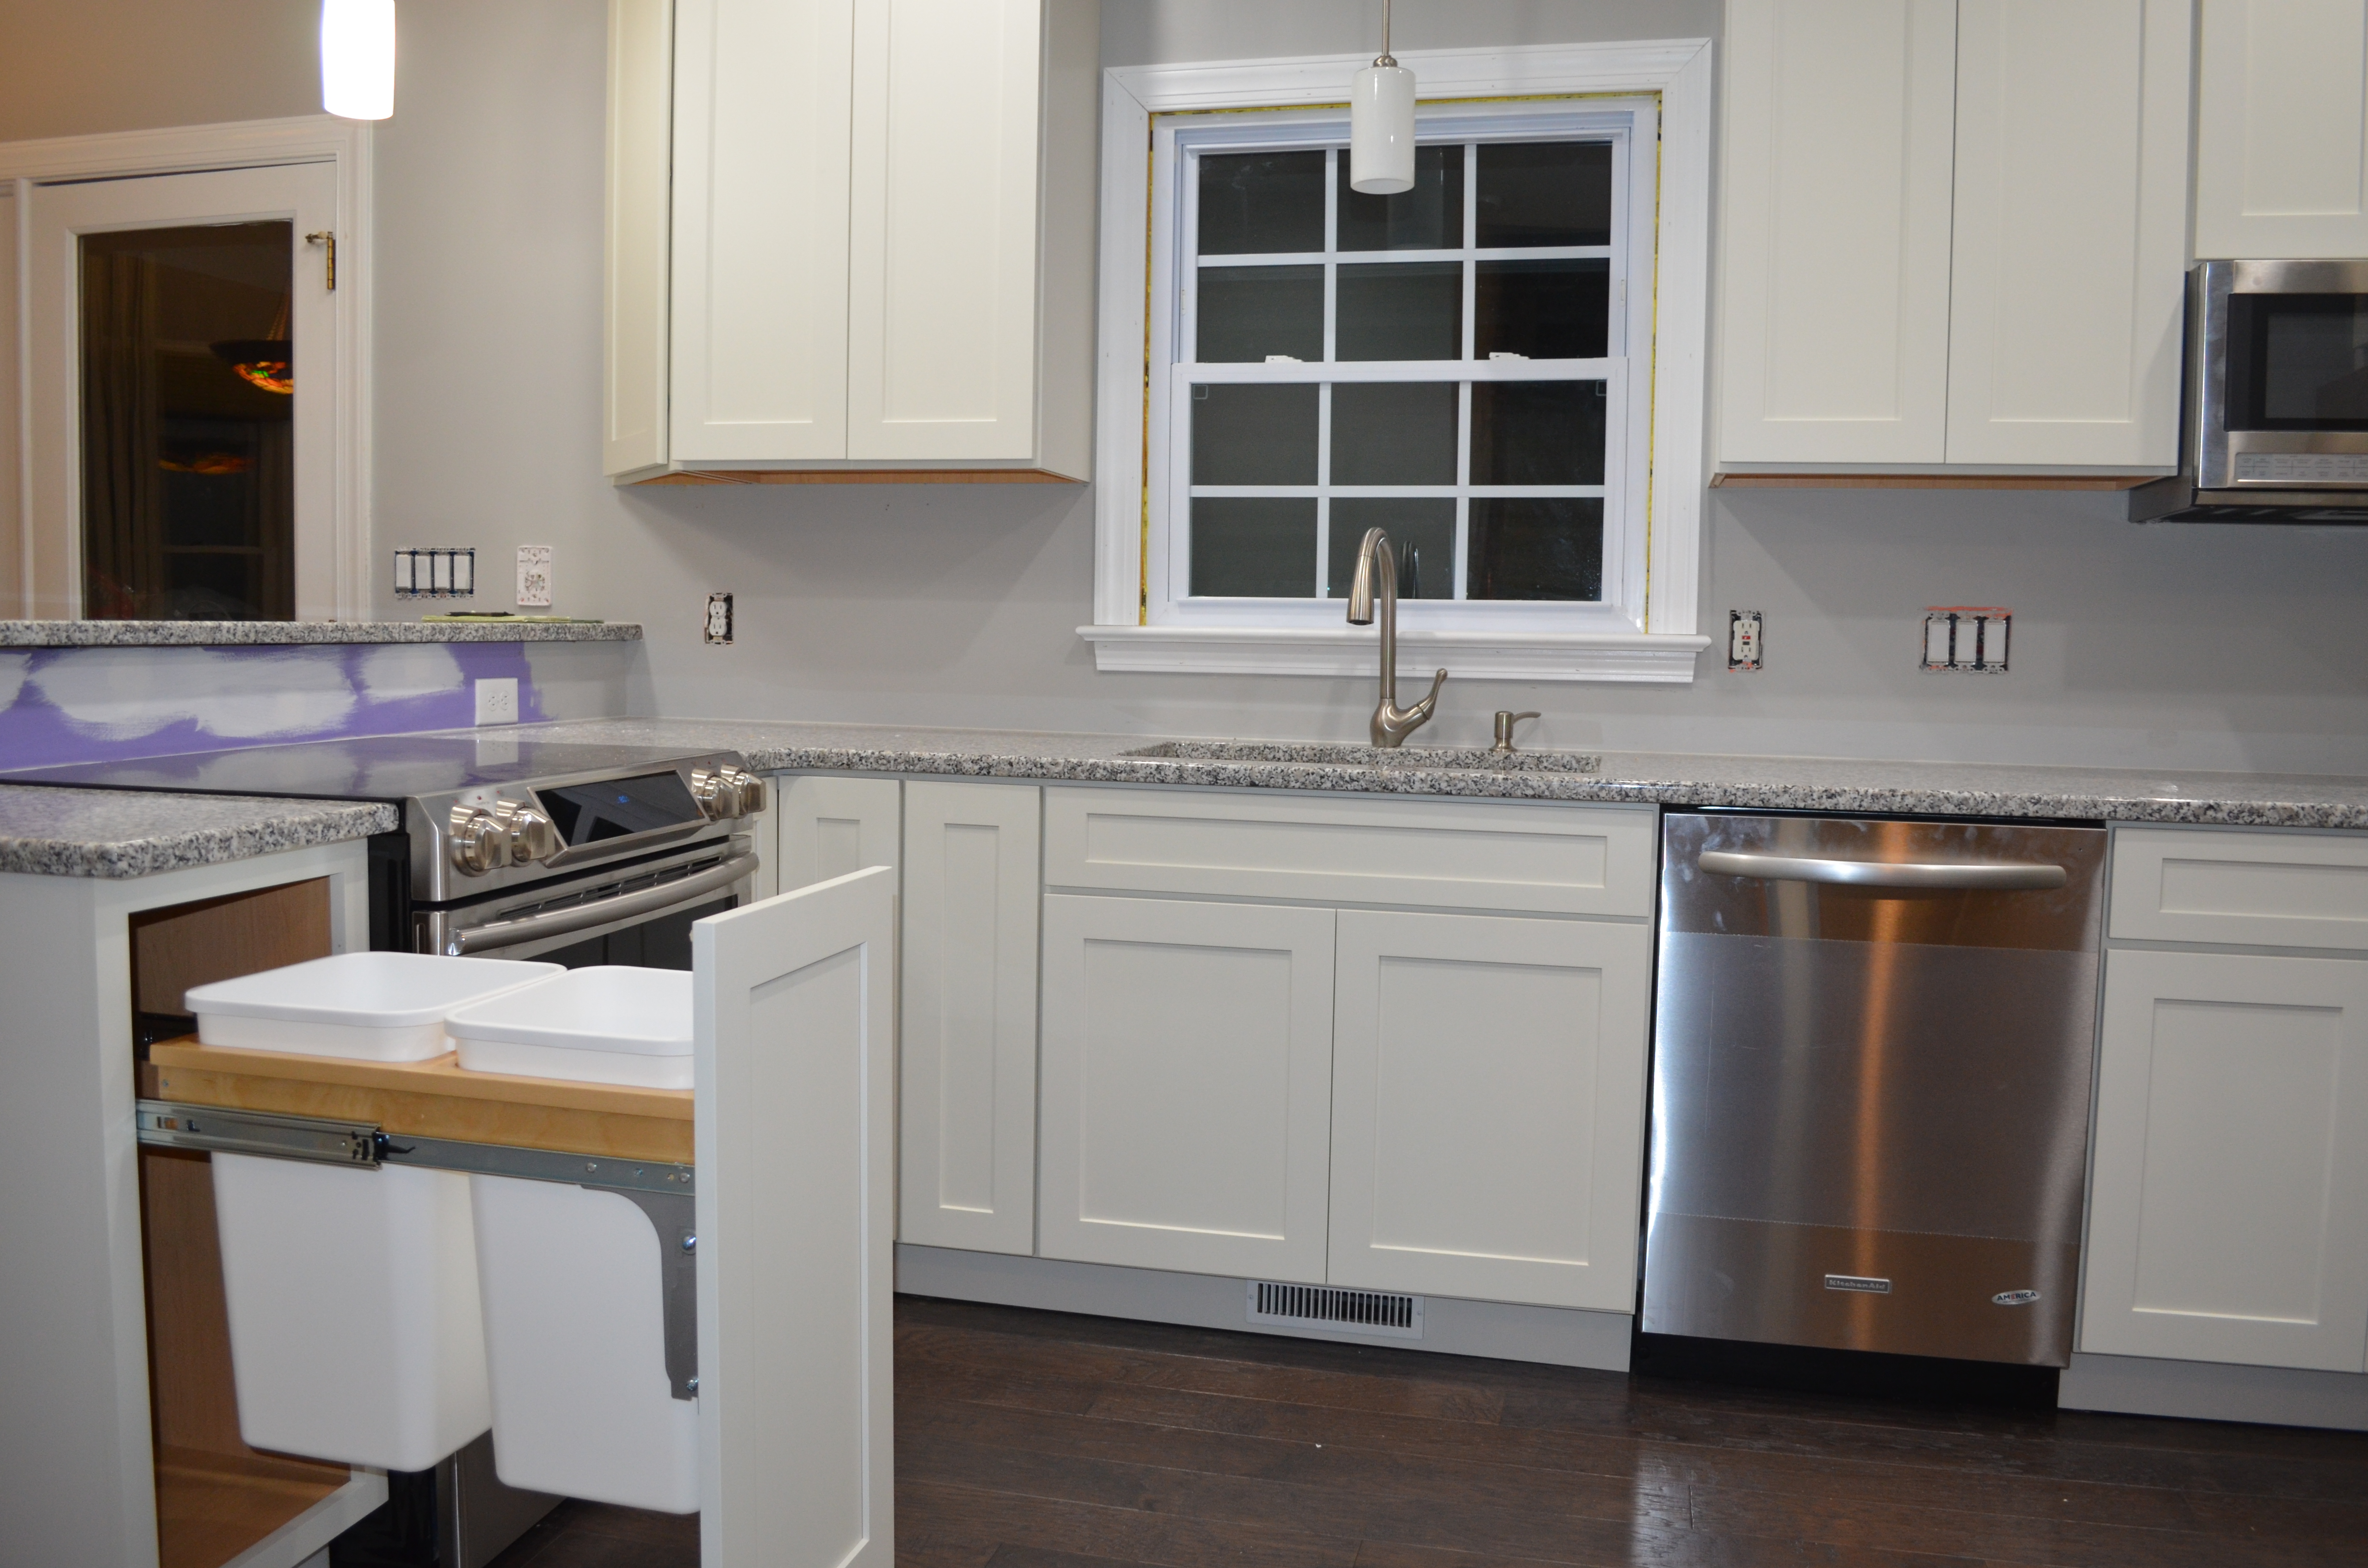
Slide out garbage cans installed.
Naturally, one of the next things we started with was the backsplash. We had picked grey subway tile that we both liked, and we did it sections at a time. It took us about 4 days (about 2 hours a day) to complete, since we had never dealt with tile before. We really wanted to finish in 3 days, but we ended up running out of spacers on day 3, so we ended up having to save the bar wall for day 4.
Ashley laid the tile out on the wall as I cut it using a wet tile saw.
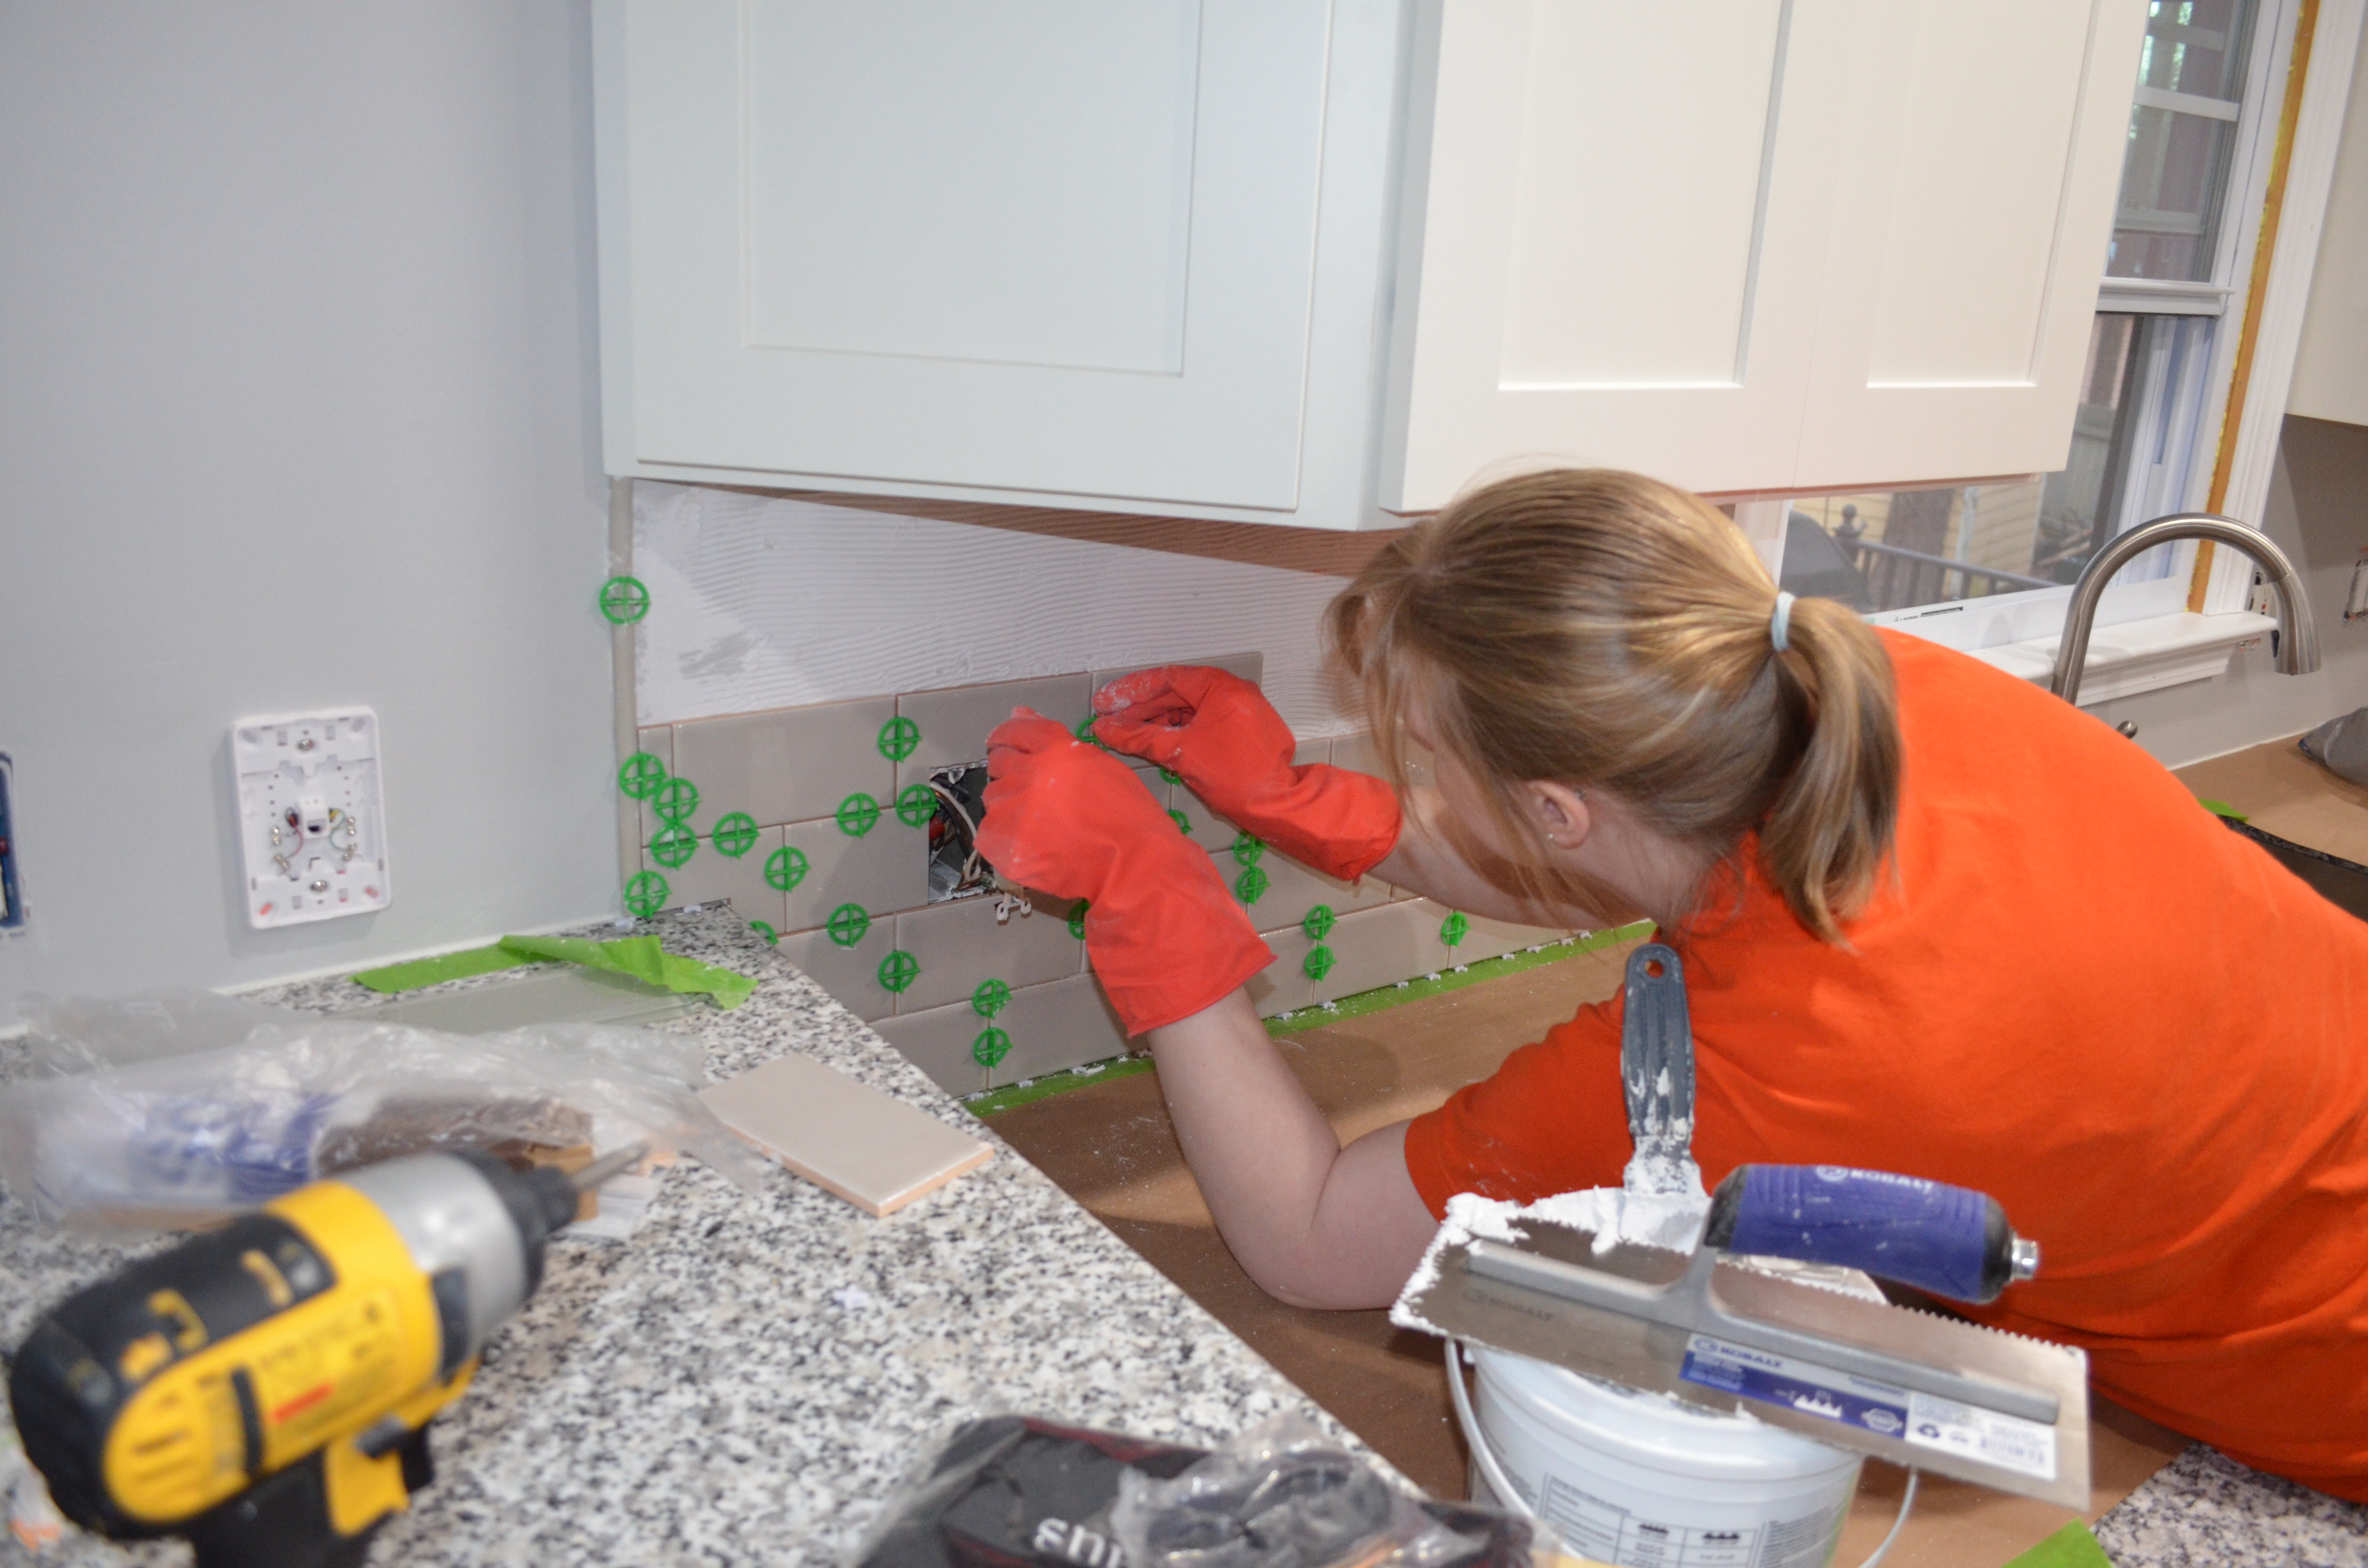
Ashley laying the tile after spreading the mortar.
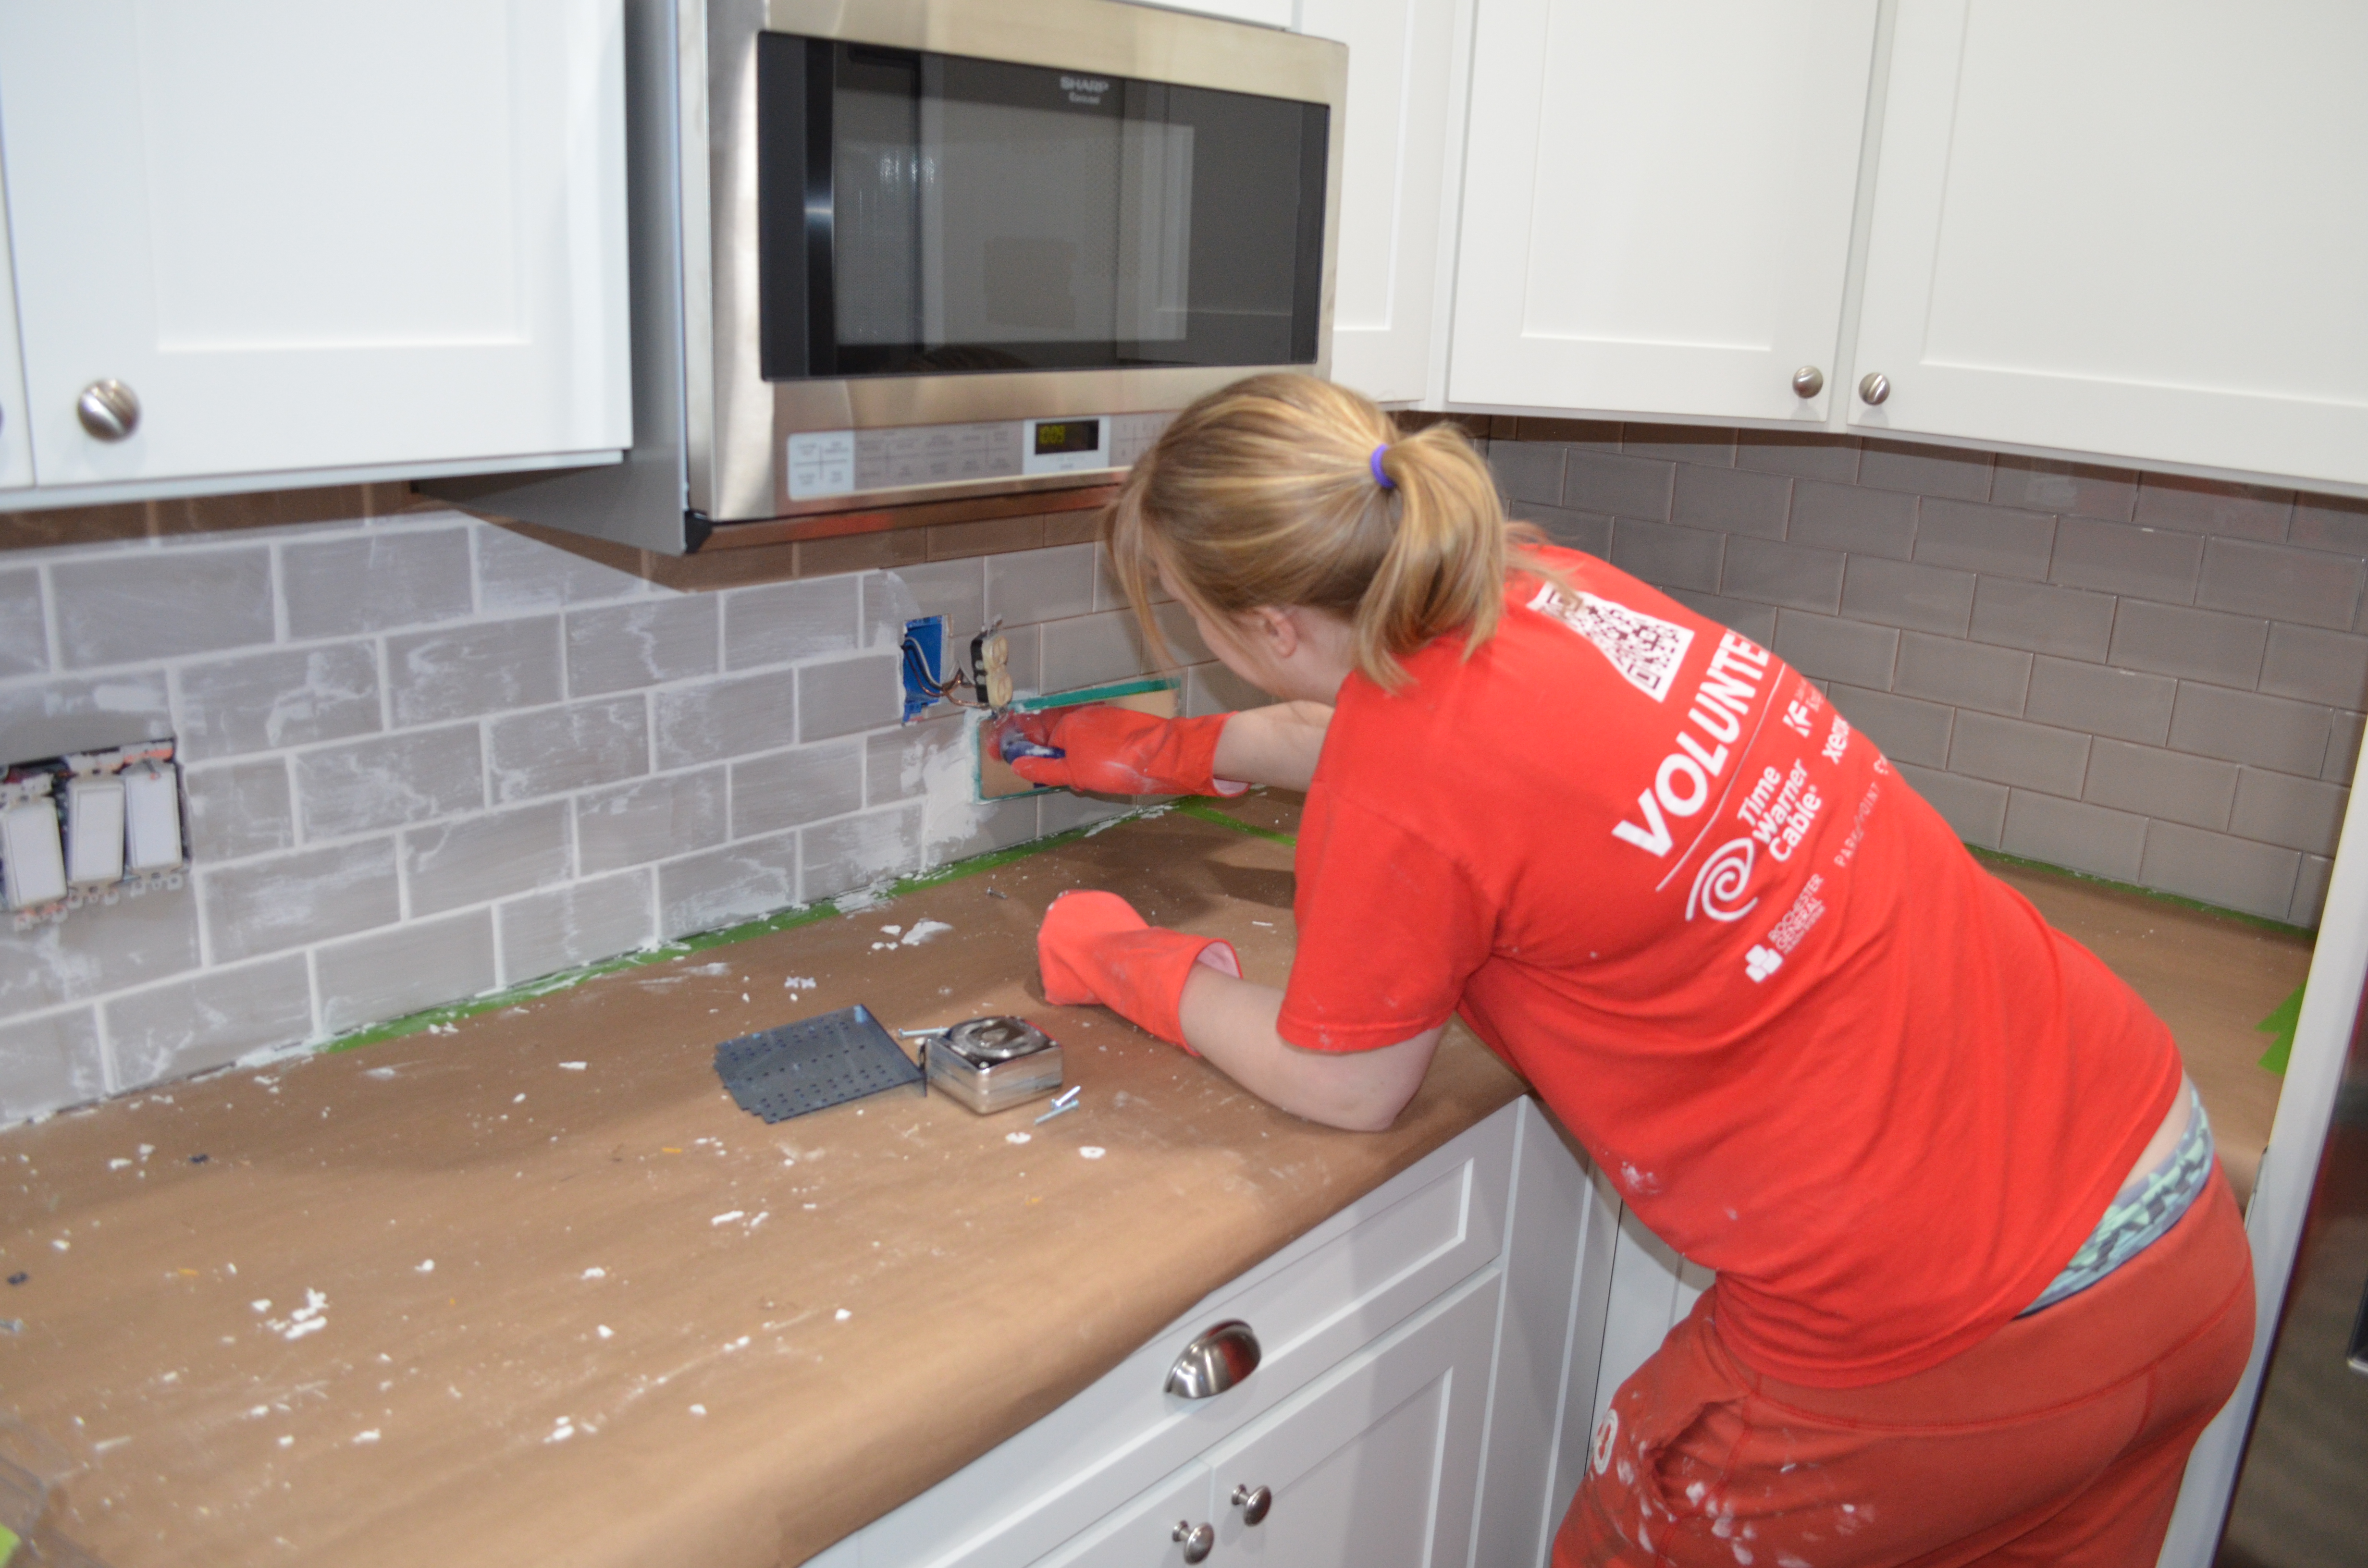
After the final day of laying tile, we then had to add grout to the tile to fill the gaps. Ashley started by spreading the grout, and I followed her, wiping and cleaning it off the tile. Since you wipe the grout all over the tile and the gaps, it leaves the tile pretty dirty if you don’t wash it off pretty quickly.
Grouting the tile.
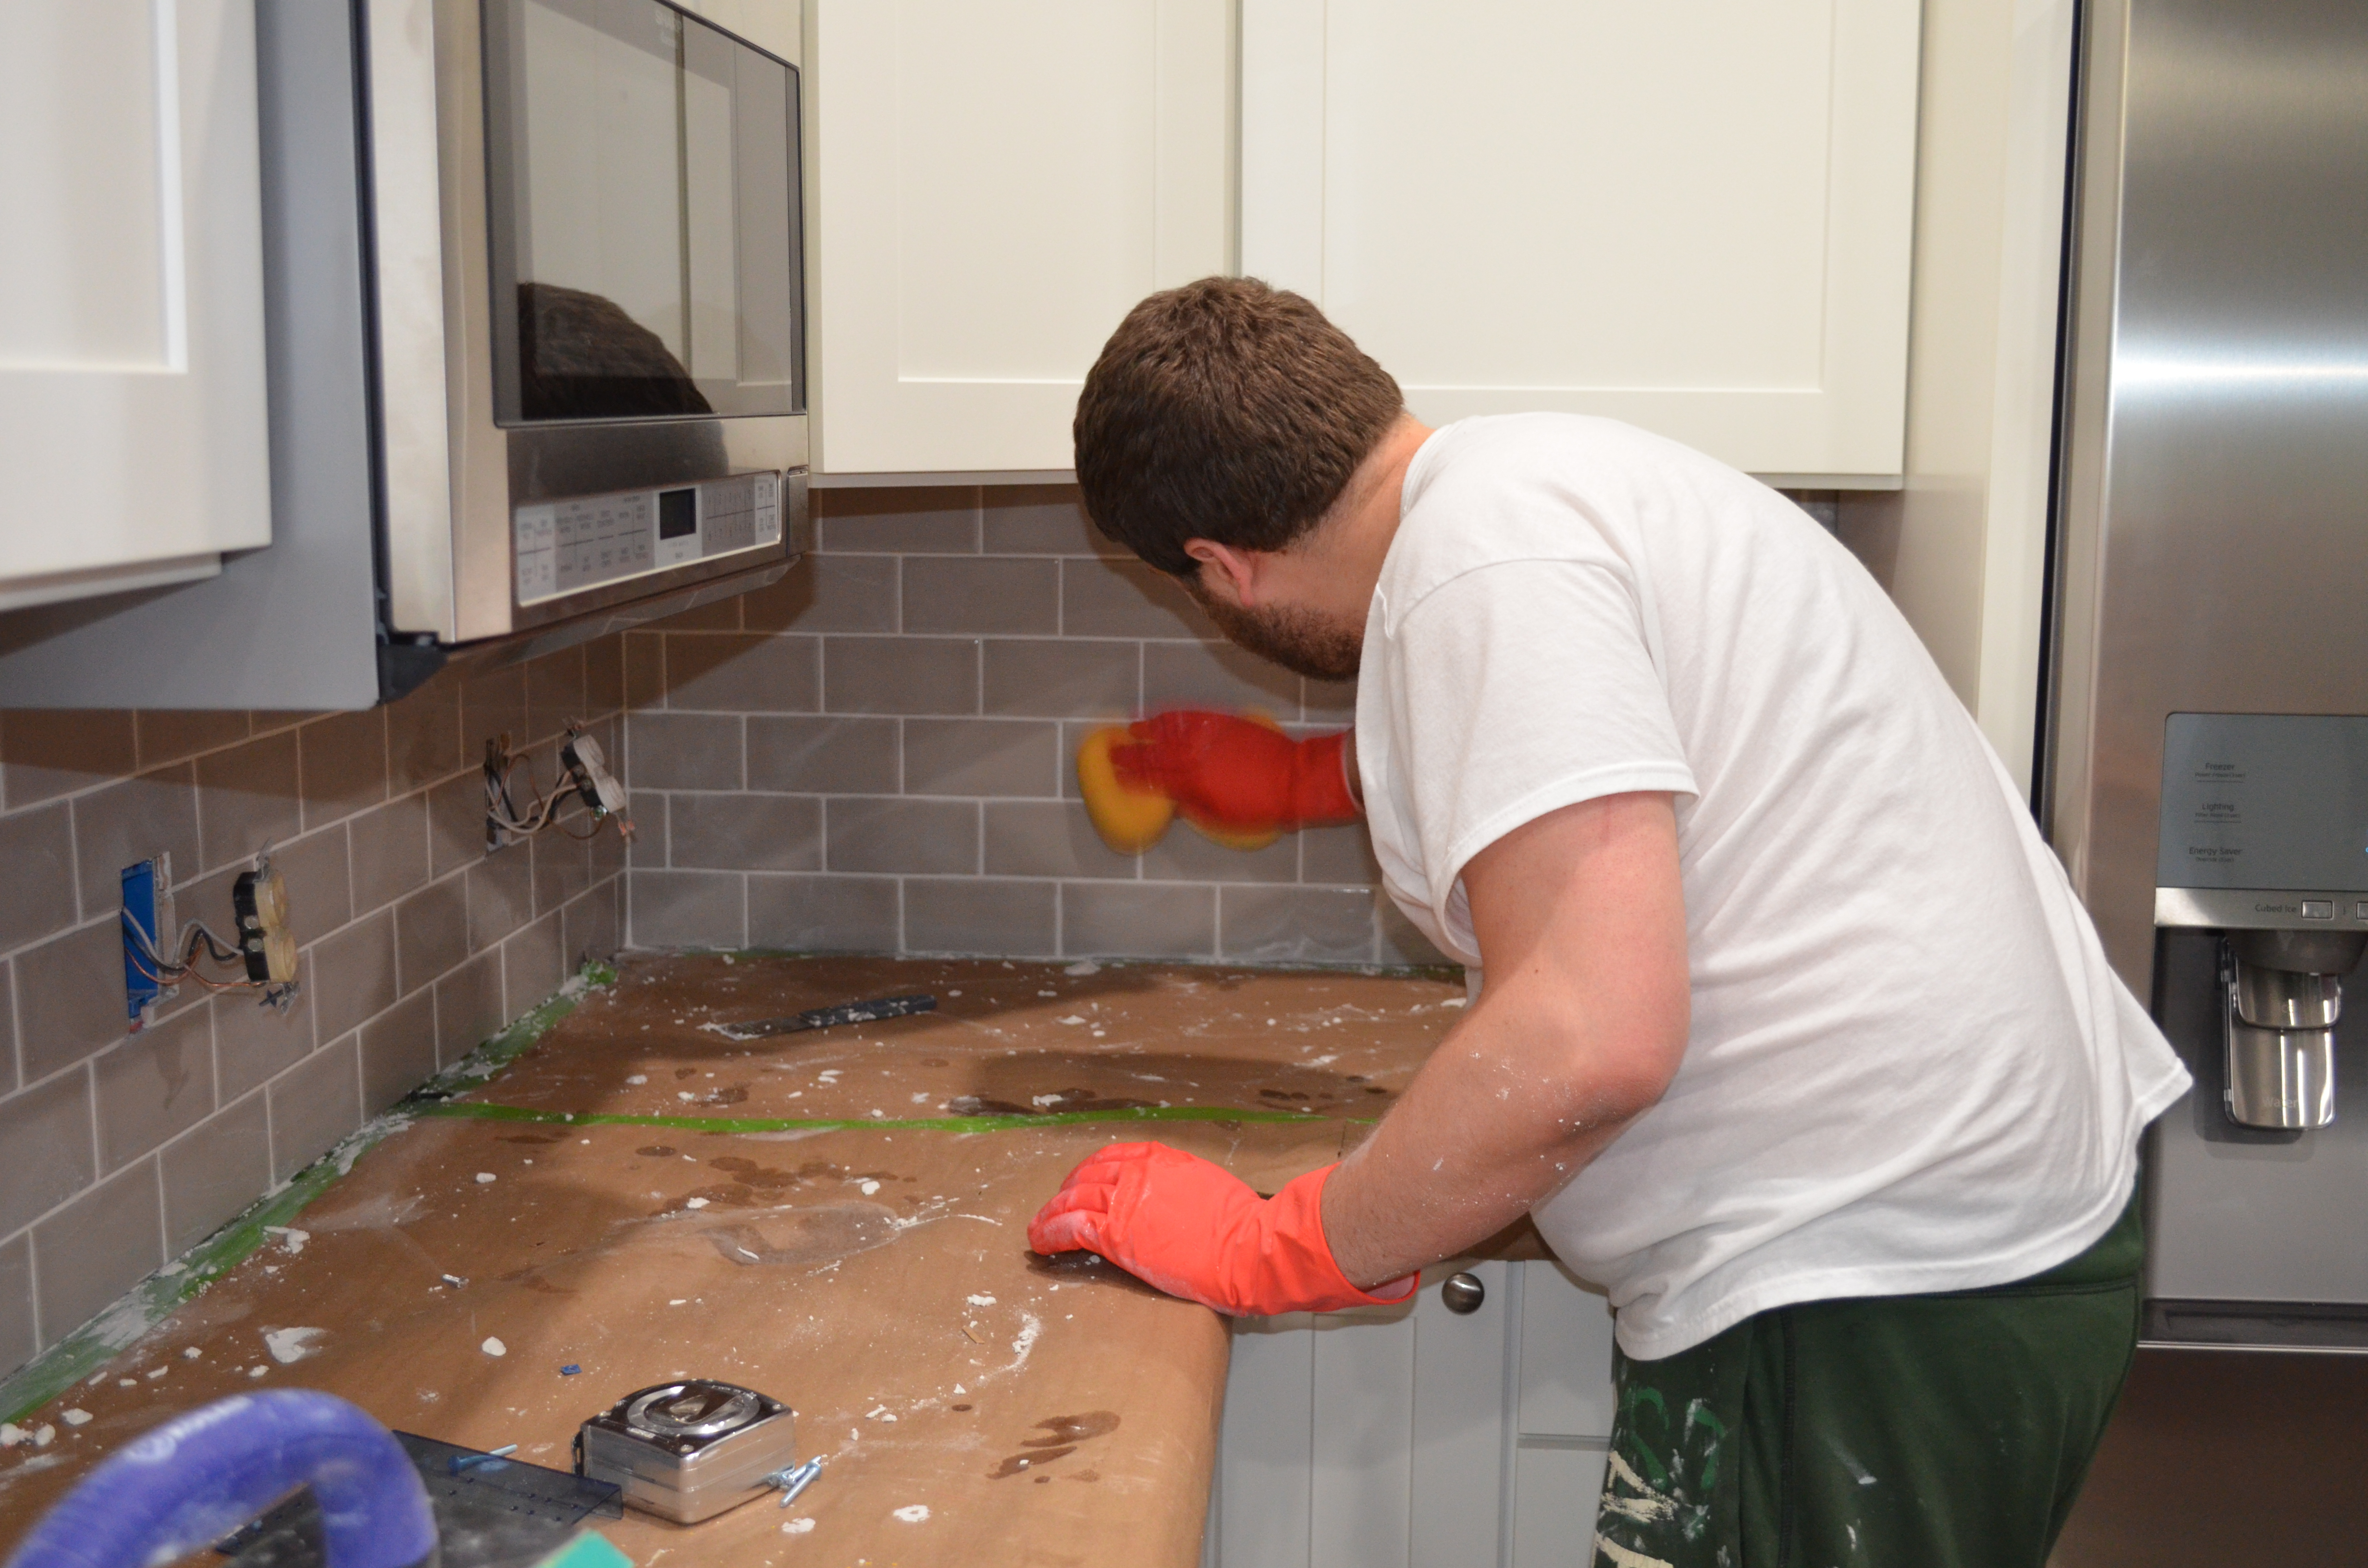
Wiping the tile clean with a sponge to make grout clean-up easier after it dries.
After we finished with the tile, one of the next things we worked on involved work around the entire downstairs – the baseboard. We installed new baseboard and quarter-round shoe moulding around the entire kitchen, hallway, and downstairs bedroom/office. This really made the place look a lot nicer, after having spent weeks with no baseboard downstairs. Unfortunately, since we were trying to get it done fast, we forgot to take some pictures during the process.
In addition to baseboard, I also put up crown moulding from the cabinets up to the soffit to close the gap between the two. I had left space during the renovation so that we could add this moulding. Building the soffit the way I did, it also allowed us to screw from the cabinets up into the soffit, to add more support for holding up the cabinets.
We also want to add crown moulding around the entire downstairs, but we haven’t quite gotten there yet, since we have to do all of it in order to do any of it.
At some point, we also added all of the hardware to the cabinets, so we could tell which way to open them, and not get the cabinets dirty with our hands by having to touch them all the time.
Finally, we have a kitchen that is all but complete – now we just need to find the right barstools that apparently don’t exist.
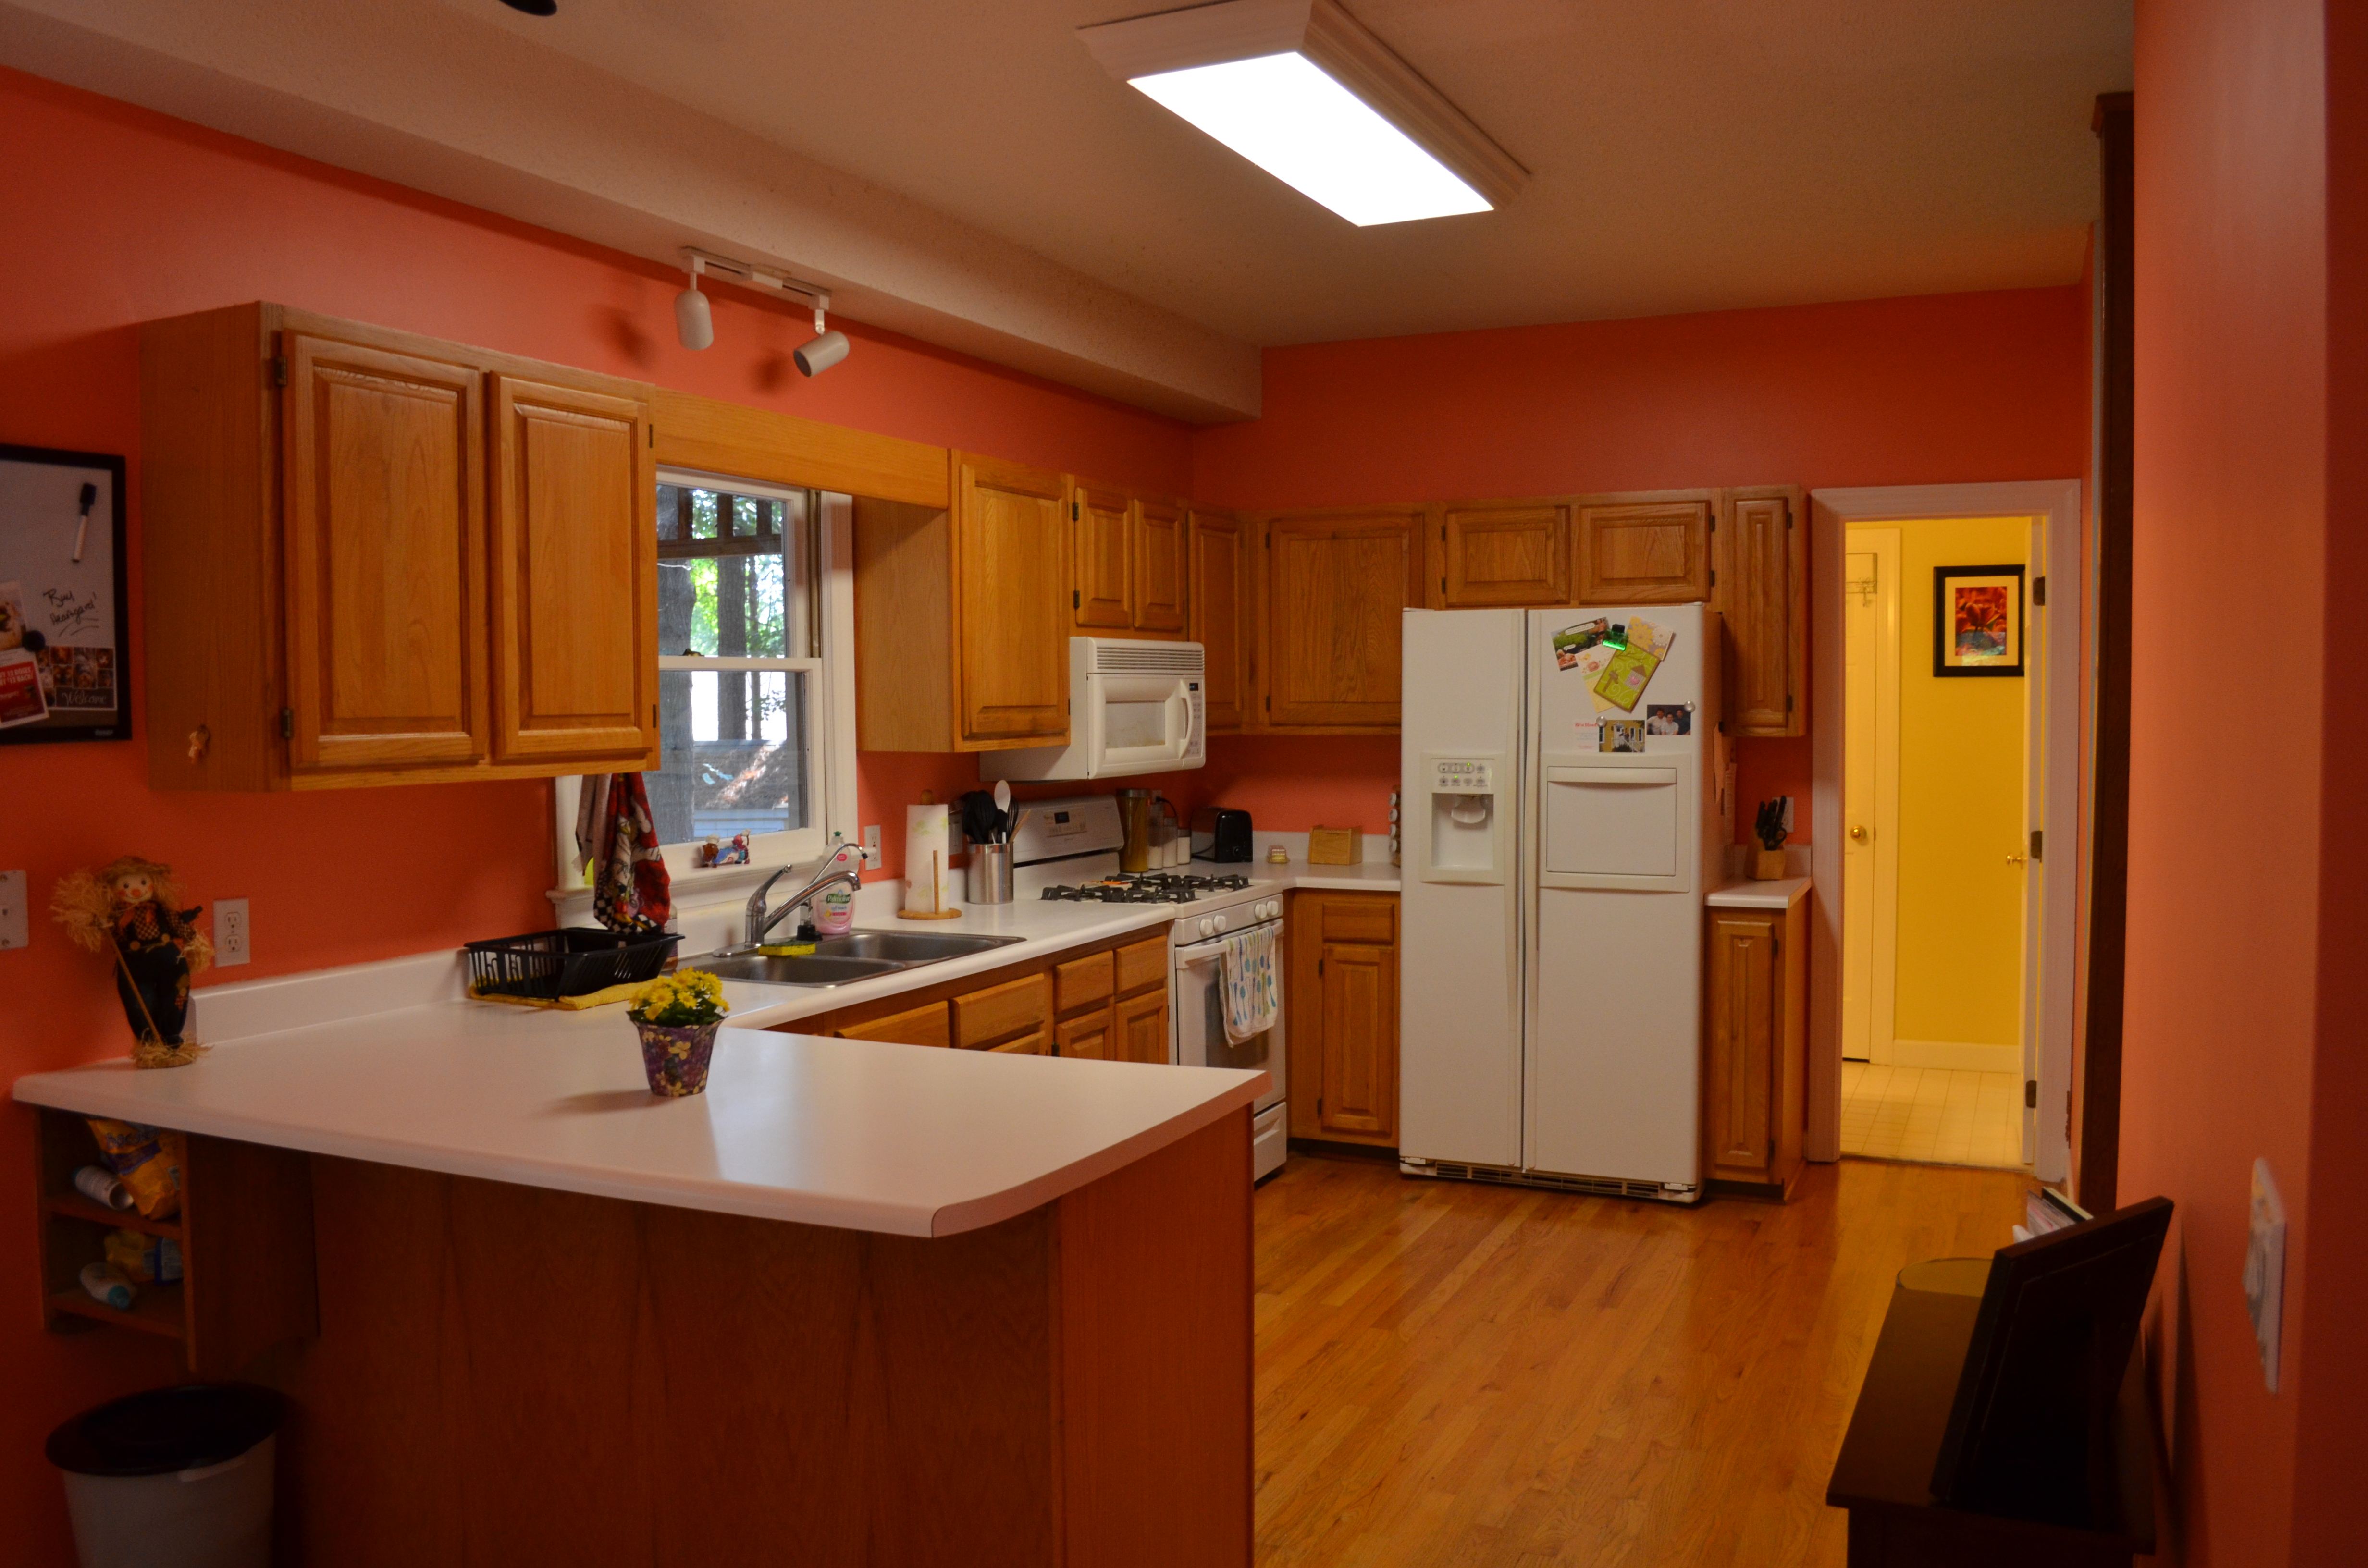
Before.
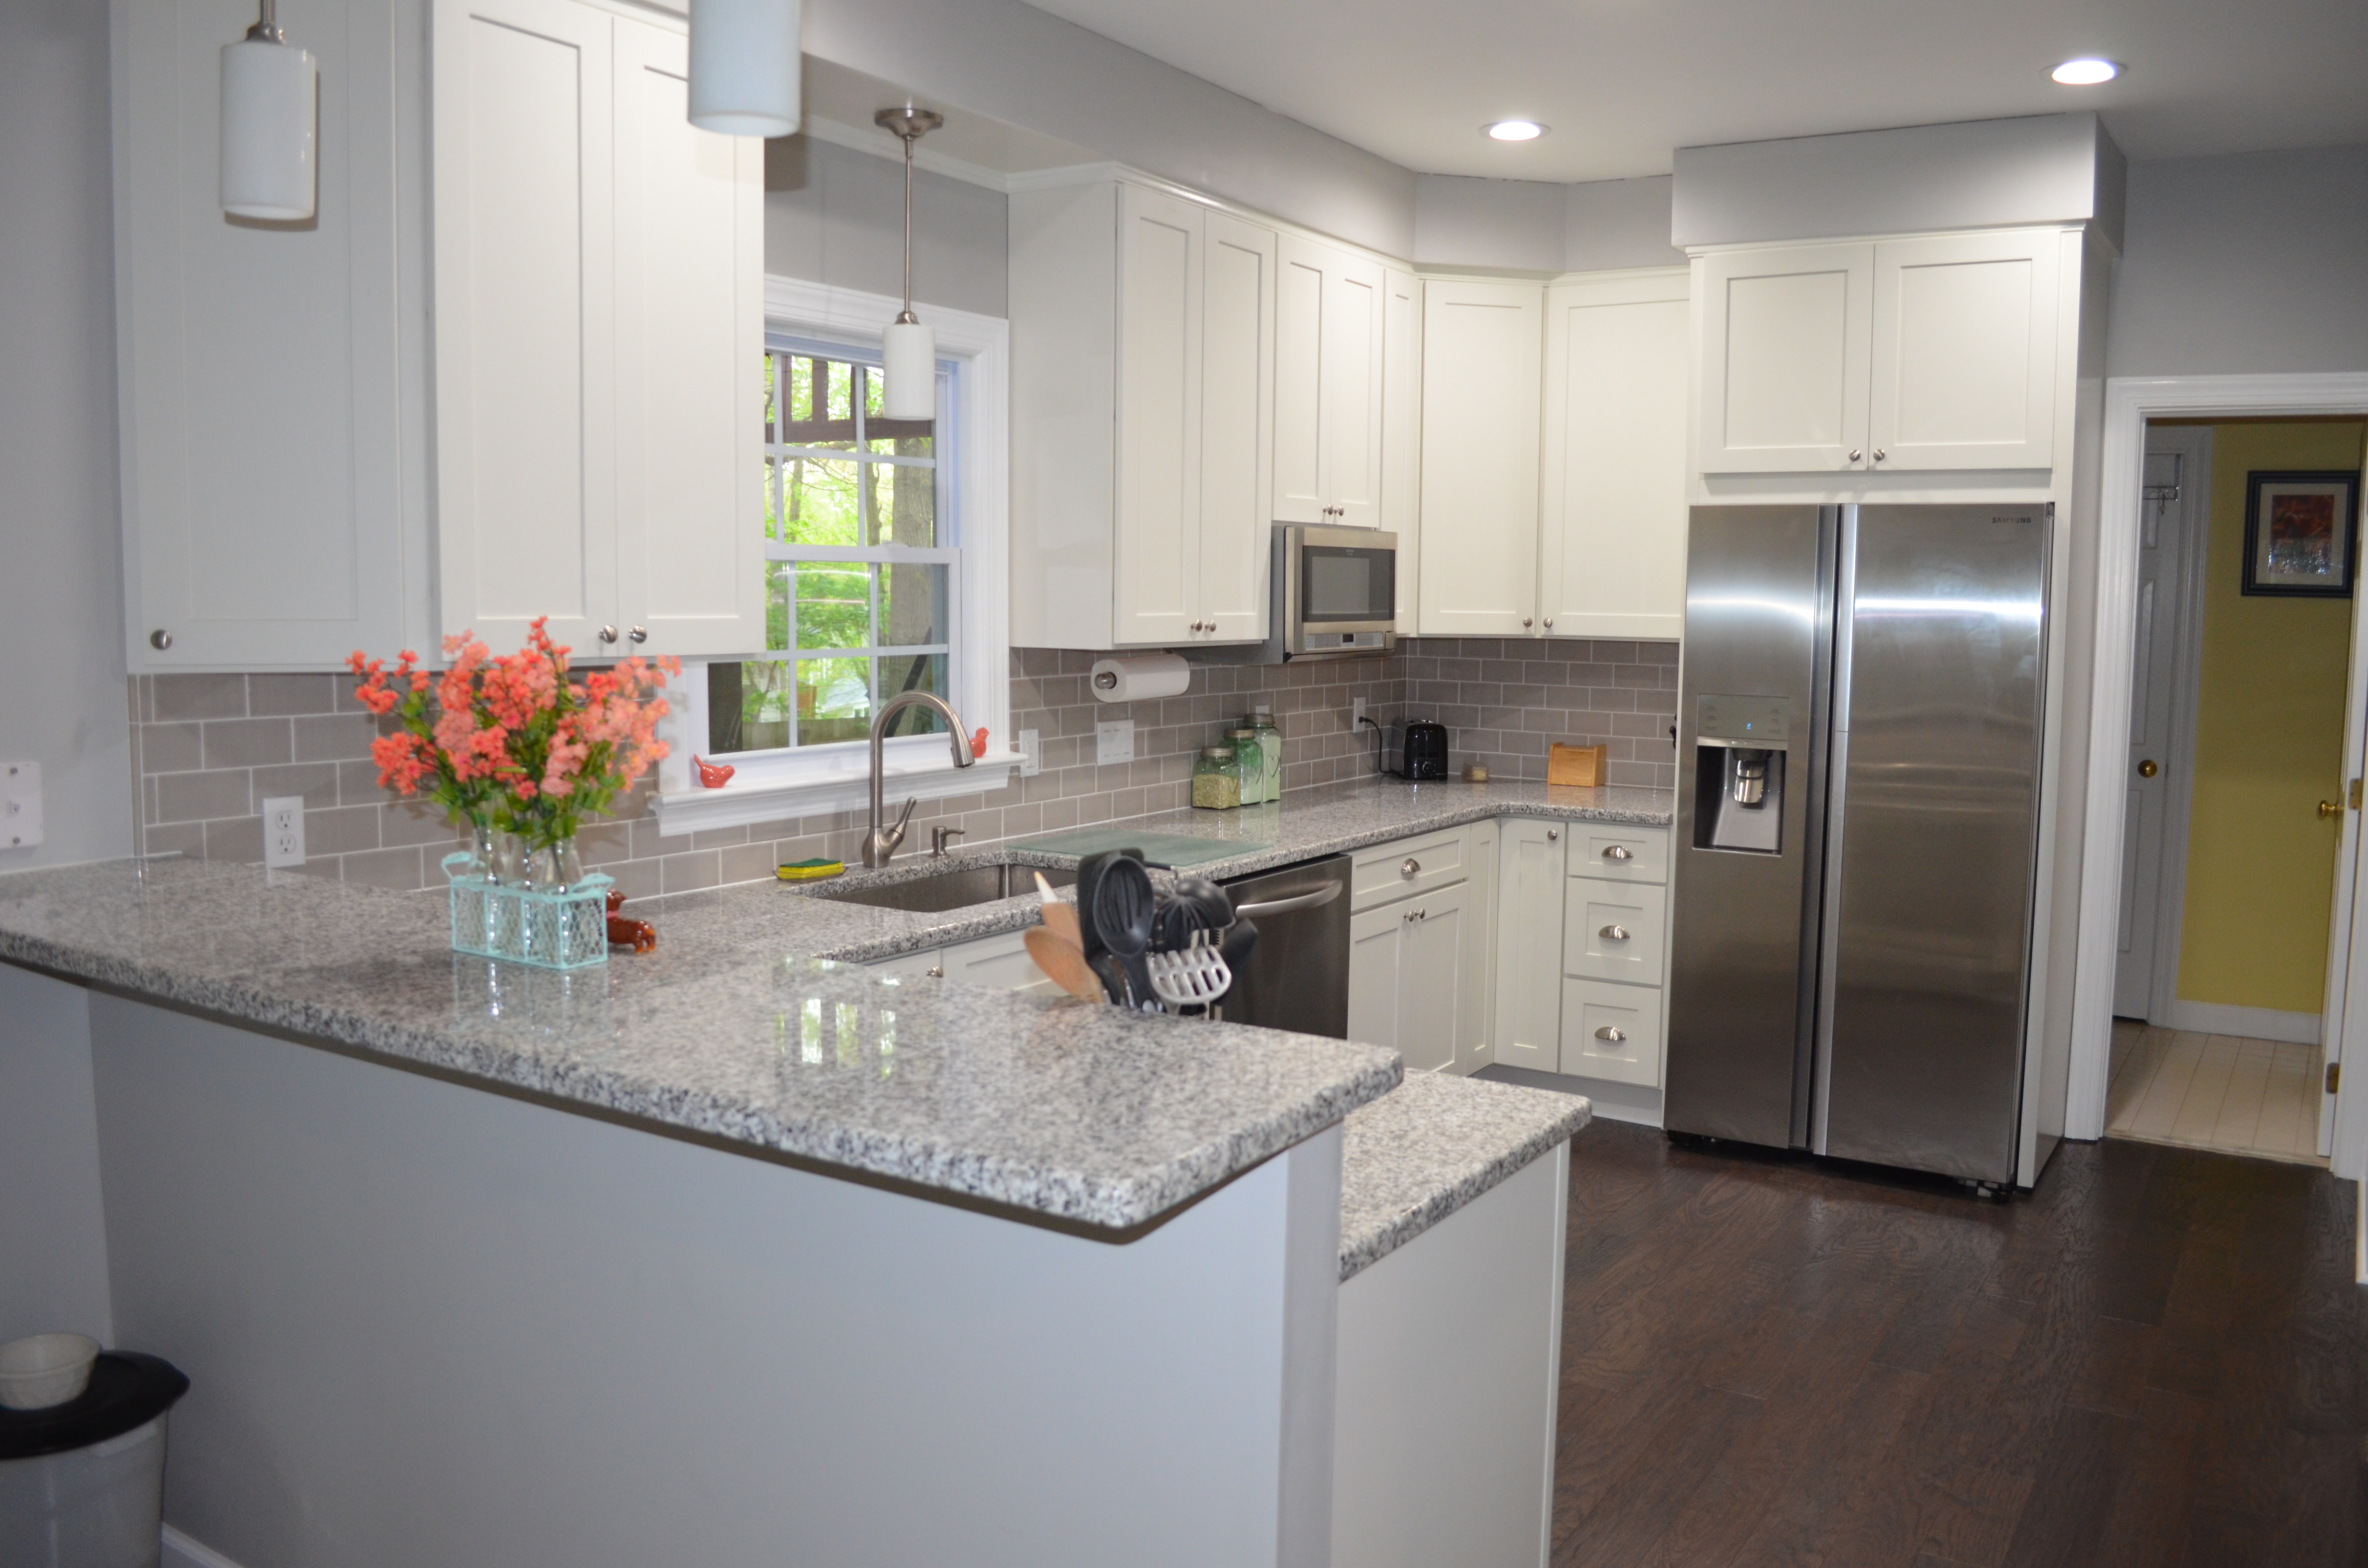
Finished kitchen.

Before.
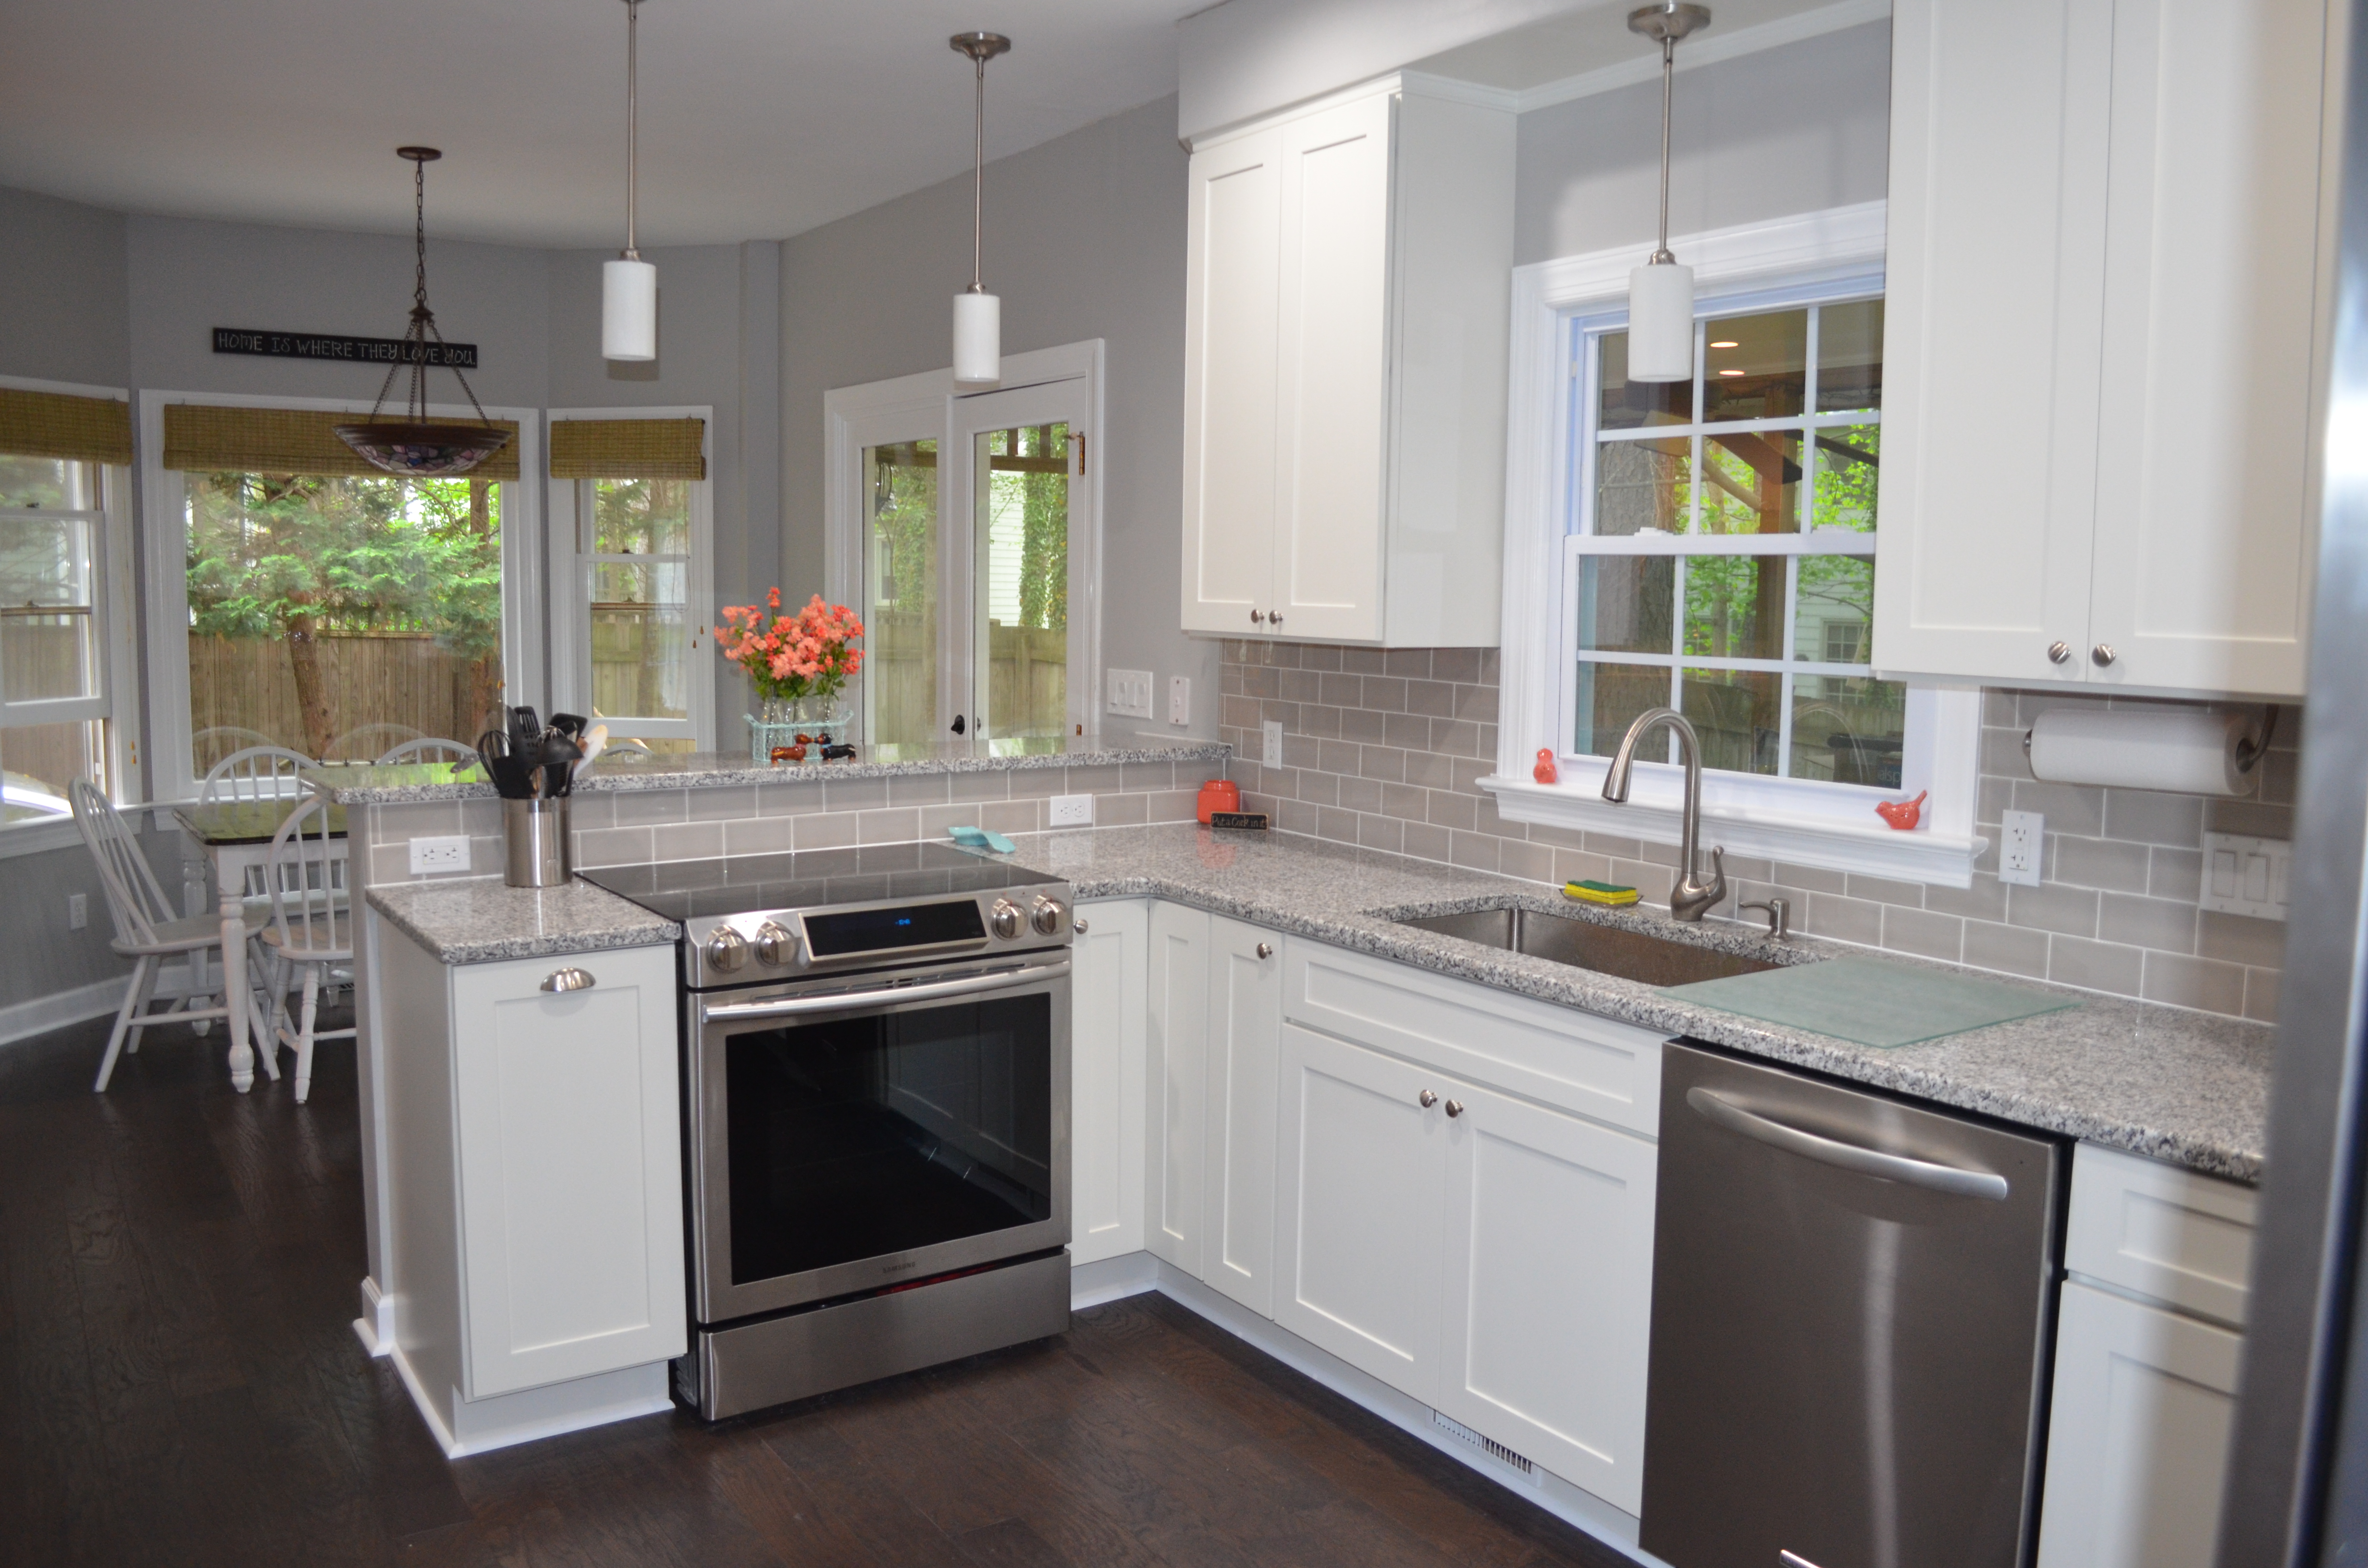
Finished kitchen.
This was definitely our biggest project yet, but we still have more to do. We might not have any projects this big remaining, but we still have 2 bathrooms to put our touches on, as well as my office. Hopefully they go as smooth as the kitchen did, and they’ll be no problem!