Well, it’s been almost a year since our last post, and over a year since our last real renovation post. Part of that is my fault, we finished the master bathroom about six months ago now, and as Ashley has continued to remind me – we need to post about it. So here it goes!
After our wedding (oh yeah, we got married last year too!), we had a weekend or two where we weren’t doing much. That was ok at first, but then we wanted to do something, and the toilet in our master bathroom started running constantly. So instead of fixing the toilet, we decided to have another full remodel in our home (we had been thinking about doing the bathroom over again, anyways).
So, fourth of July weekend, we started tearing up the bathroom.
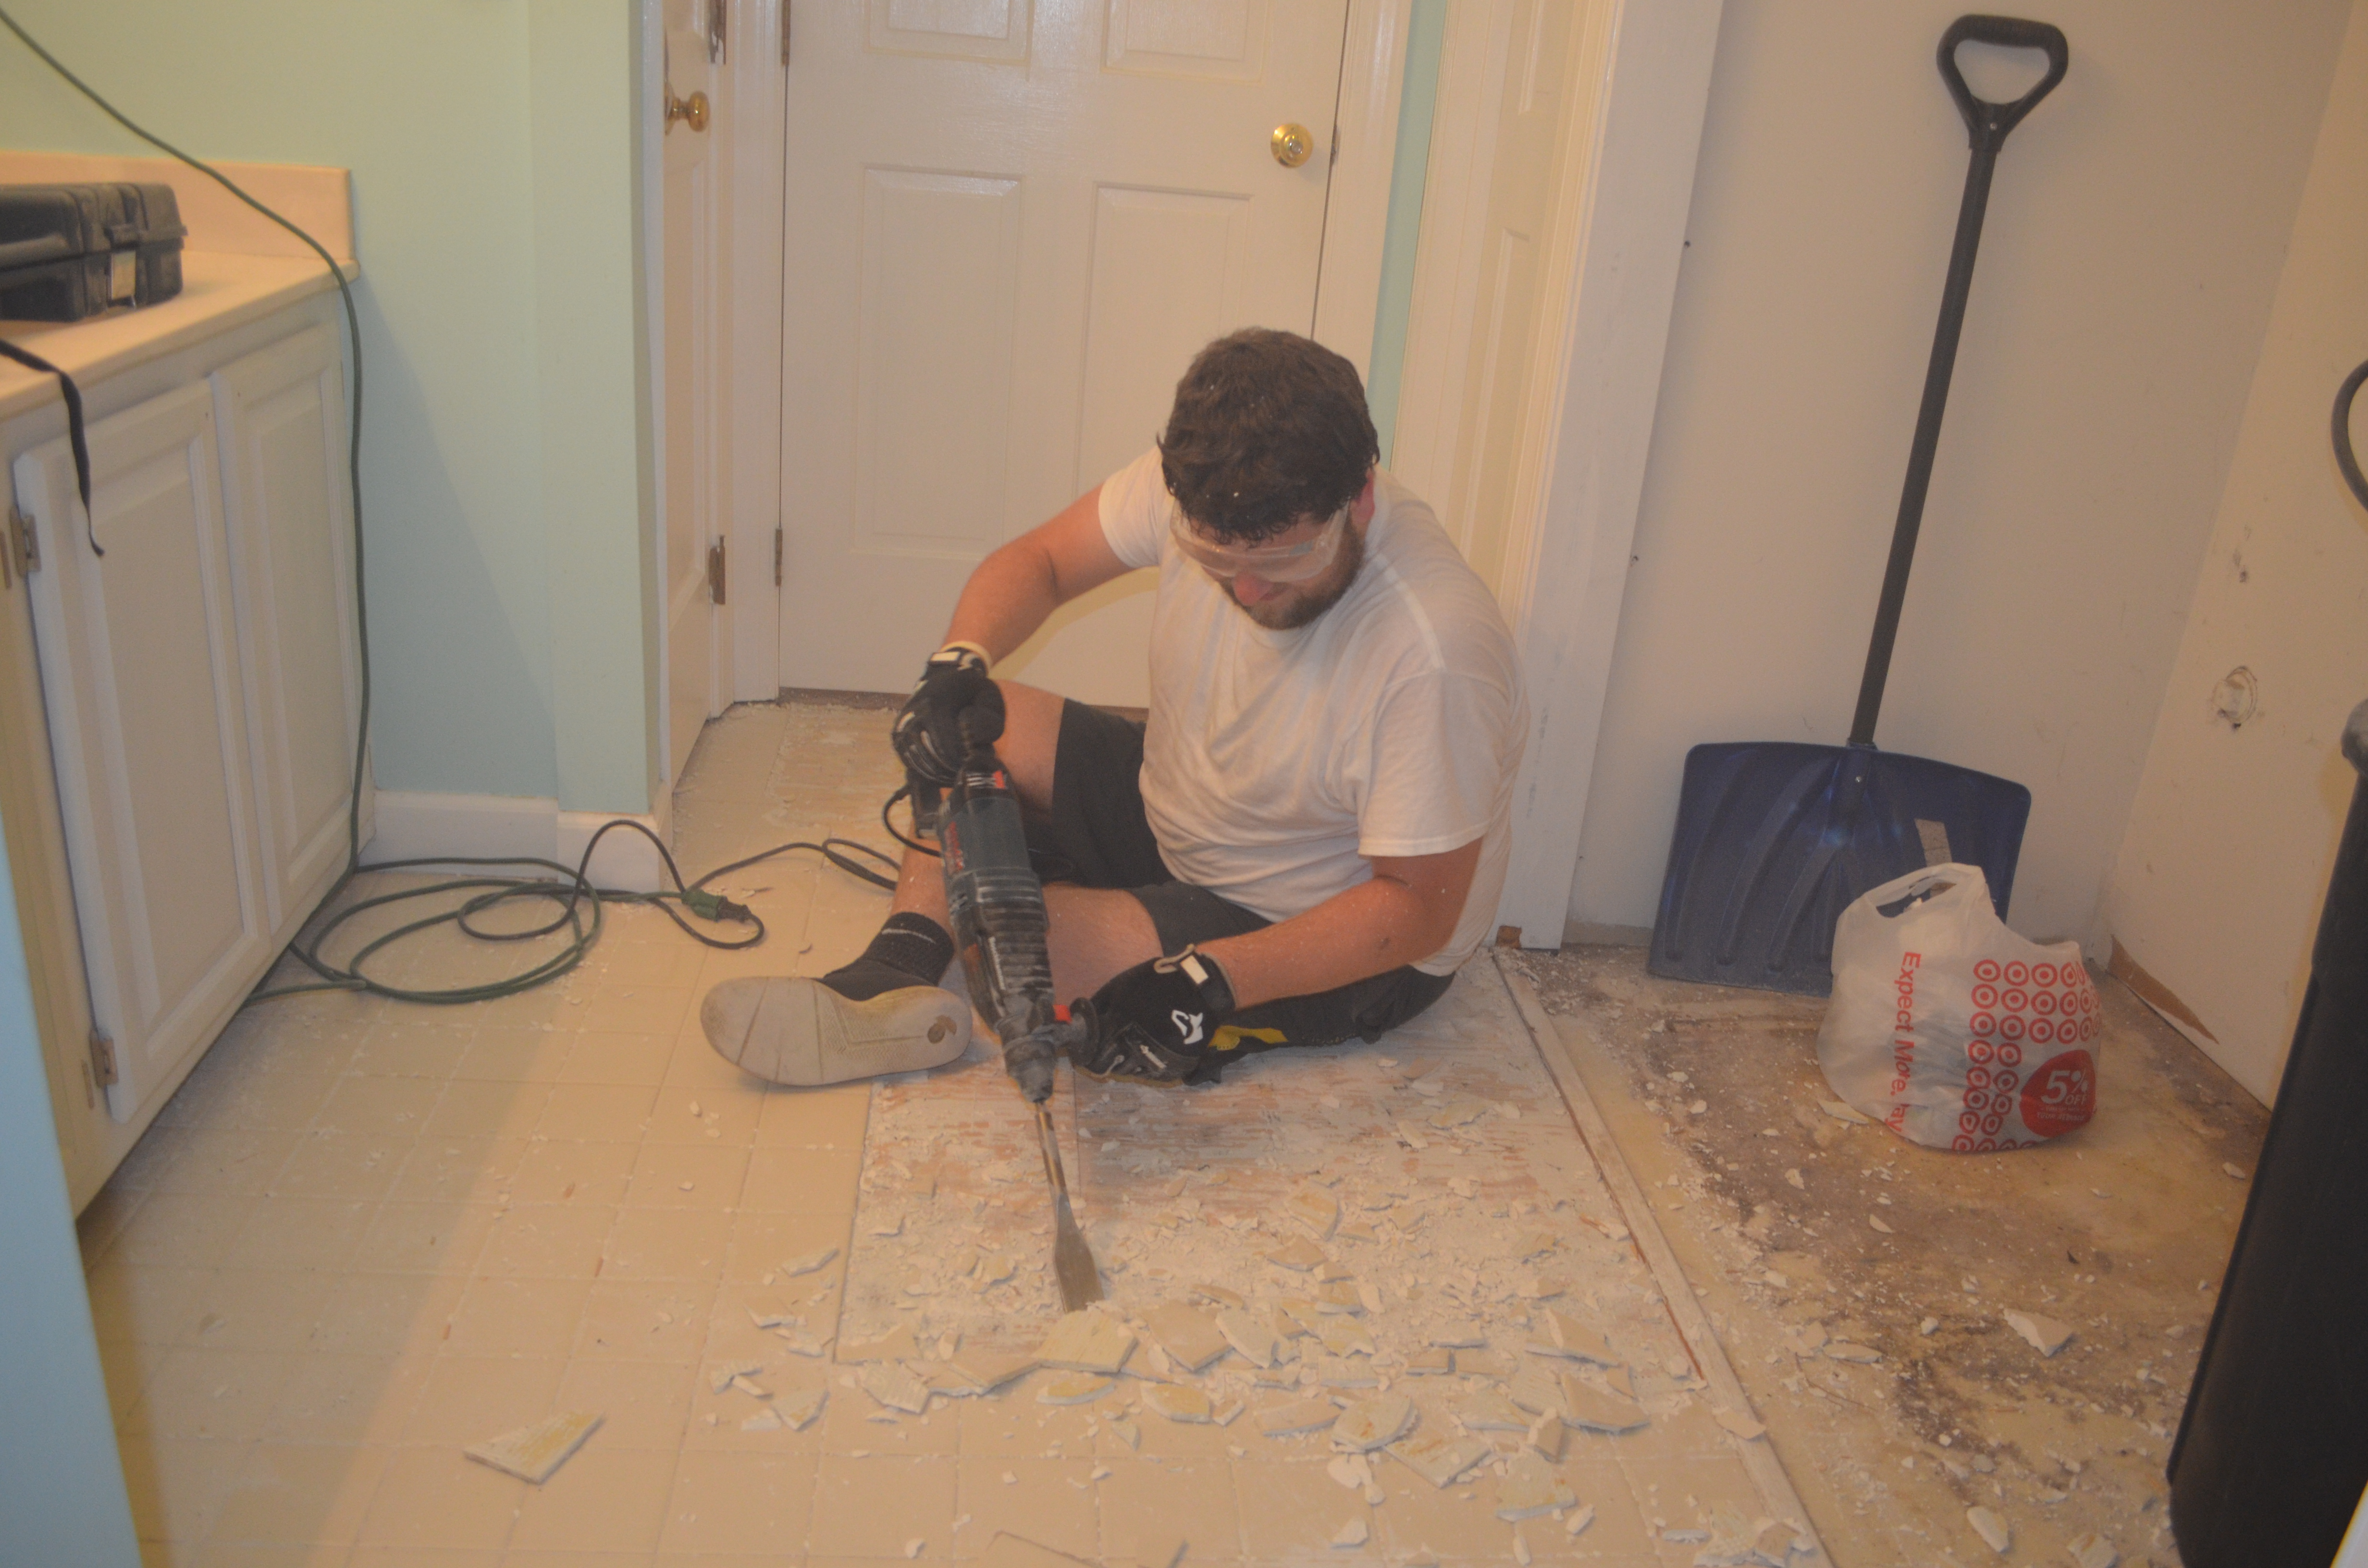
Tearing up the floors.
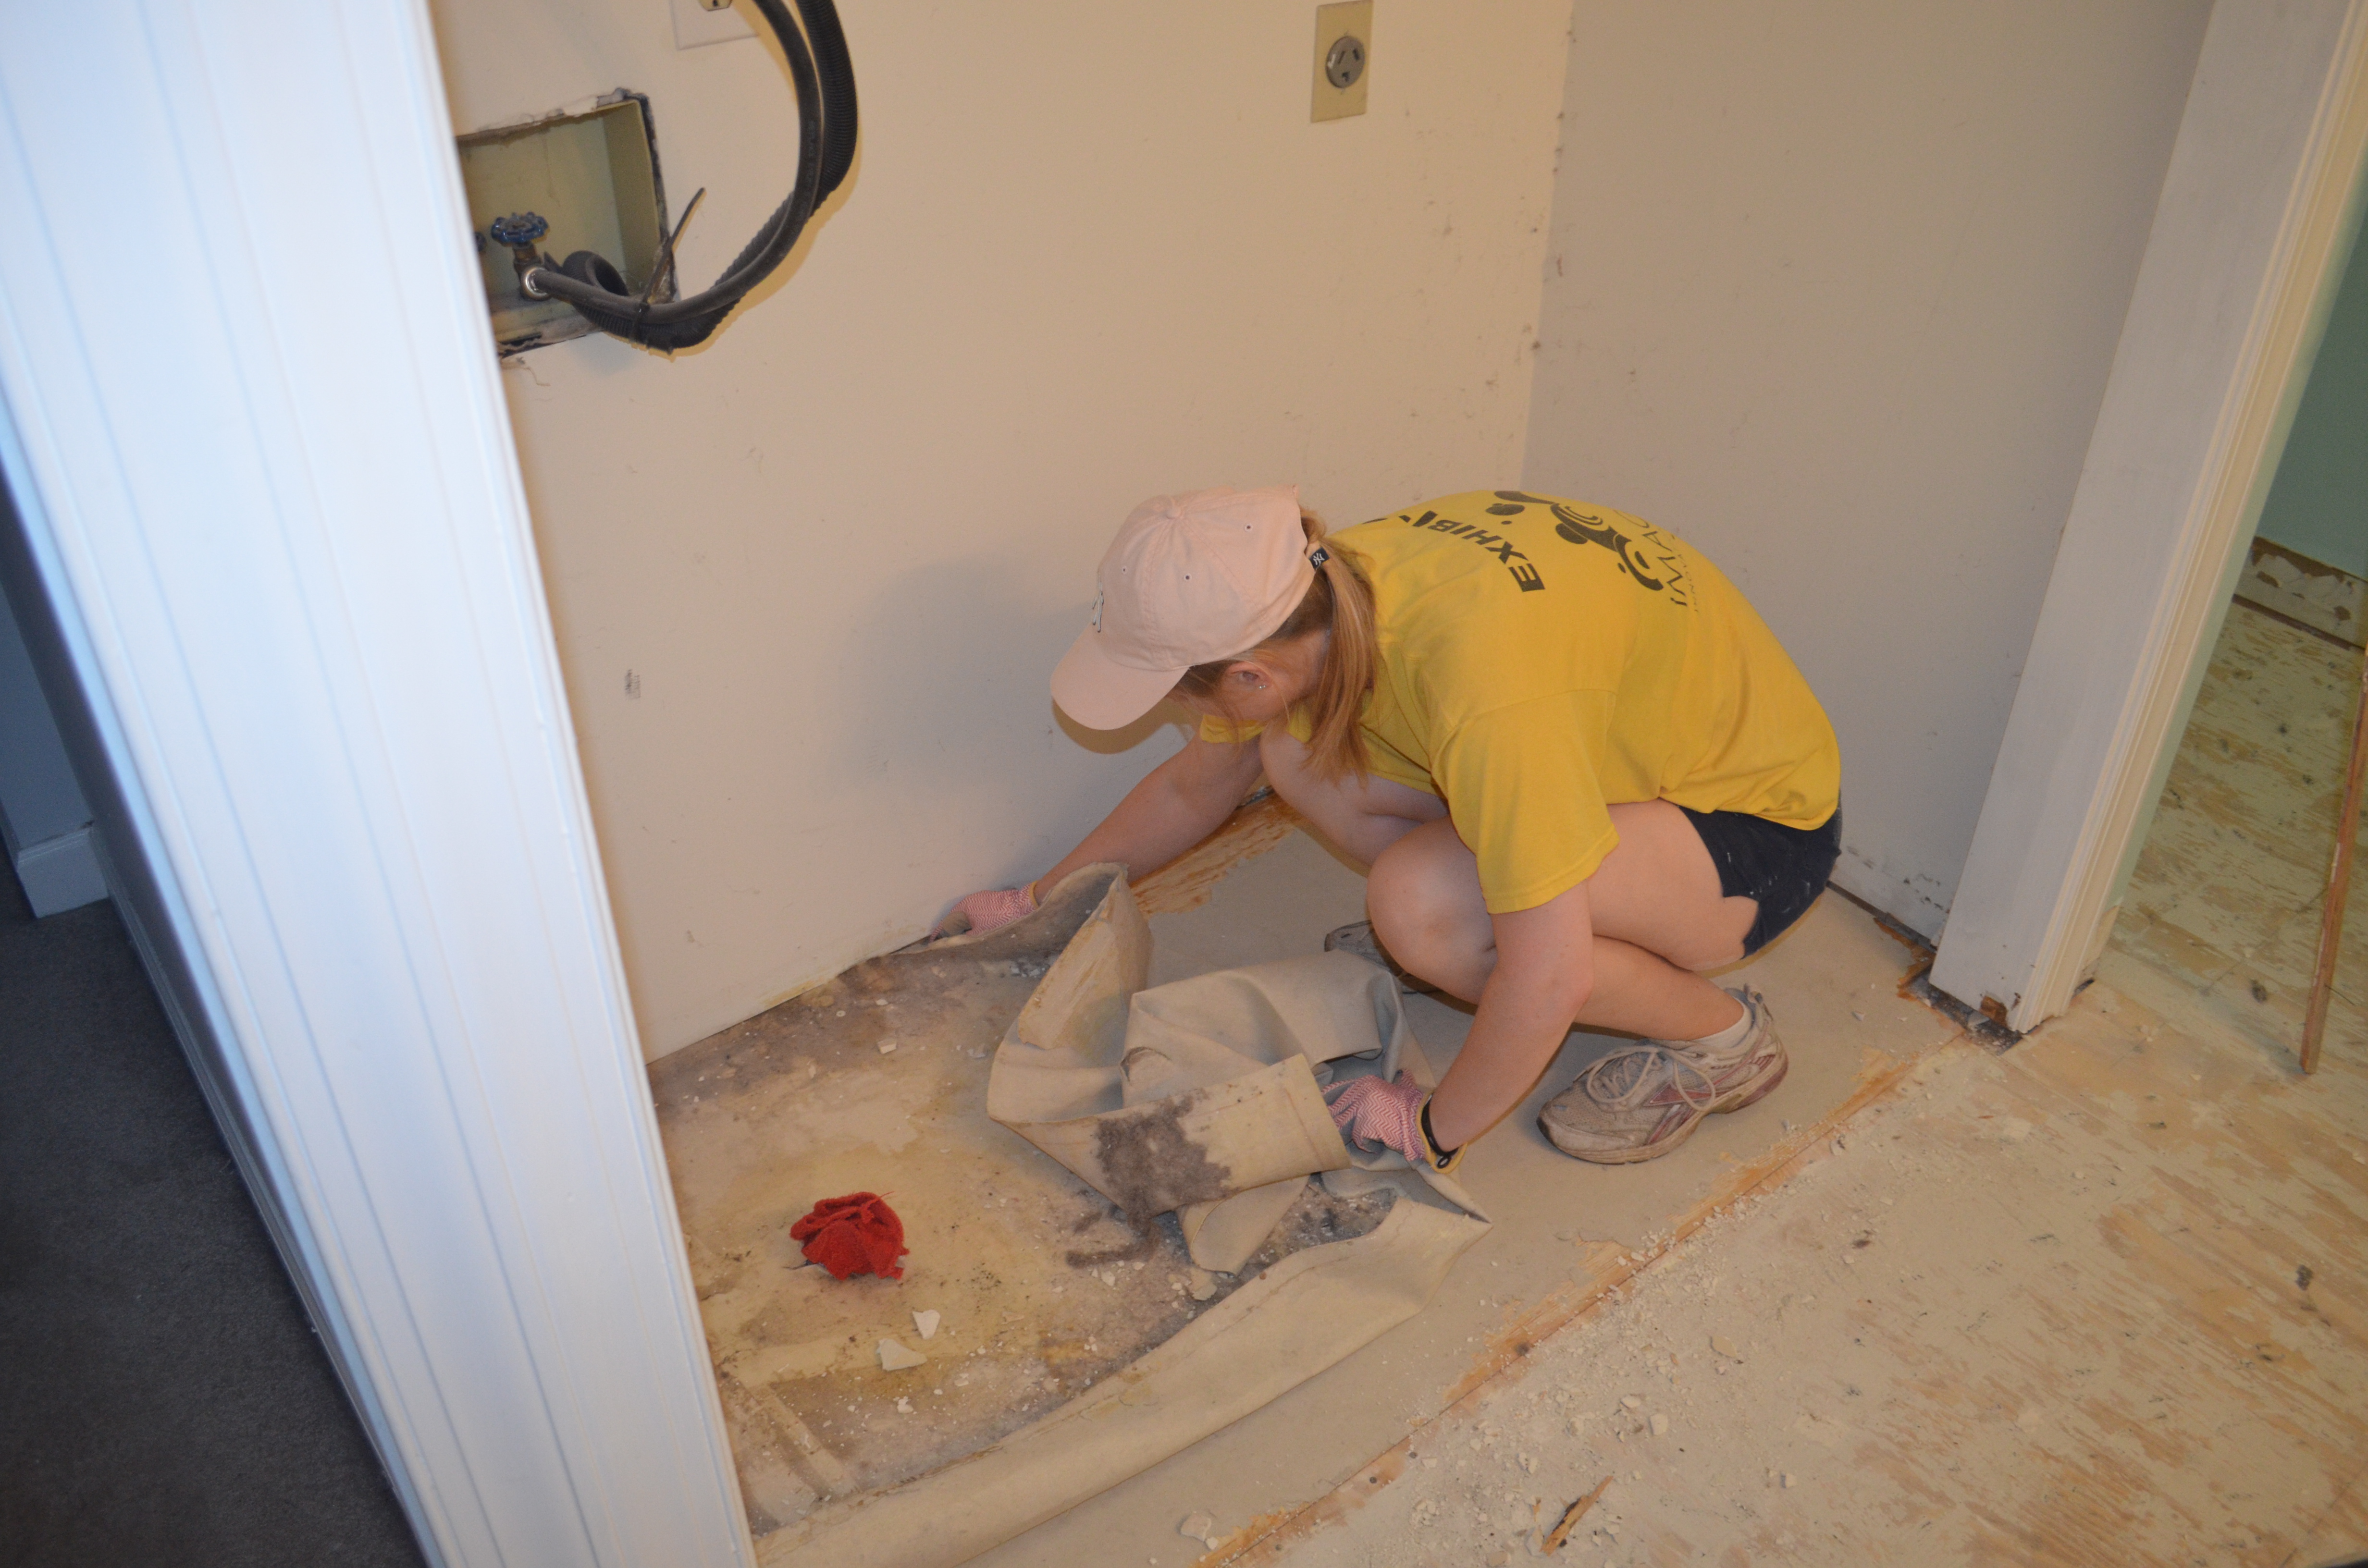
Taking up the linoleum that was under the washer and dryer.
The floors were WAY more annoying than I remember from doing the downstairs. The tile kept chipping and wasn’t coming up in solid pieces. It was also more tile than the downstairs, so having to carry it all downstairs in garbage cans was a little more heavy and difficult.
Other than that, removing the vanity and shower wasn’t actually that bad. I was surprised to find that there was no mold or any indication of mold anywhere – I was almost sure we’d find something.
To see some progress quickly, we decided to start on the floors, and try to get those in before the long weekend was over. We wanted to level the floors, similar to how we handled the downstairs bathroom. Ashley rolled on the primer for the floor leveler and nailed the metal lath down while I cut the boards to put along the wall (to stop the self-leveler from seeping into places it shouldn’t.
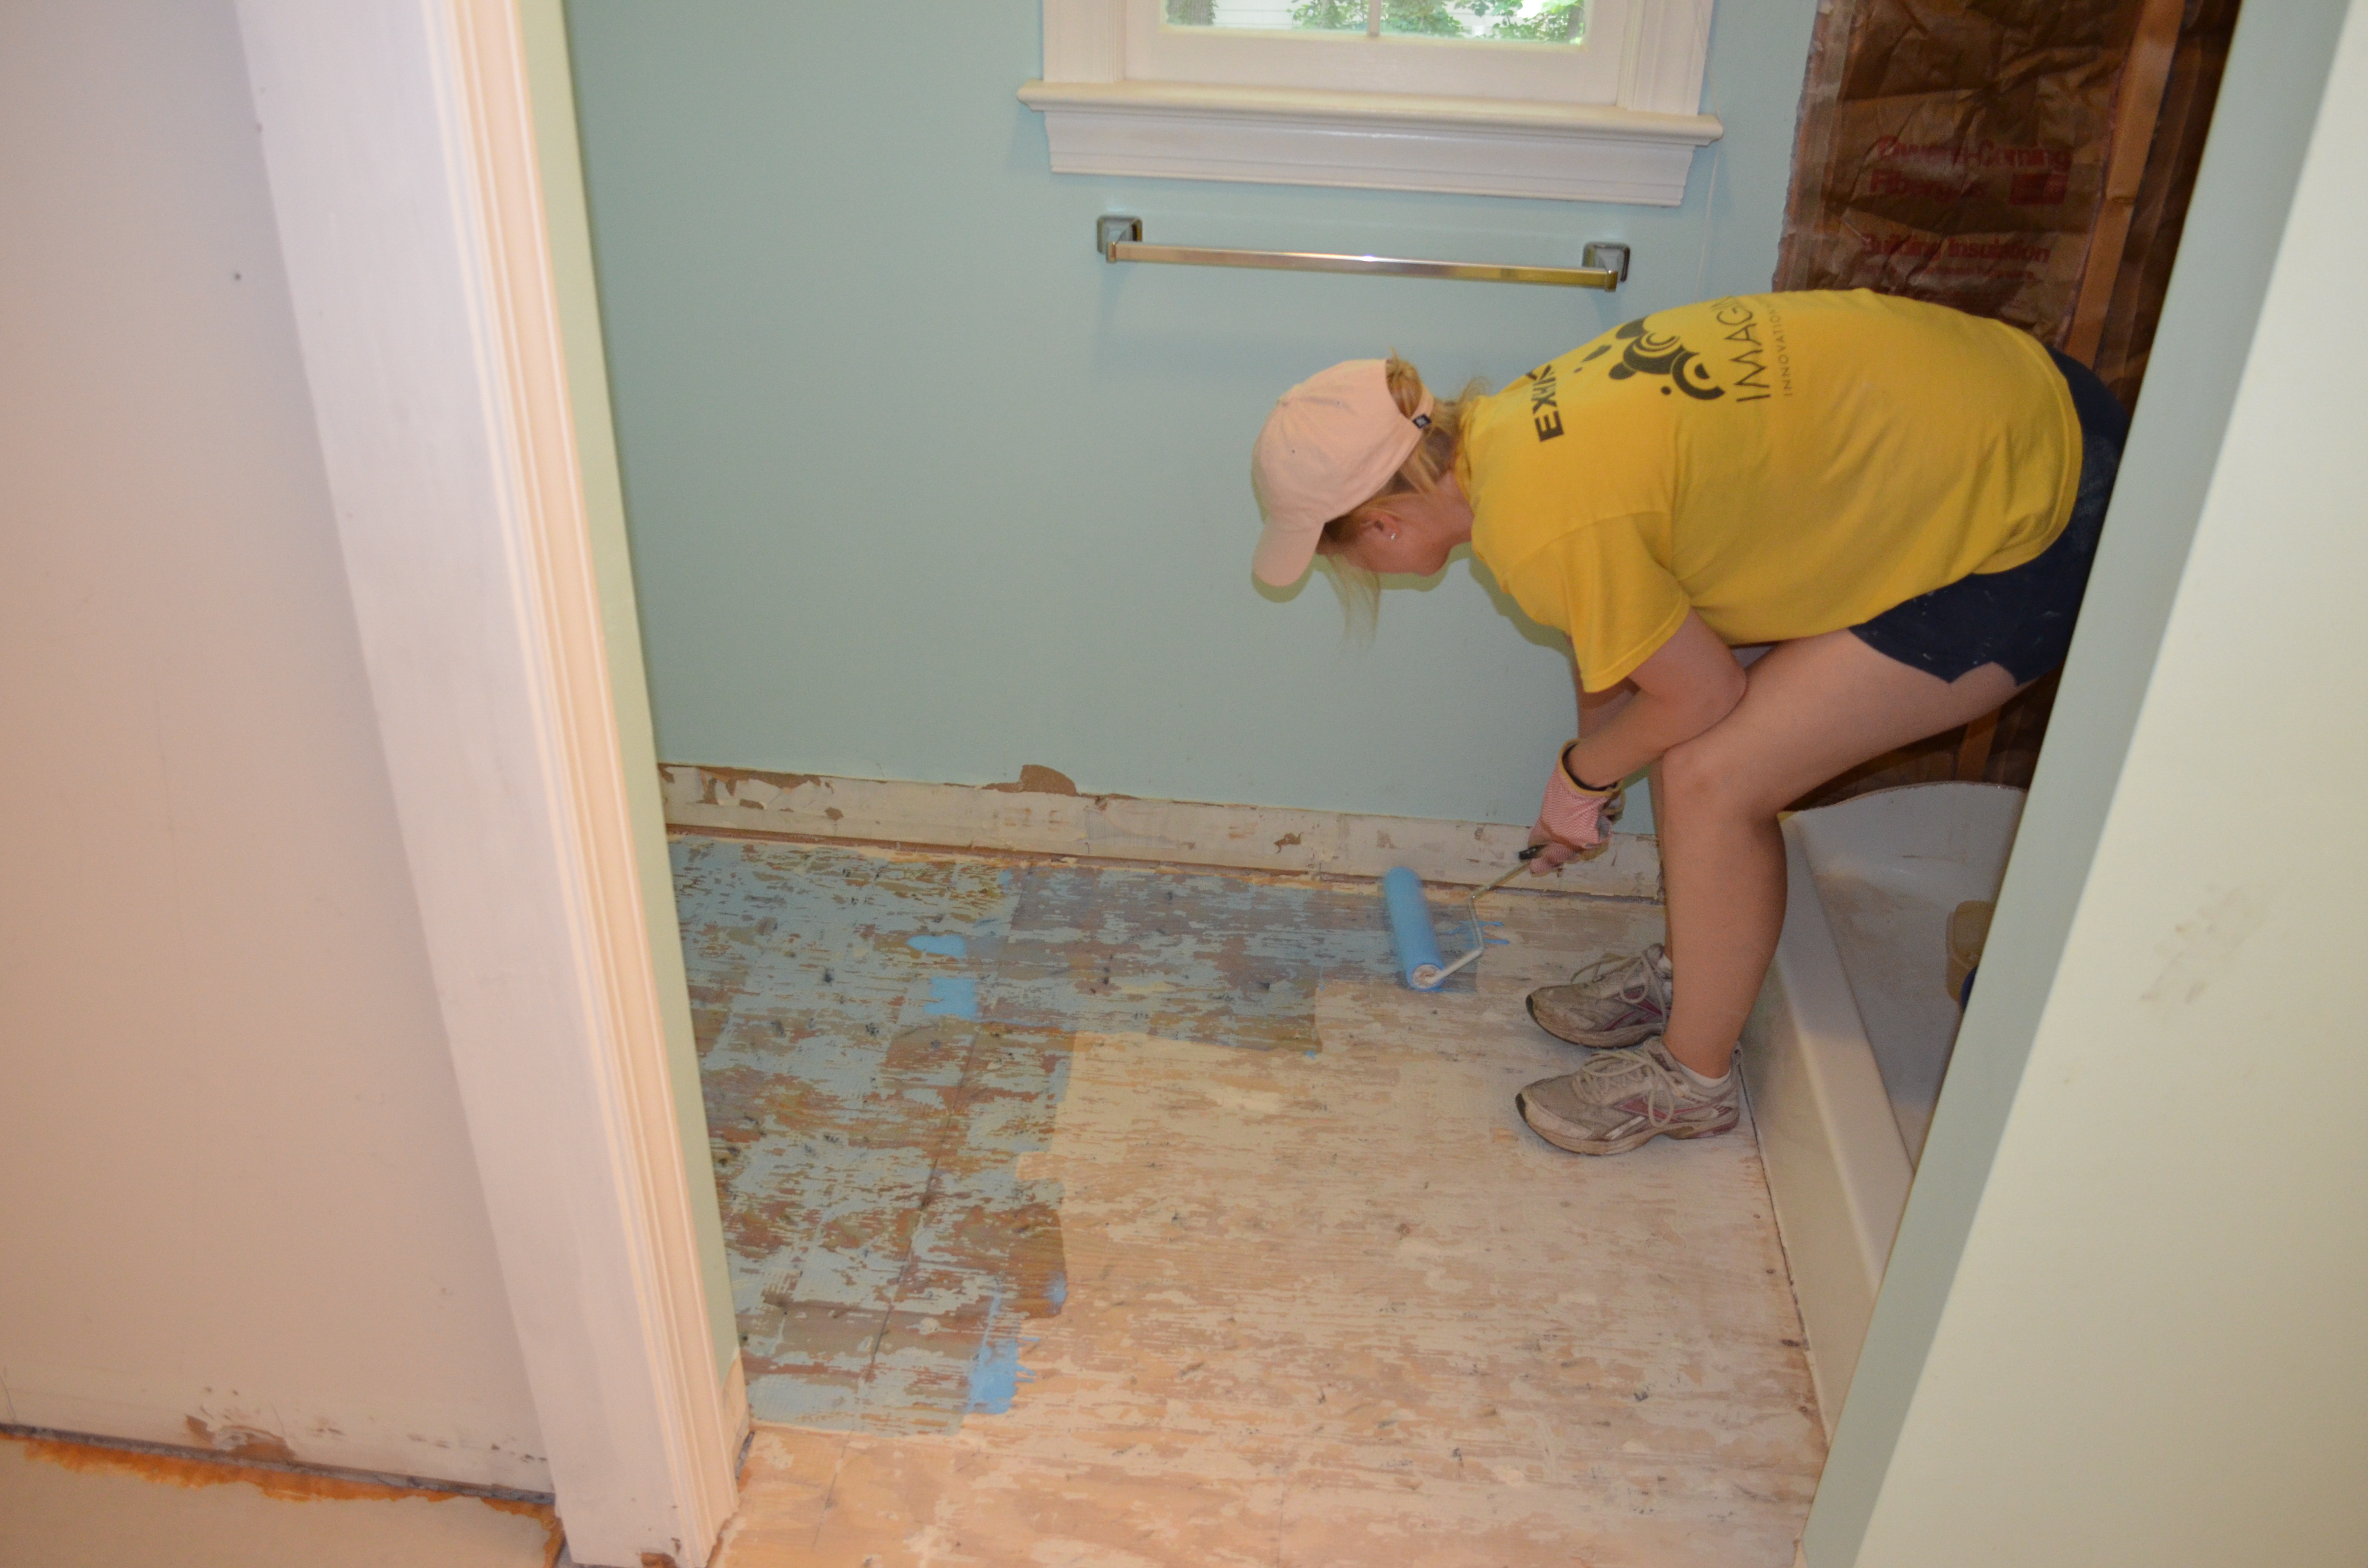
Rolling down the primer.
Setting metal lath.
After that, we were ready to put down the self-leveling concrete. Unfortunately, it didn’t go smoothly. It was a warm day, and I was mixing in the sun, and it seemed like it dried as fast as I could get it up the stairs. And by the time I went to dump it, it was already hardened. This happened right before we were done, so I had to run to Home Depot and grab a few more bags before we were able to finish. And because the first layer had mostly dried, it really didn’t turn out as completely level as we would have liked.
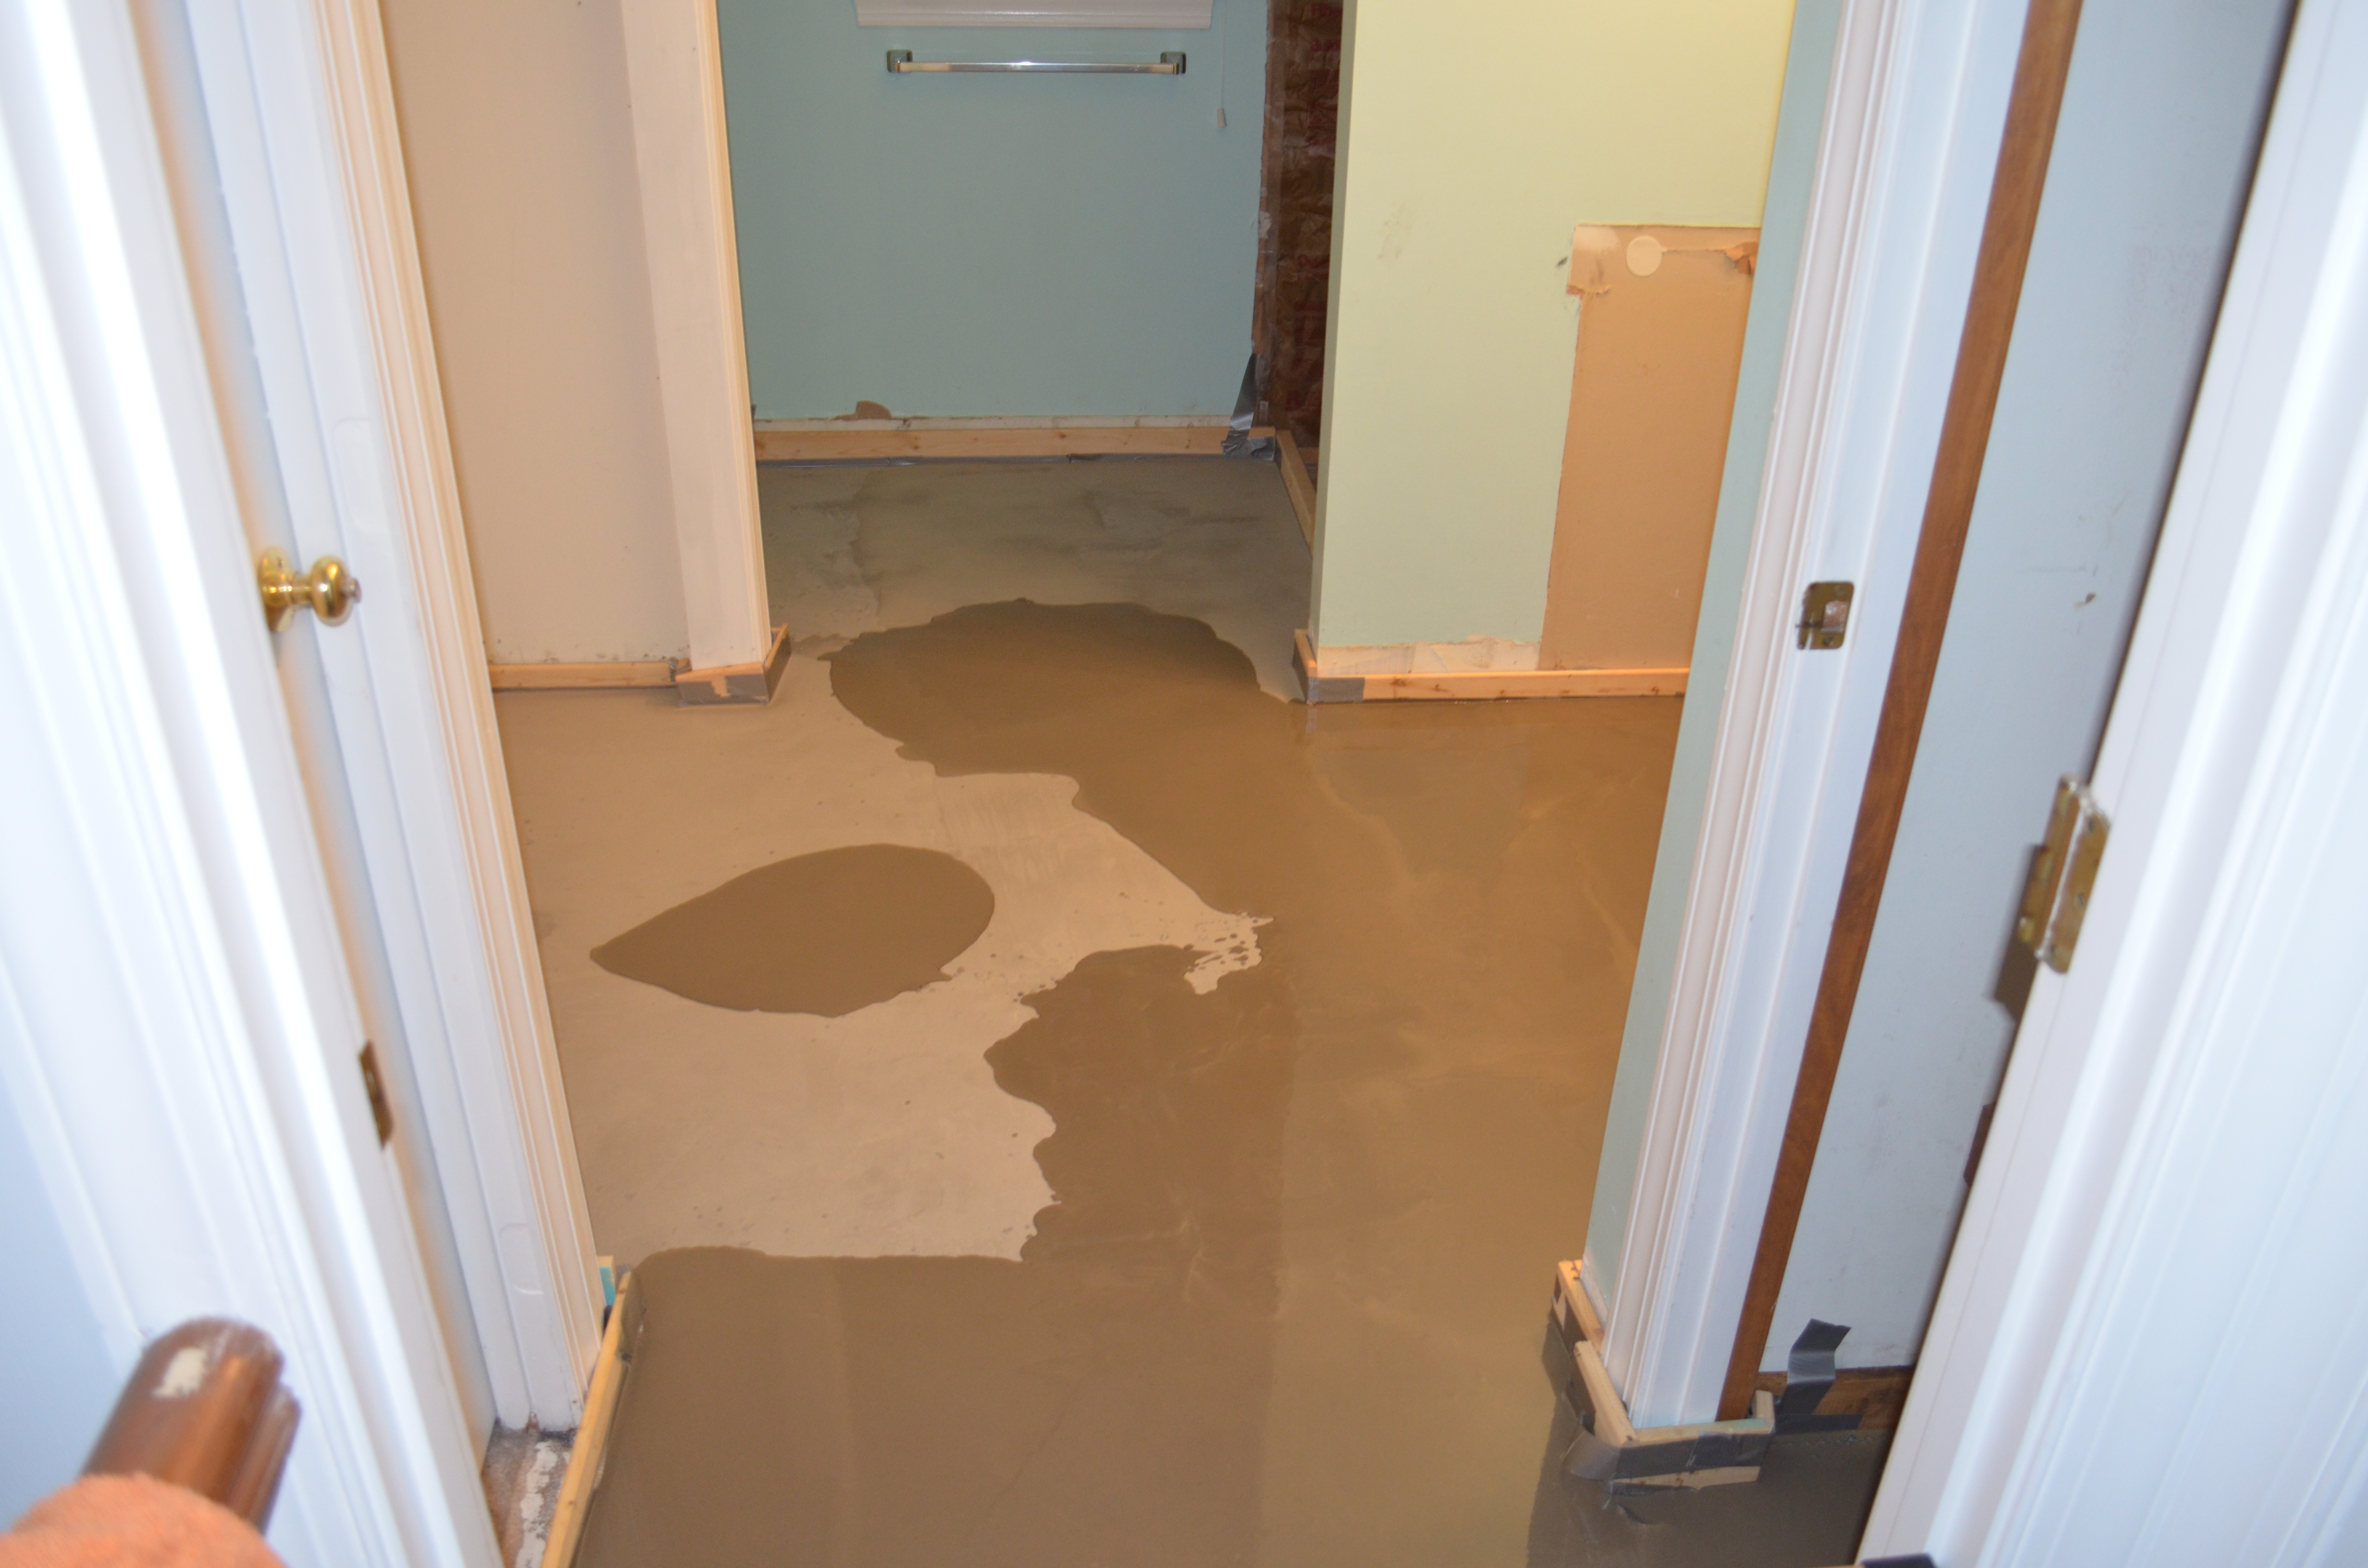
Watching the self-leveler dry.
The self-leveler needed to dry for 24 hours, but once that was done, we started the tiling work. I cut the tile, while Ashley laid it out.
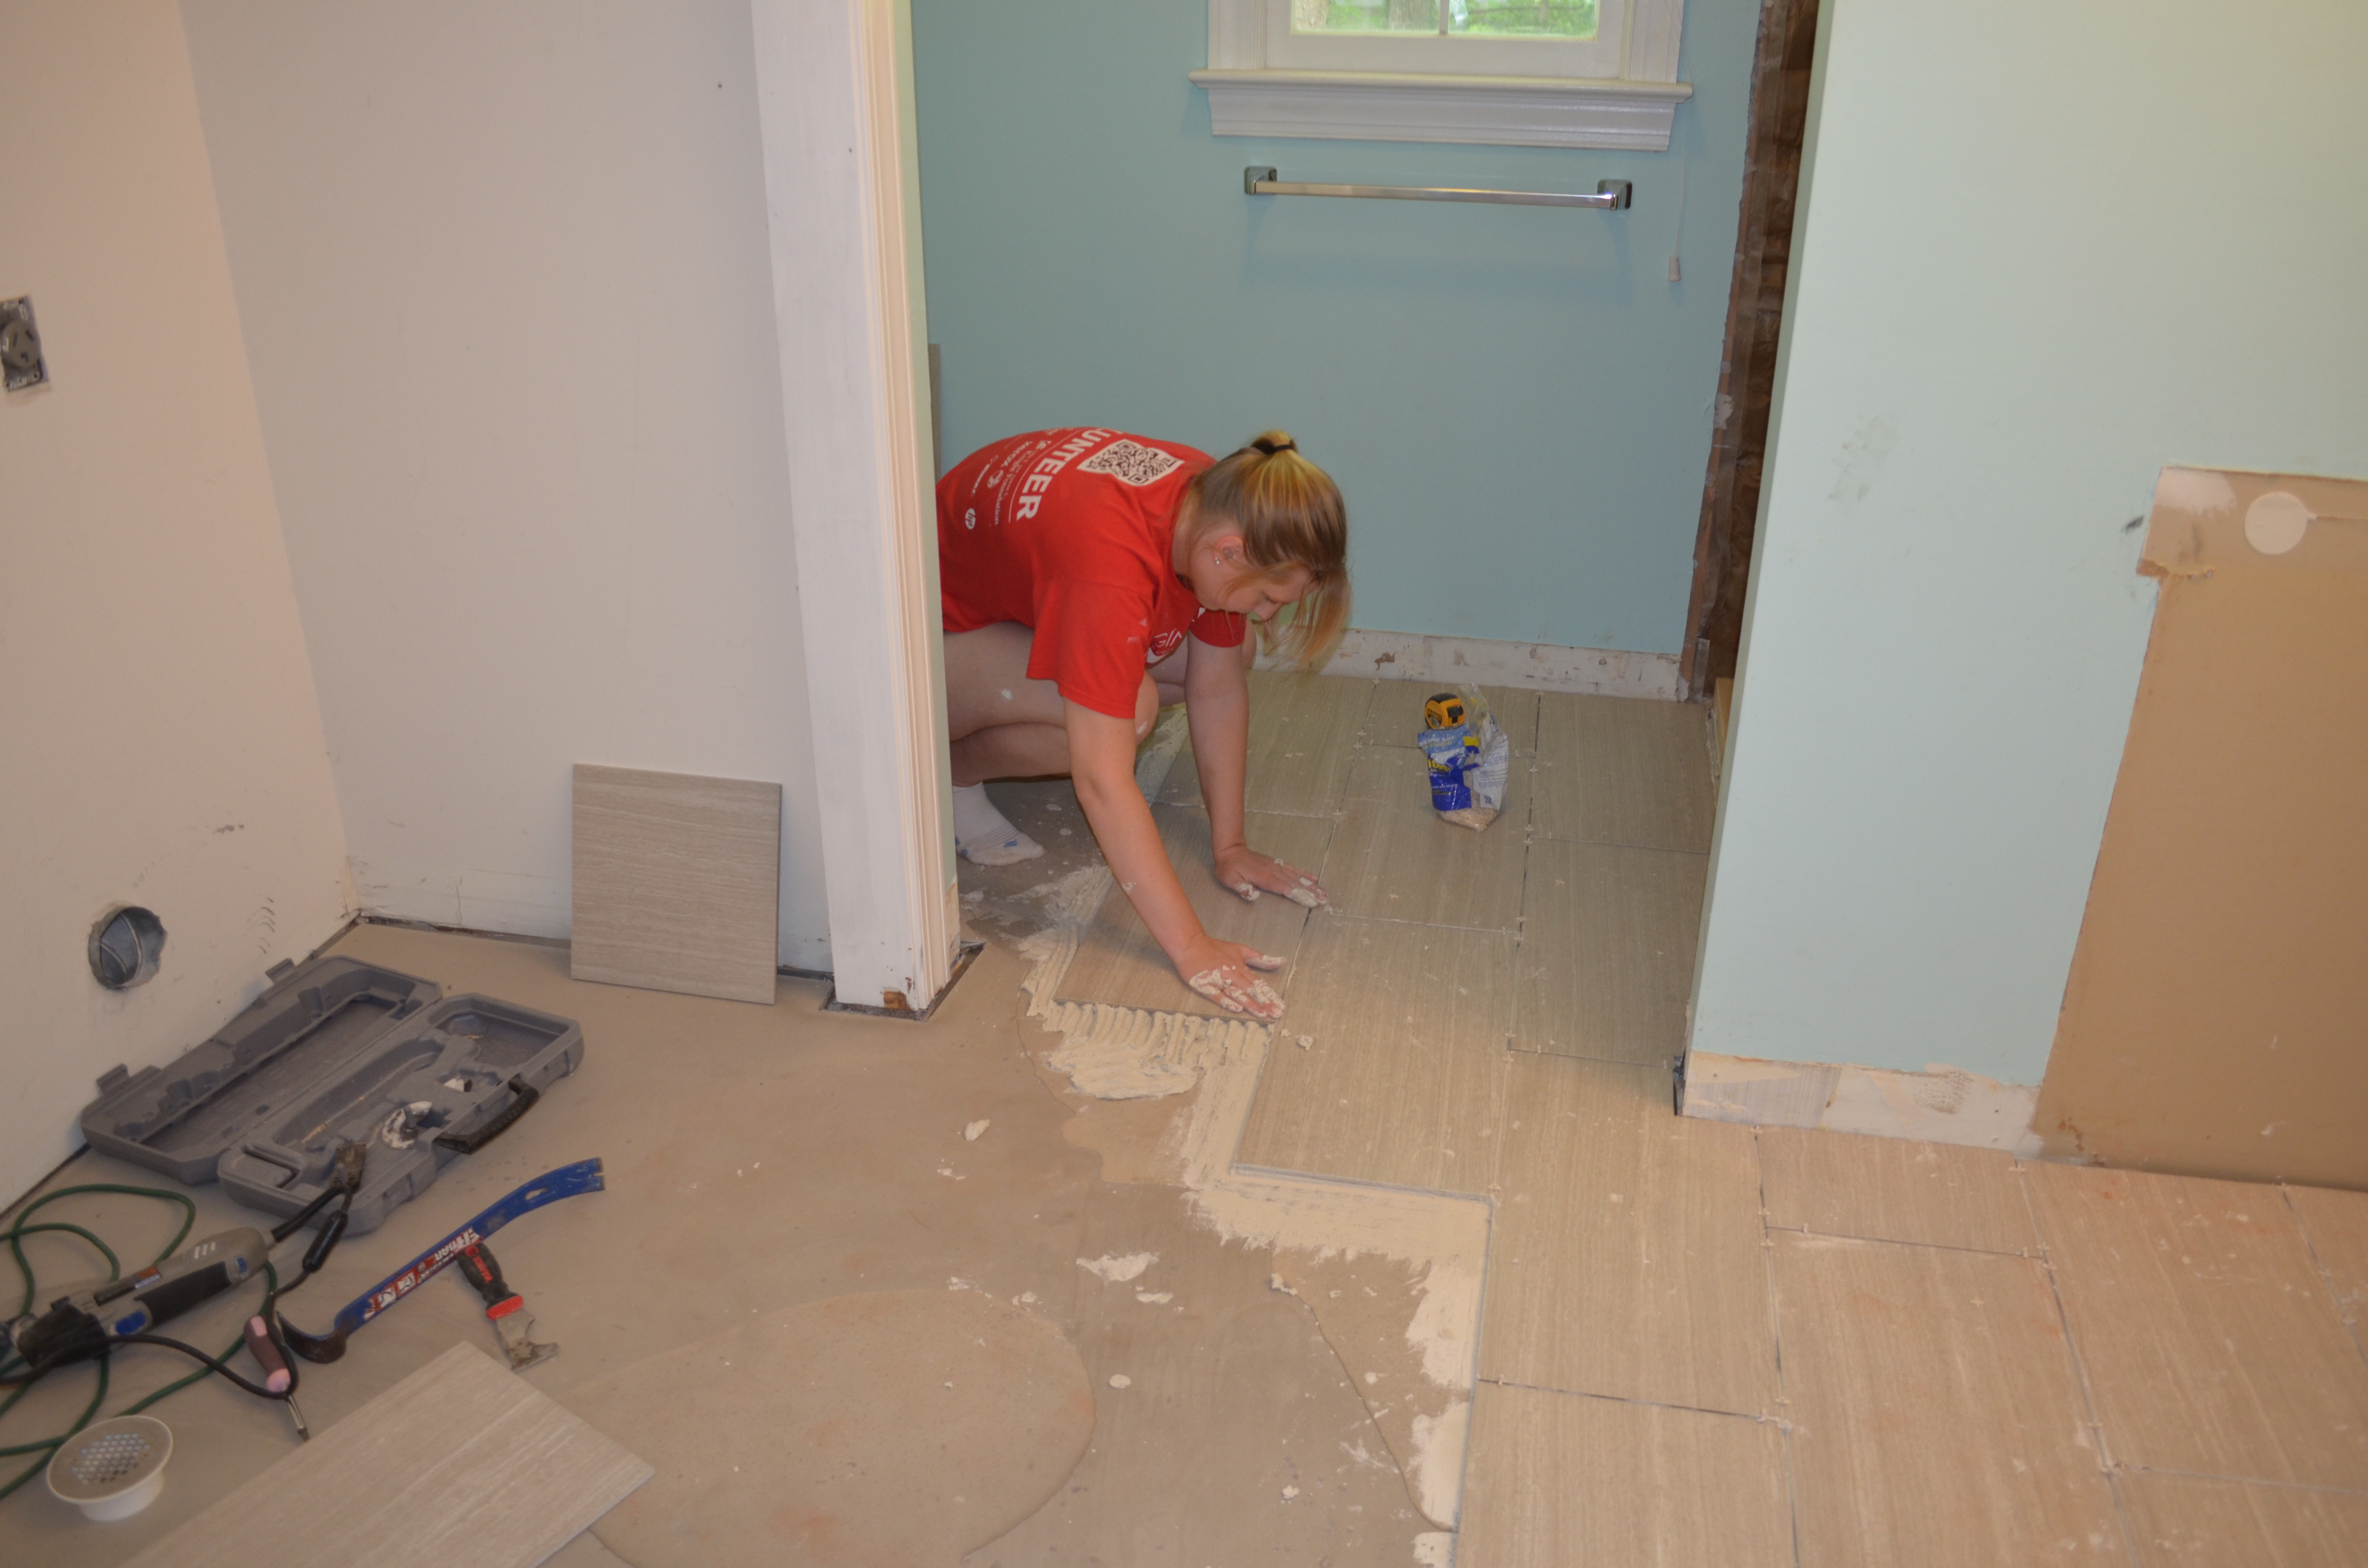
Laying tile.

Floor is done.
Now that the floors were laid, we had to wait again until we could walk on them and grout them. This was where we ended our Fourth of July weekend. We pretty much made the progress we expected to over the course of the three days. The next night, we began the grouting. Once the grouting was done, we had a pretty smooth installation of the new toilet, which was nice to have back for the middle-of-the-night bathroom trips. Now that we had restored 1/3 of the functionality to the bathroom, we began to work on another piece of it.
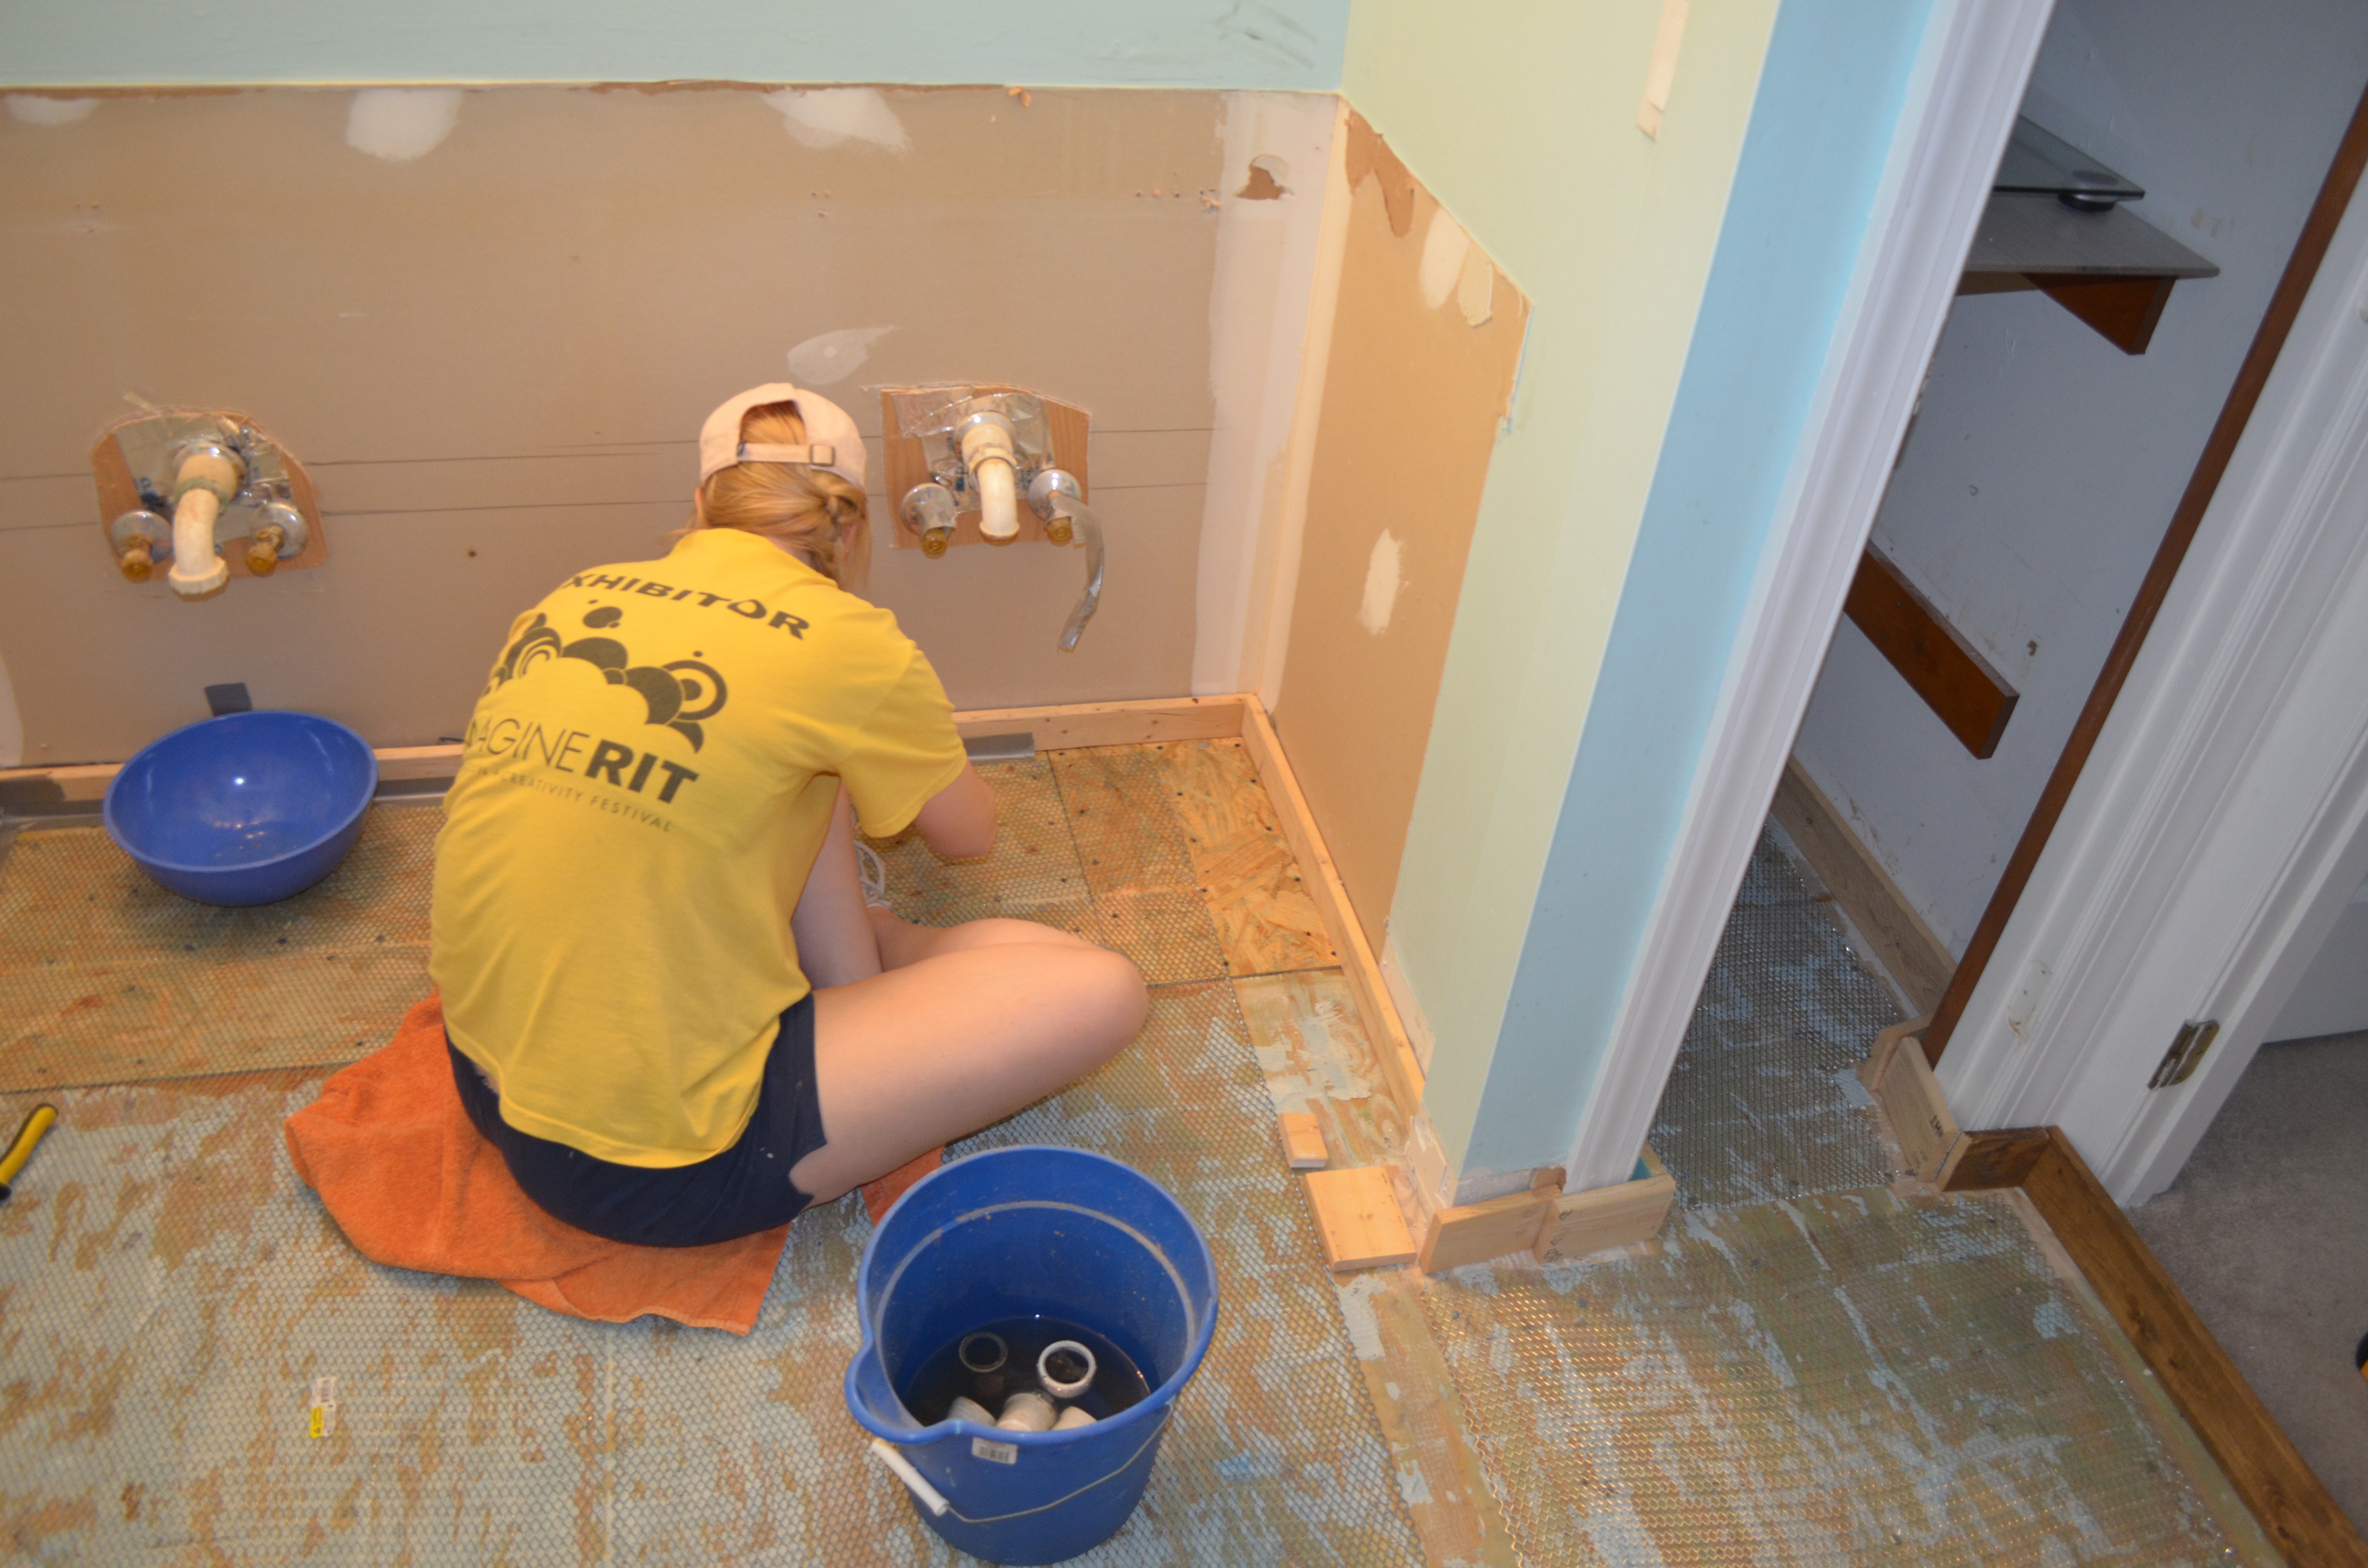
The vanity was a more difficult project – our vanity area isn’t a standard width, so I decided to build it myself. We also wanted to remove the “hollywood-style” vanity lights that we had. Unfortunately, I found some surprising wiring behind it – whoever had done the addition on the opposite side of the wall decided to turn the old light fixture into a junction box (the style of light we had doesn’t need a junction box behind it, so it was done right inside the light).
I ended up shuffling around wires and rewiring the other side of the wall, sticking my arm as far inside of the hole as I could. In addition to that, the vent pipes were right where I originally wanted to put the new vanity lights, so that threw me off as well. Even moving them over a little to try and keep them in line with the sinks’ eventual placement, I still ended up needing to use a shallow junction box, because the pipe was still in the way. Overall, even though there was a lot of delays in getting the lighting to work out, we managed to get them in place and working.
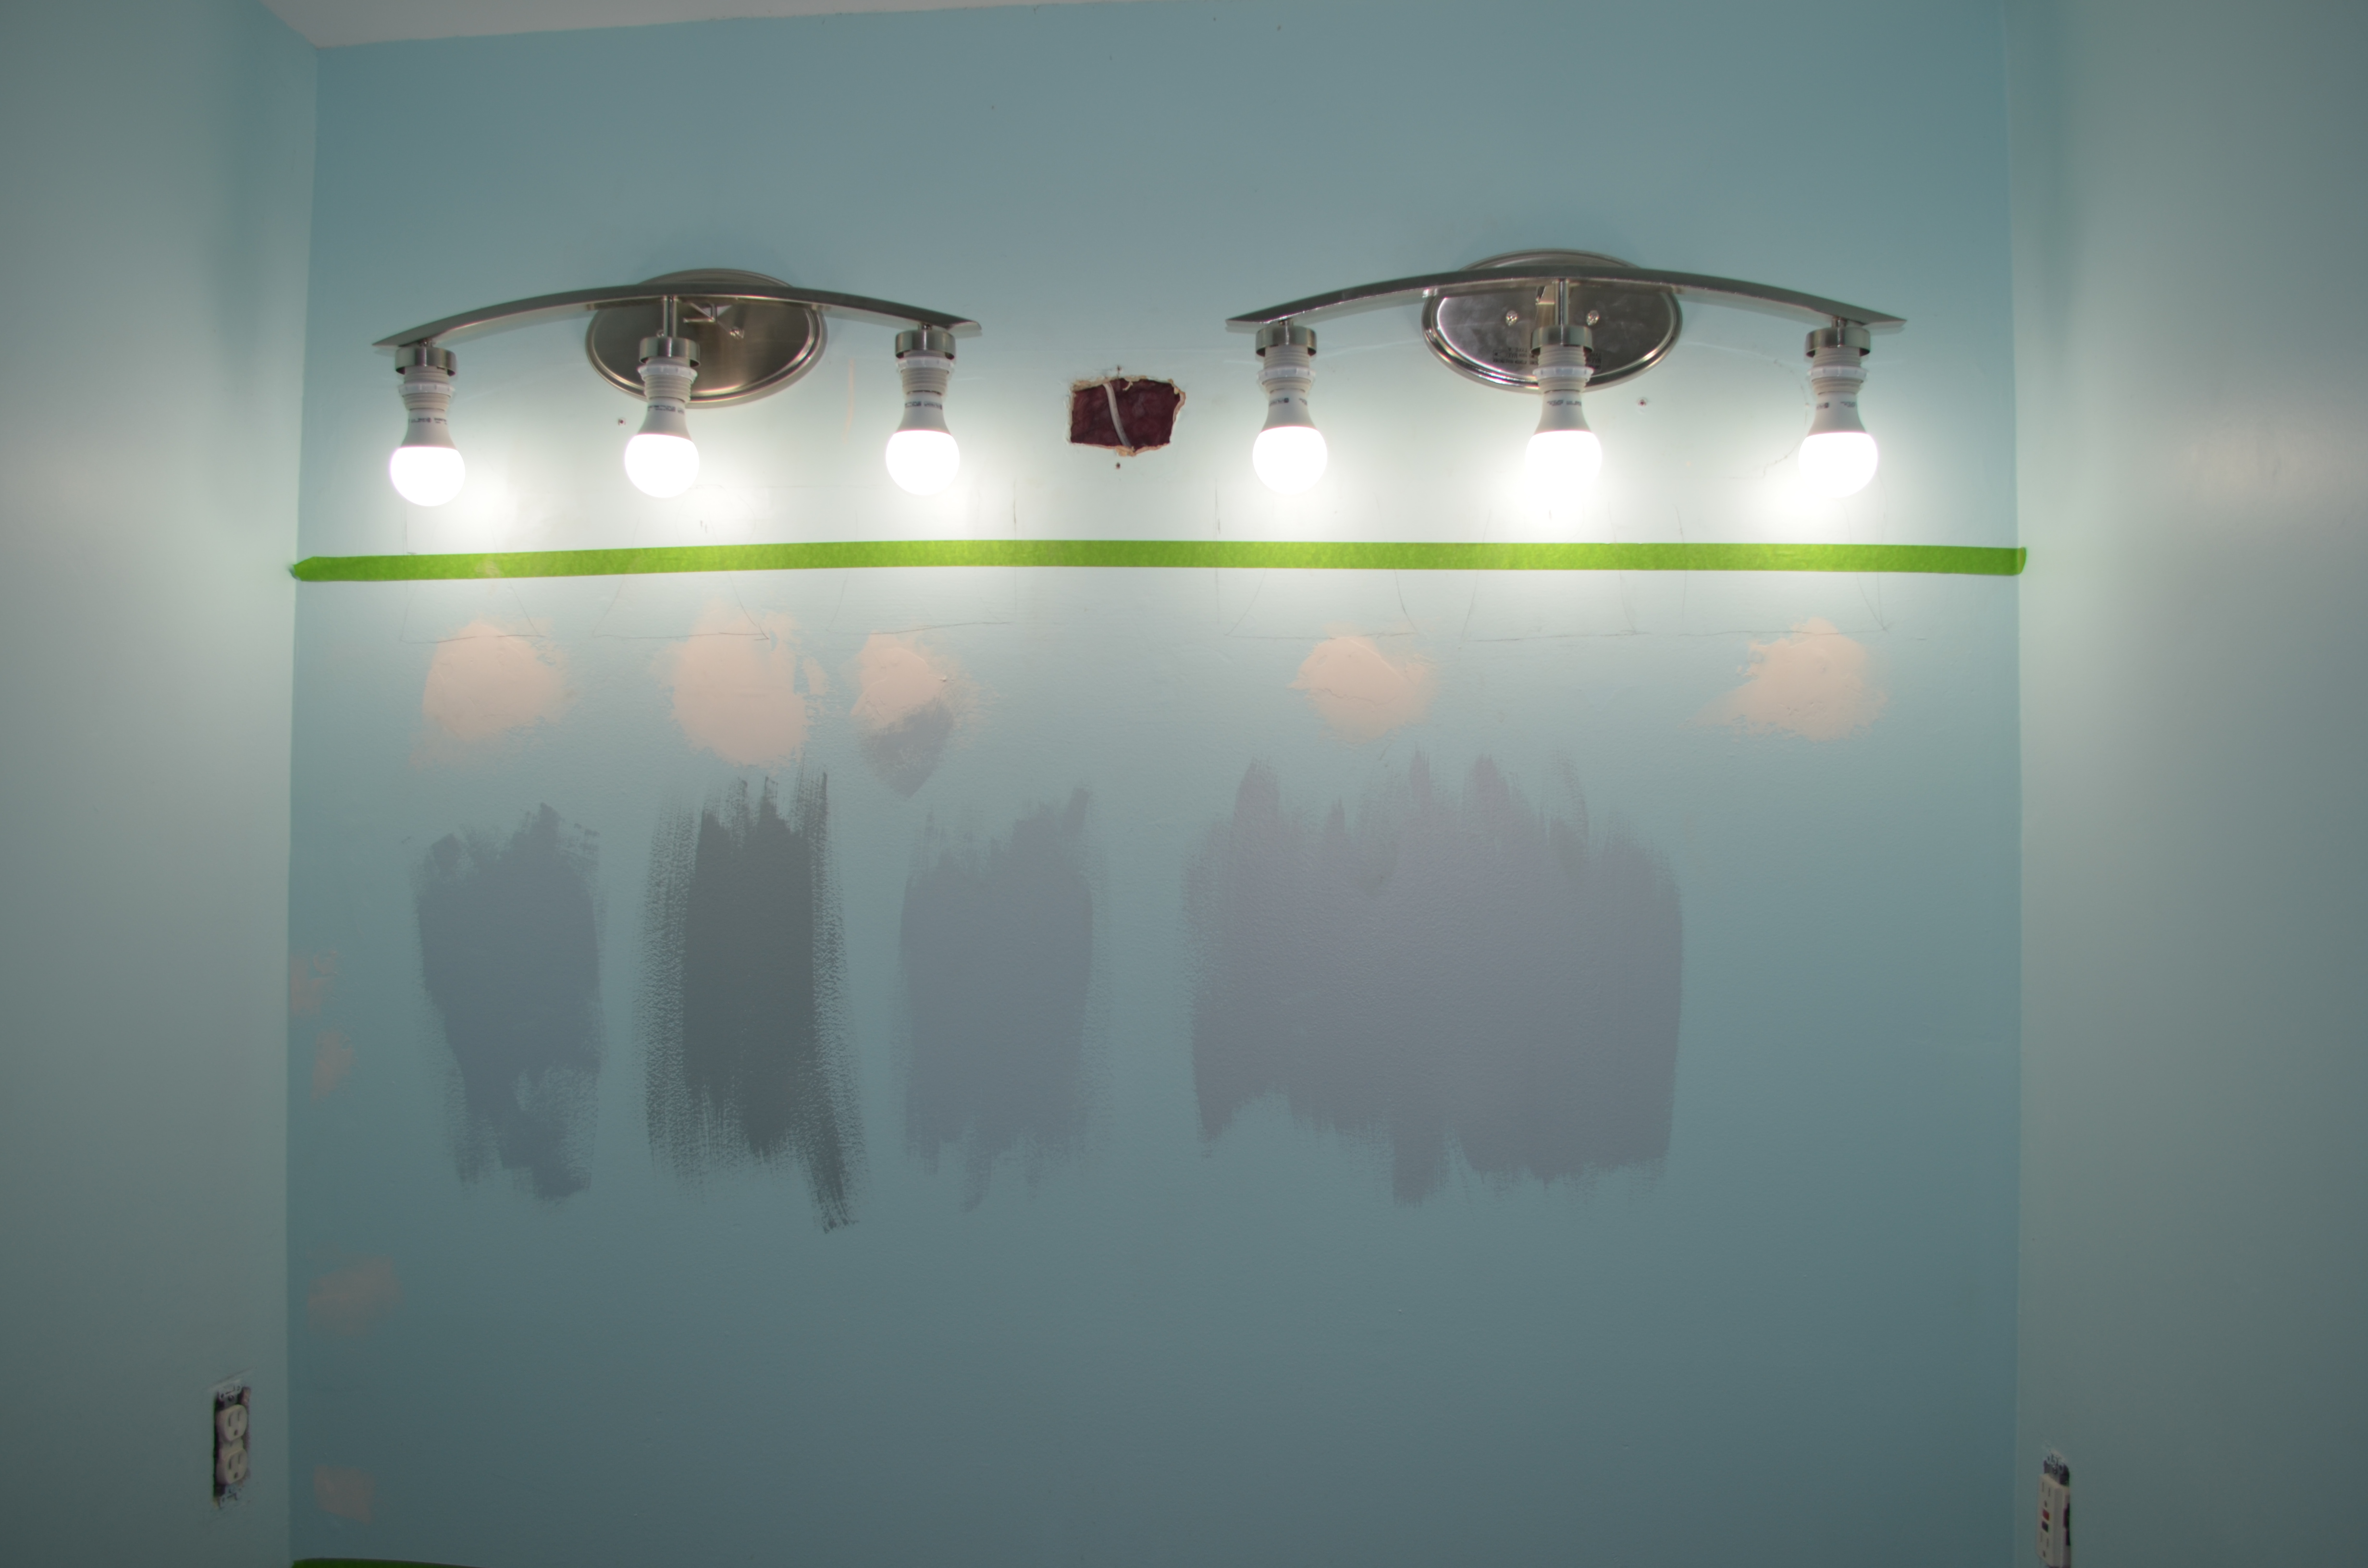
Lights in place, with our color thought process below them.
While putting the lights in place, since I already had to do a bunch of wiring, I also decided to add an extra outlet inside the vanity, so that I could have my razors charging inside the cabinet, without having the wires all over the countertop. Finally, when we brought the box of the vanity up to put it in place, as Ashley pointed out to me, it wasn’t going to fit. We have a small lip in the bathroom that sticks out about 1-2″ in front of the vanity, and we weren’t going to get it in in a single piece. Ashley had warned me of this previously, but I thought we could get it in if we went in at an angle. I was wrong. So I unbuilt it, we put it in place, and I rebuilt it.

Vanity box in place.
Once that was done, I installed the face frame, and the granite was installed. This got us back to a 2/3 functioning bathroom. It was the shower that would take another month to finish.
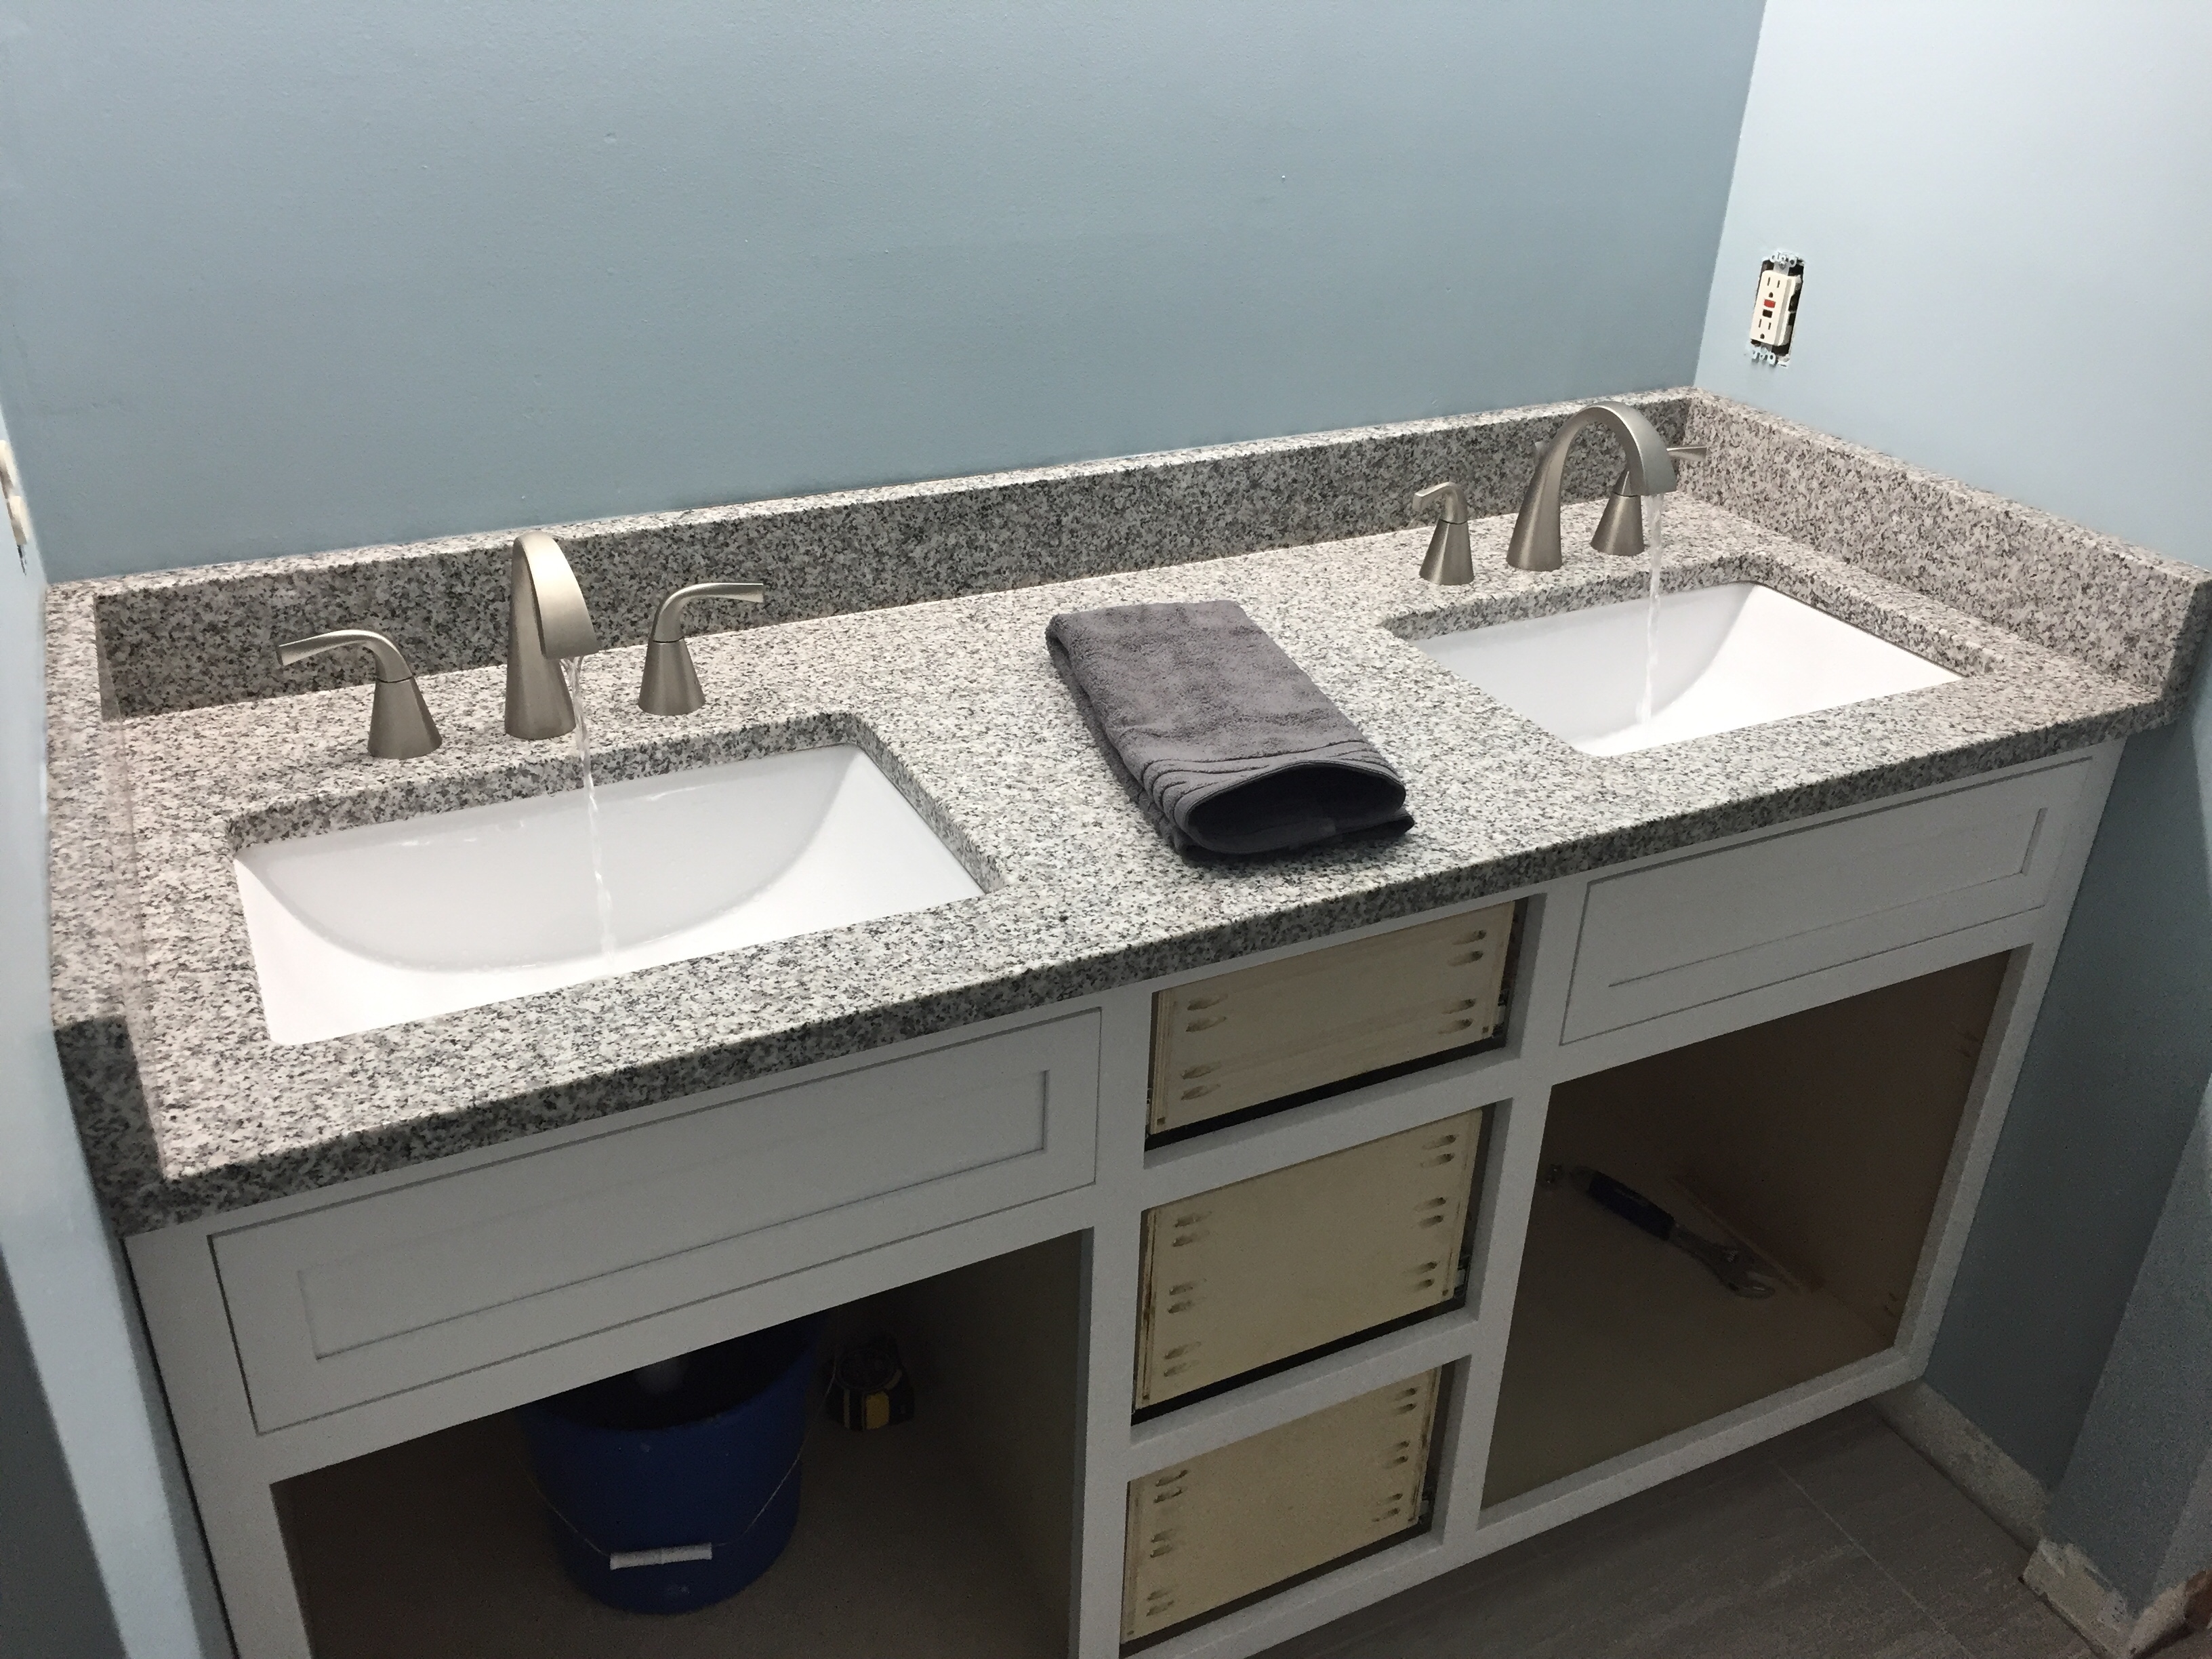
Granite and face frame in place.
The shower. The shower turned out to be just as we expected: AWFUL. The reason we hated doing the downstairs was because of the shower downstairs, and this didn’t turn out to be any better. This one was just even more complicated. When we took out the fiberglass enclosure from the previous shower, we realized a vent pipe was sticking out where we needed it to be flat. The old shower was raised enough to get around it, but our new shower wouldn’t be.
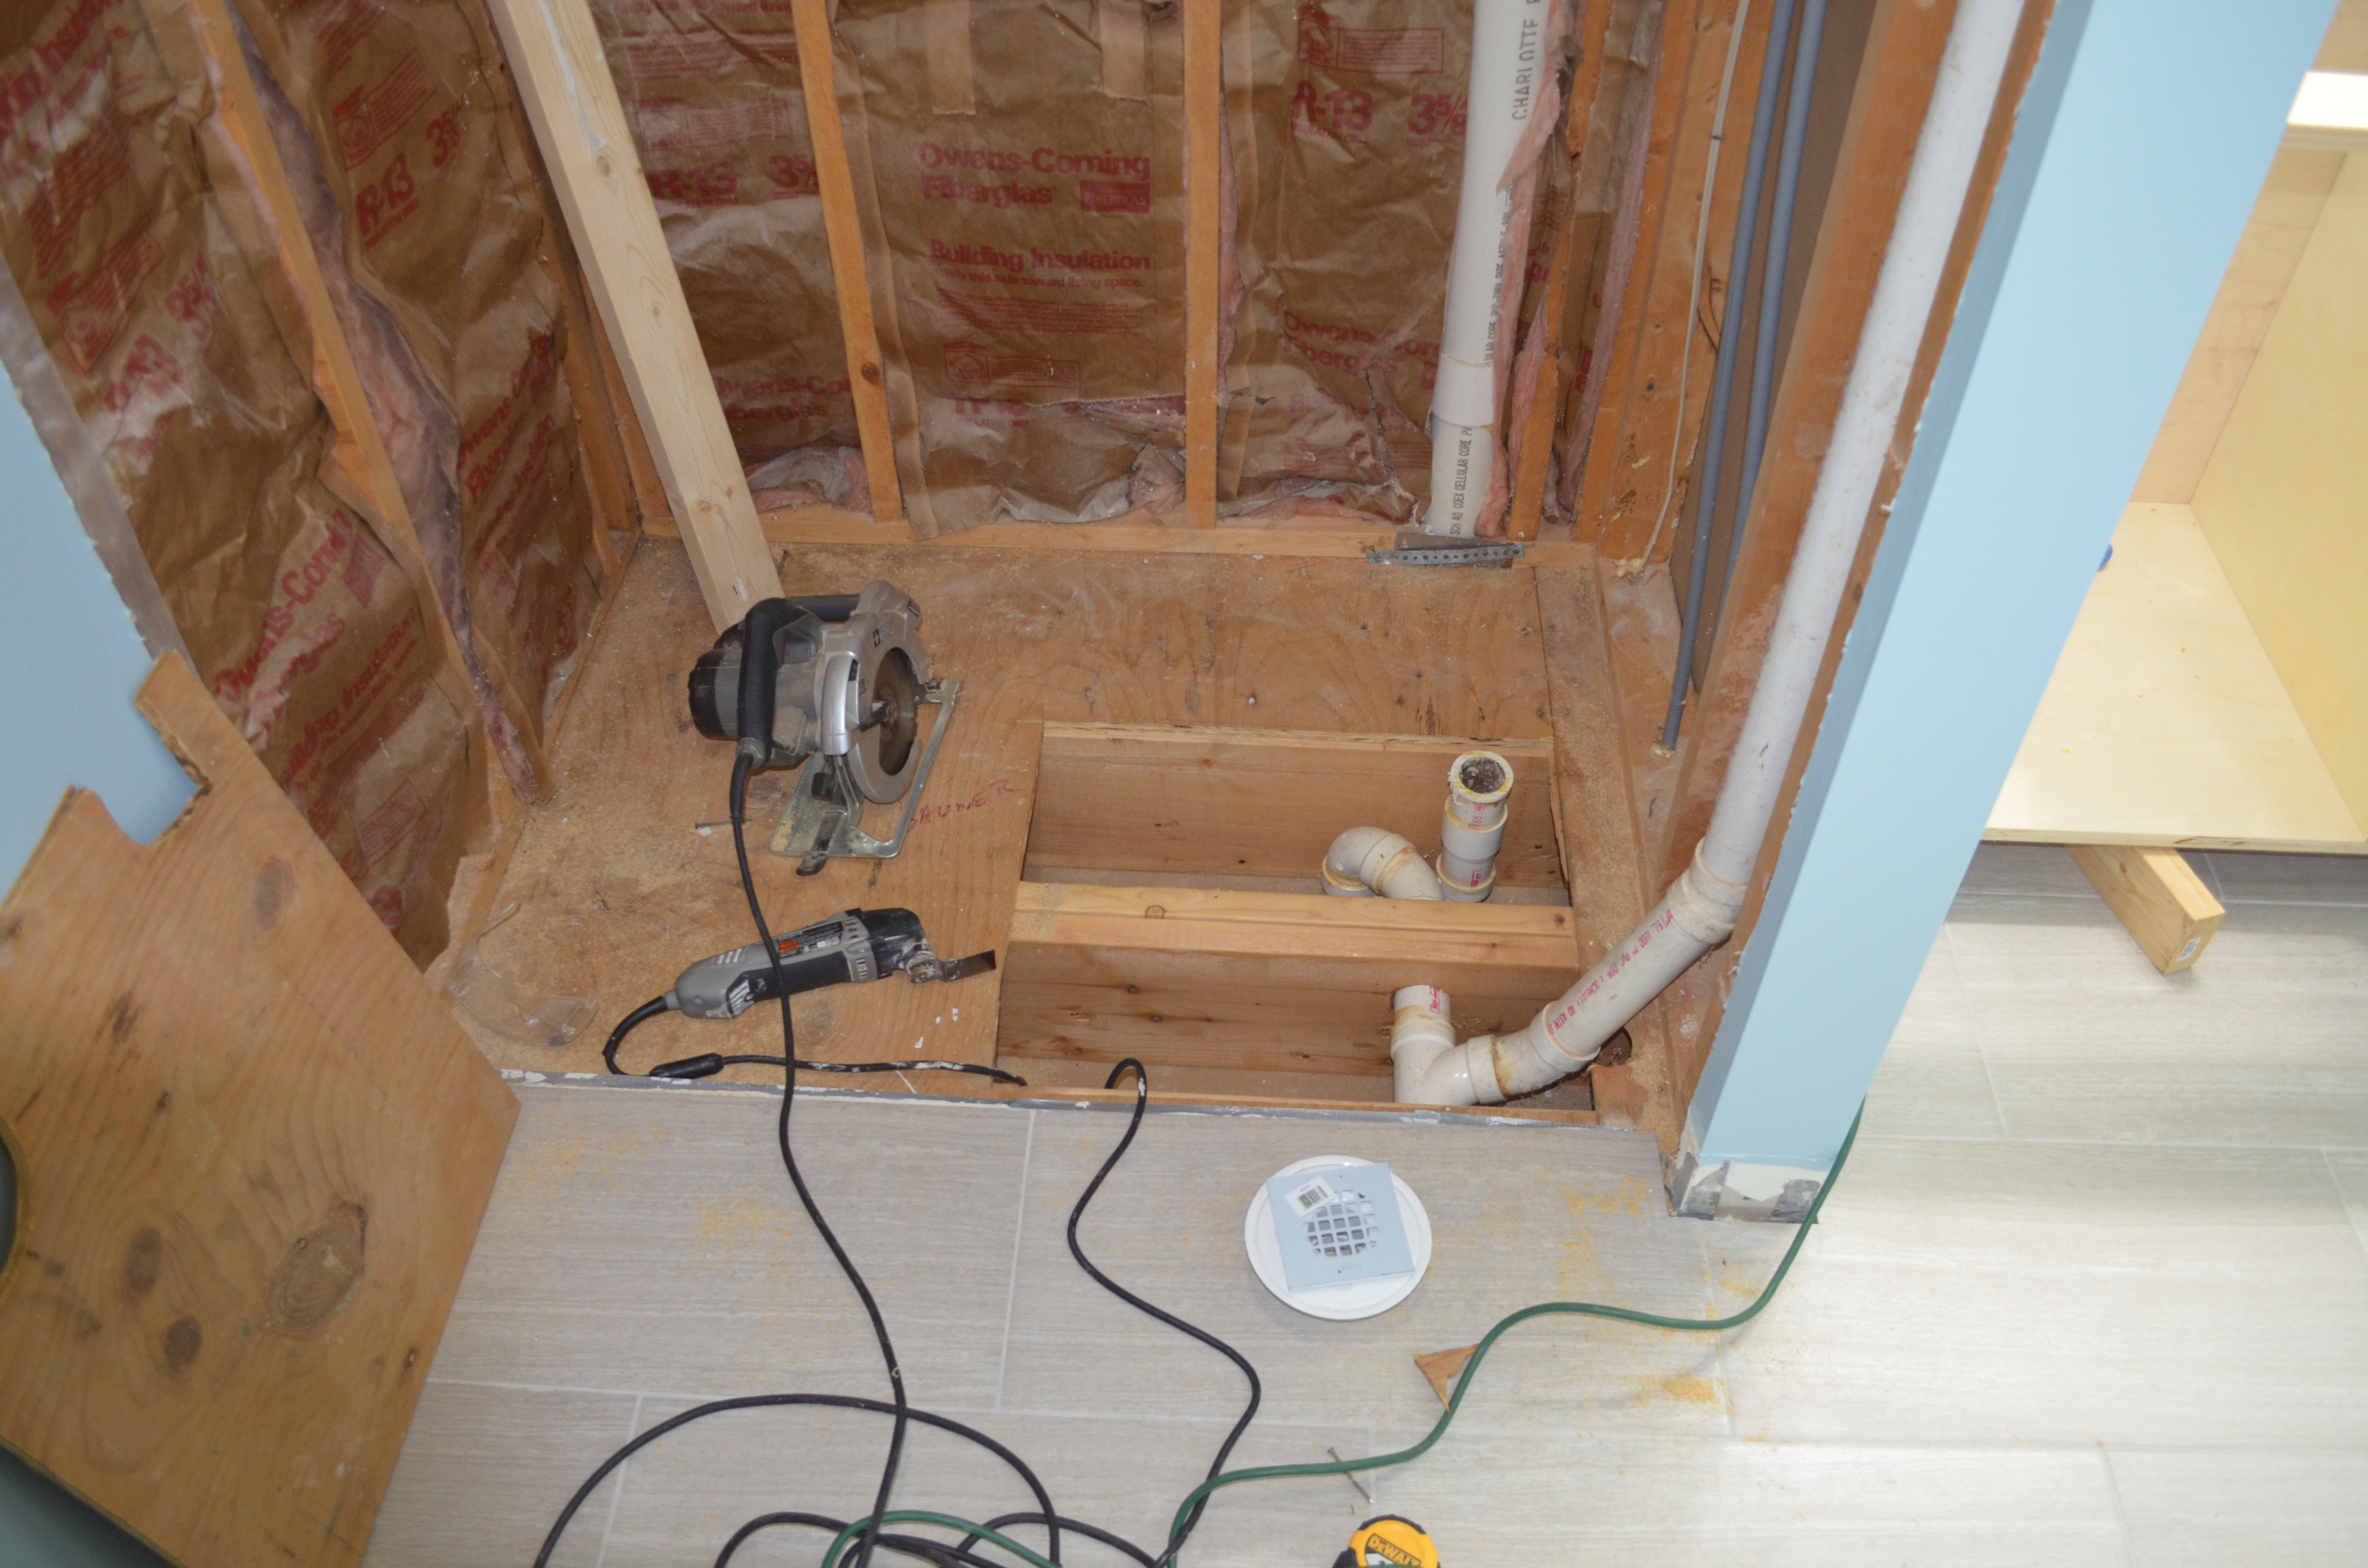
Our pipe dilemma.
We were originally planning on keeping the drain where it was, to keep costs down, but since we ended up getting a plumber to come and move the other pipe, we ended up moving it to the center of the shower. This probably was for the better, anyways. It meant we didn’t need as much of a slope in the shower base, which made pouring the basin a little easier. We also ended up using the “Goof-Proof Shower Pre-Pitch” guides, to help us get the pitch of the shower basin right.

Ashley spreading the first layer of the concrete shower base.
Once the first layer of the shower base dried, I went ahead and laid the PVC Shower liner.
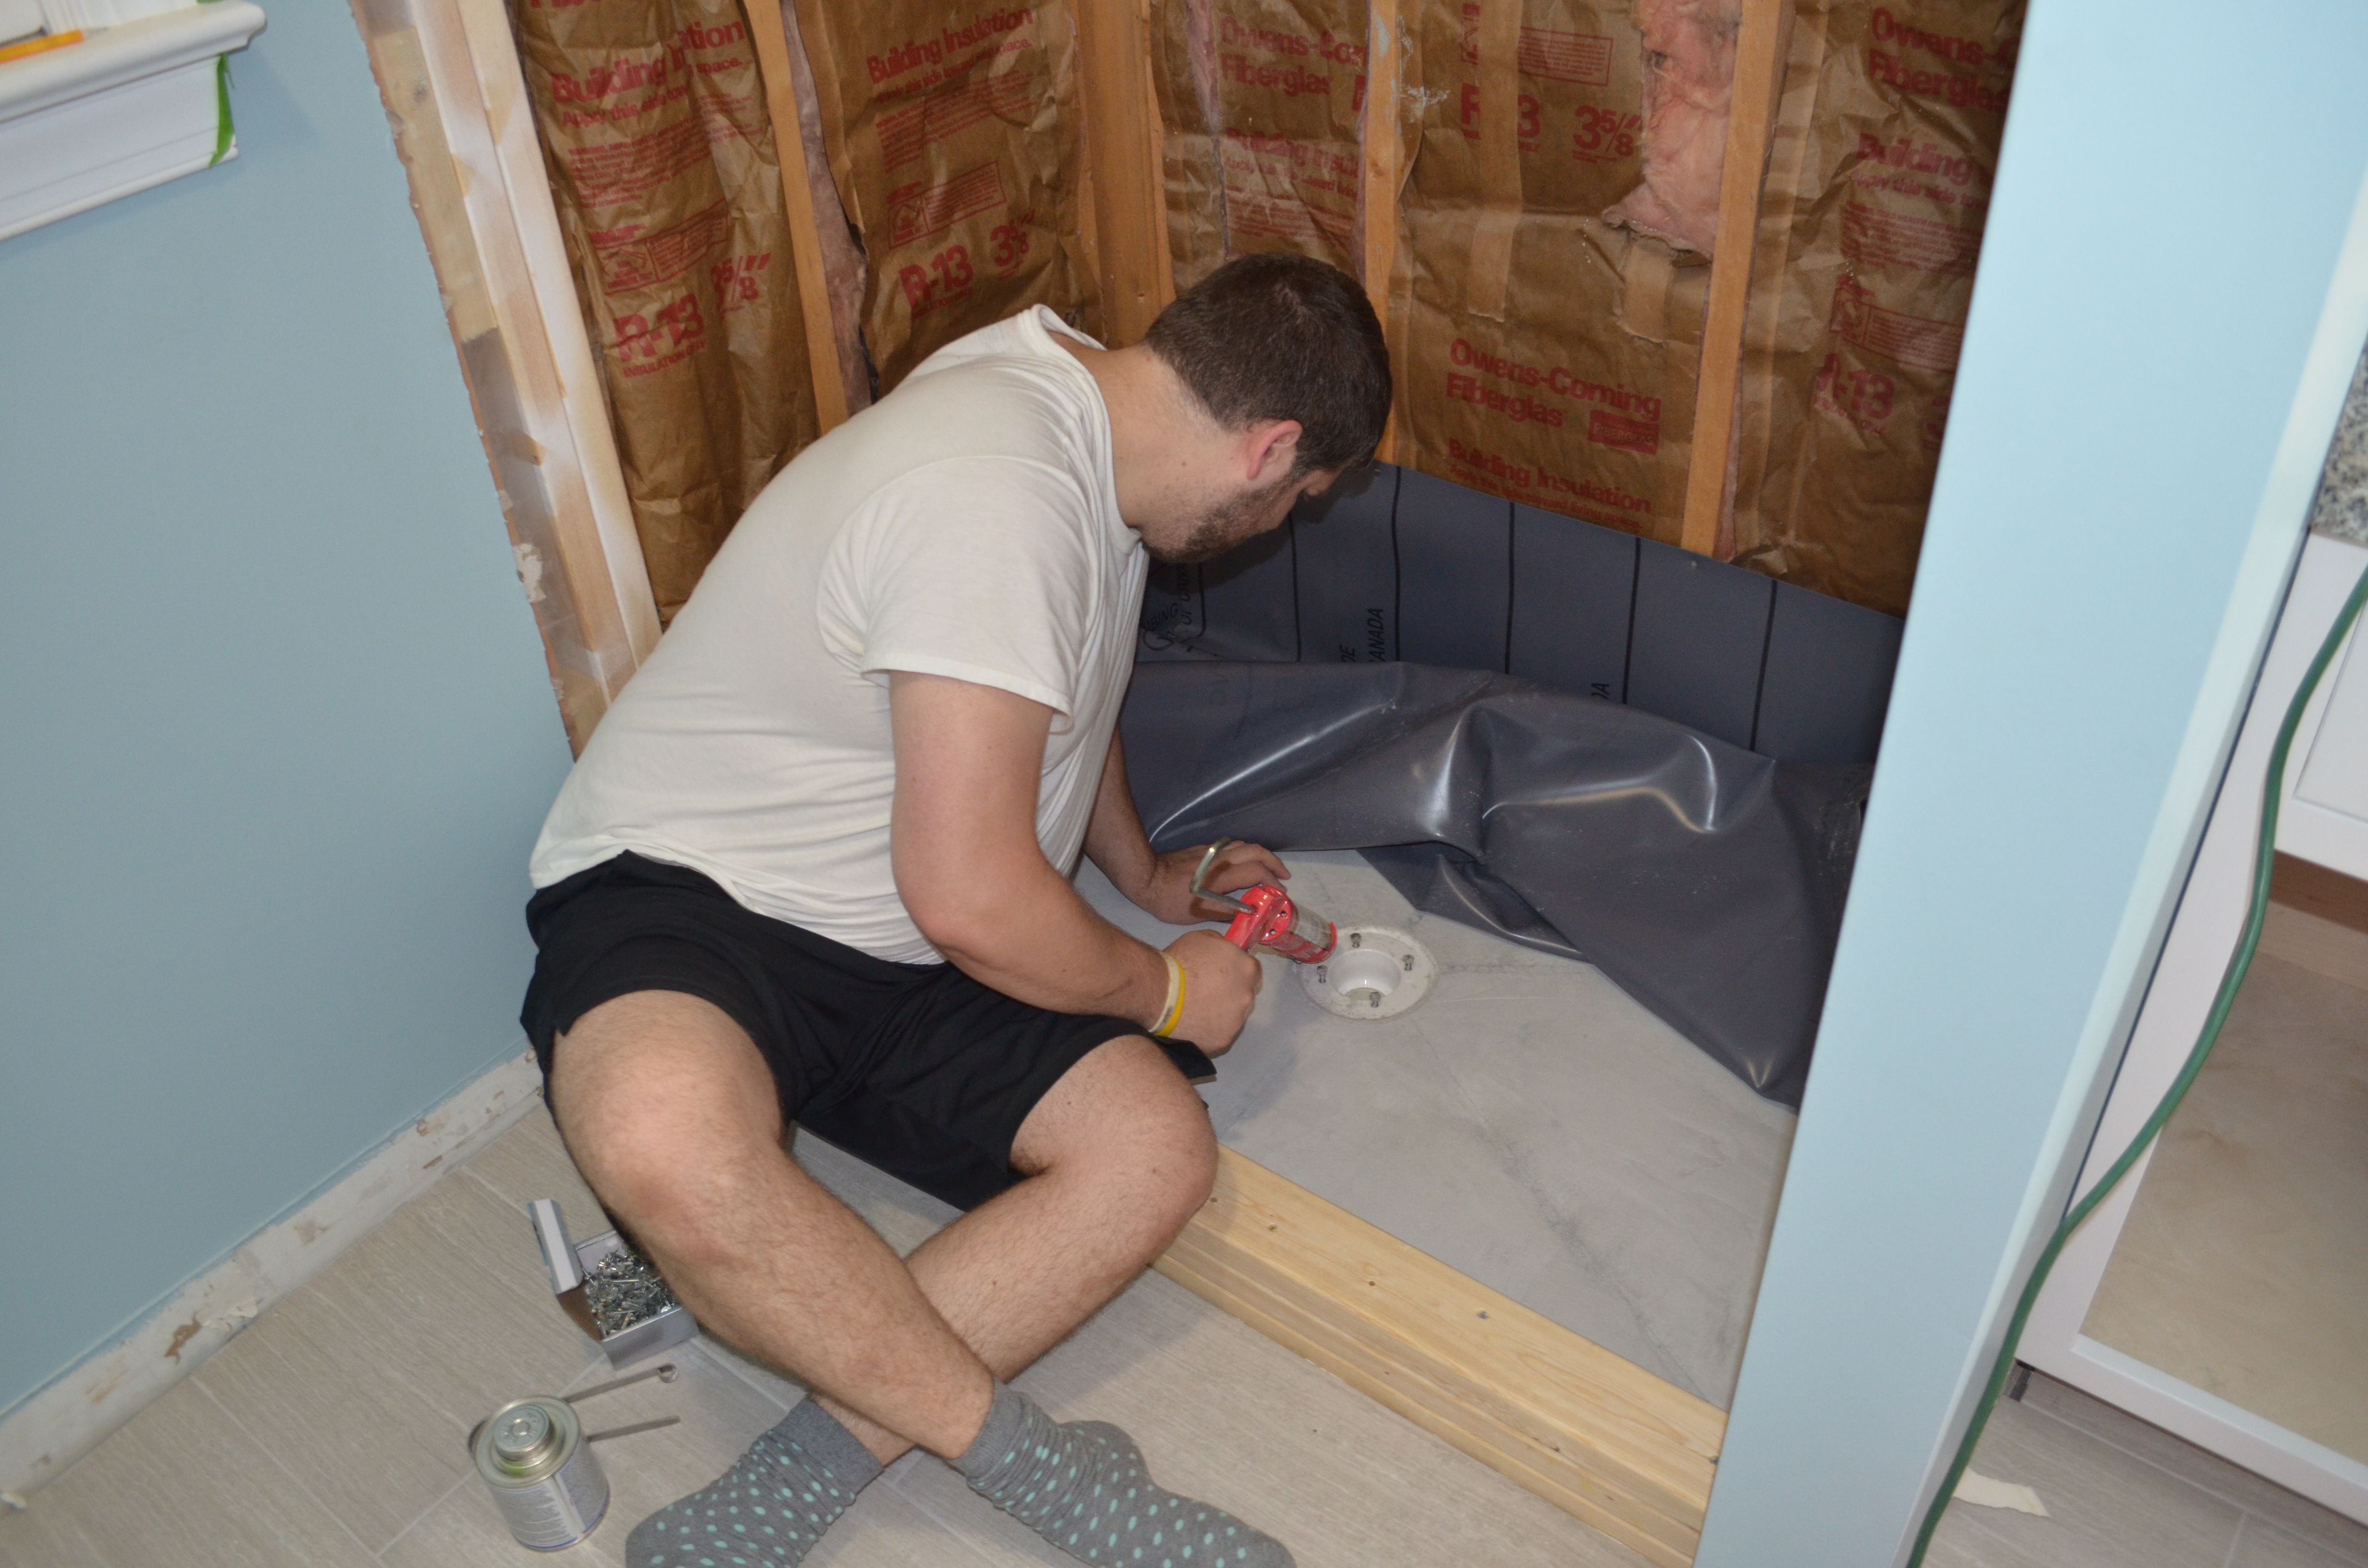
Caulking the PVC liner to the drain.
Once the liner was laid, I had to test it. There’s a kit you can buy that’s meant for plugging a shower drain, but it was more than I wanted to pay for this single use. I looked online, and the best suggestion I found was to put a balloon in the drain and blow it up. This plugs the drain. Once I had the drain plugged, I filled up the water quite a bit more than I ever expected it to get, marked the level with a Sharpie, and left it overnight. This basically tests for small leaks in the liner – and this part actually went smooth. Nothing leaked over a 24 hour period, so I drained it, and we were able to move on.
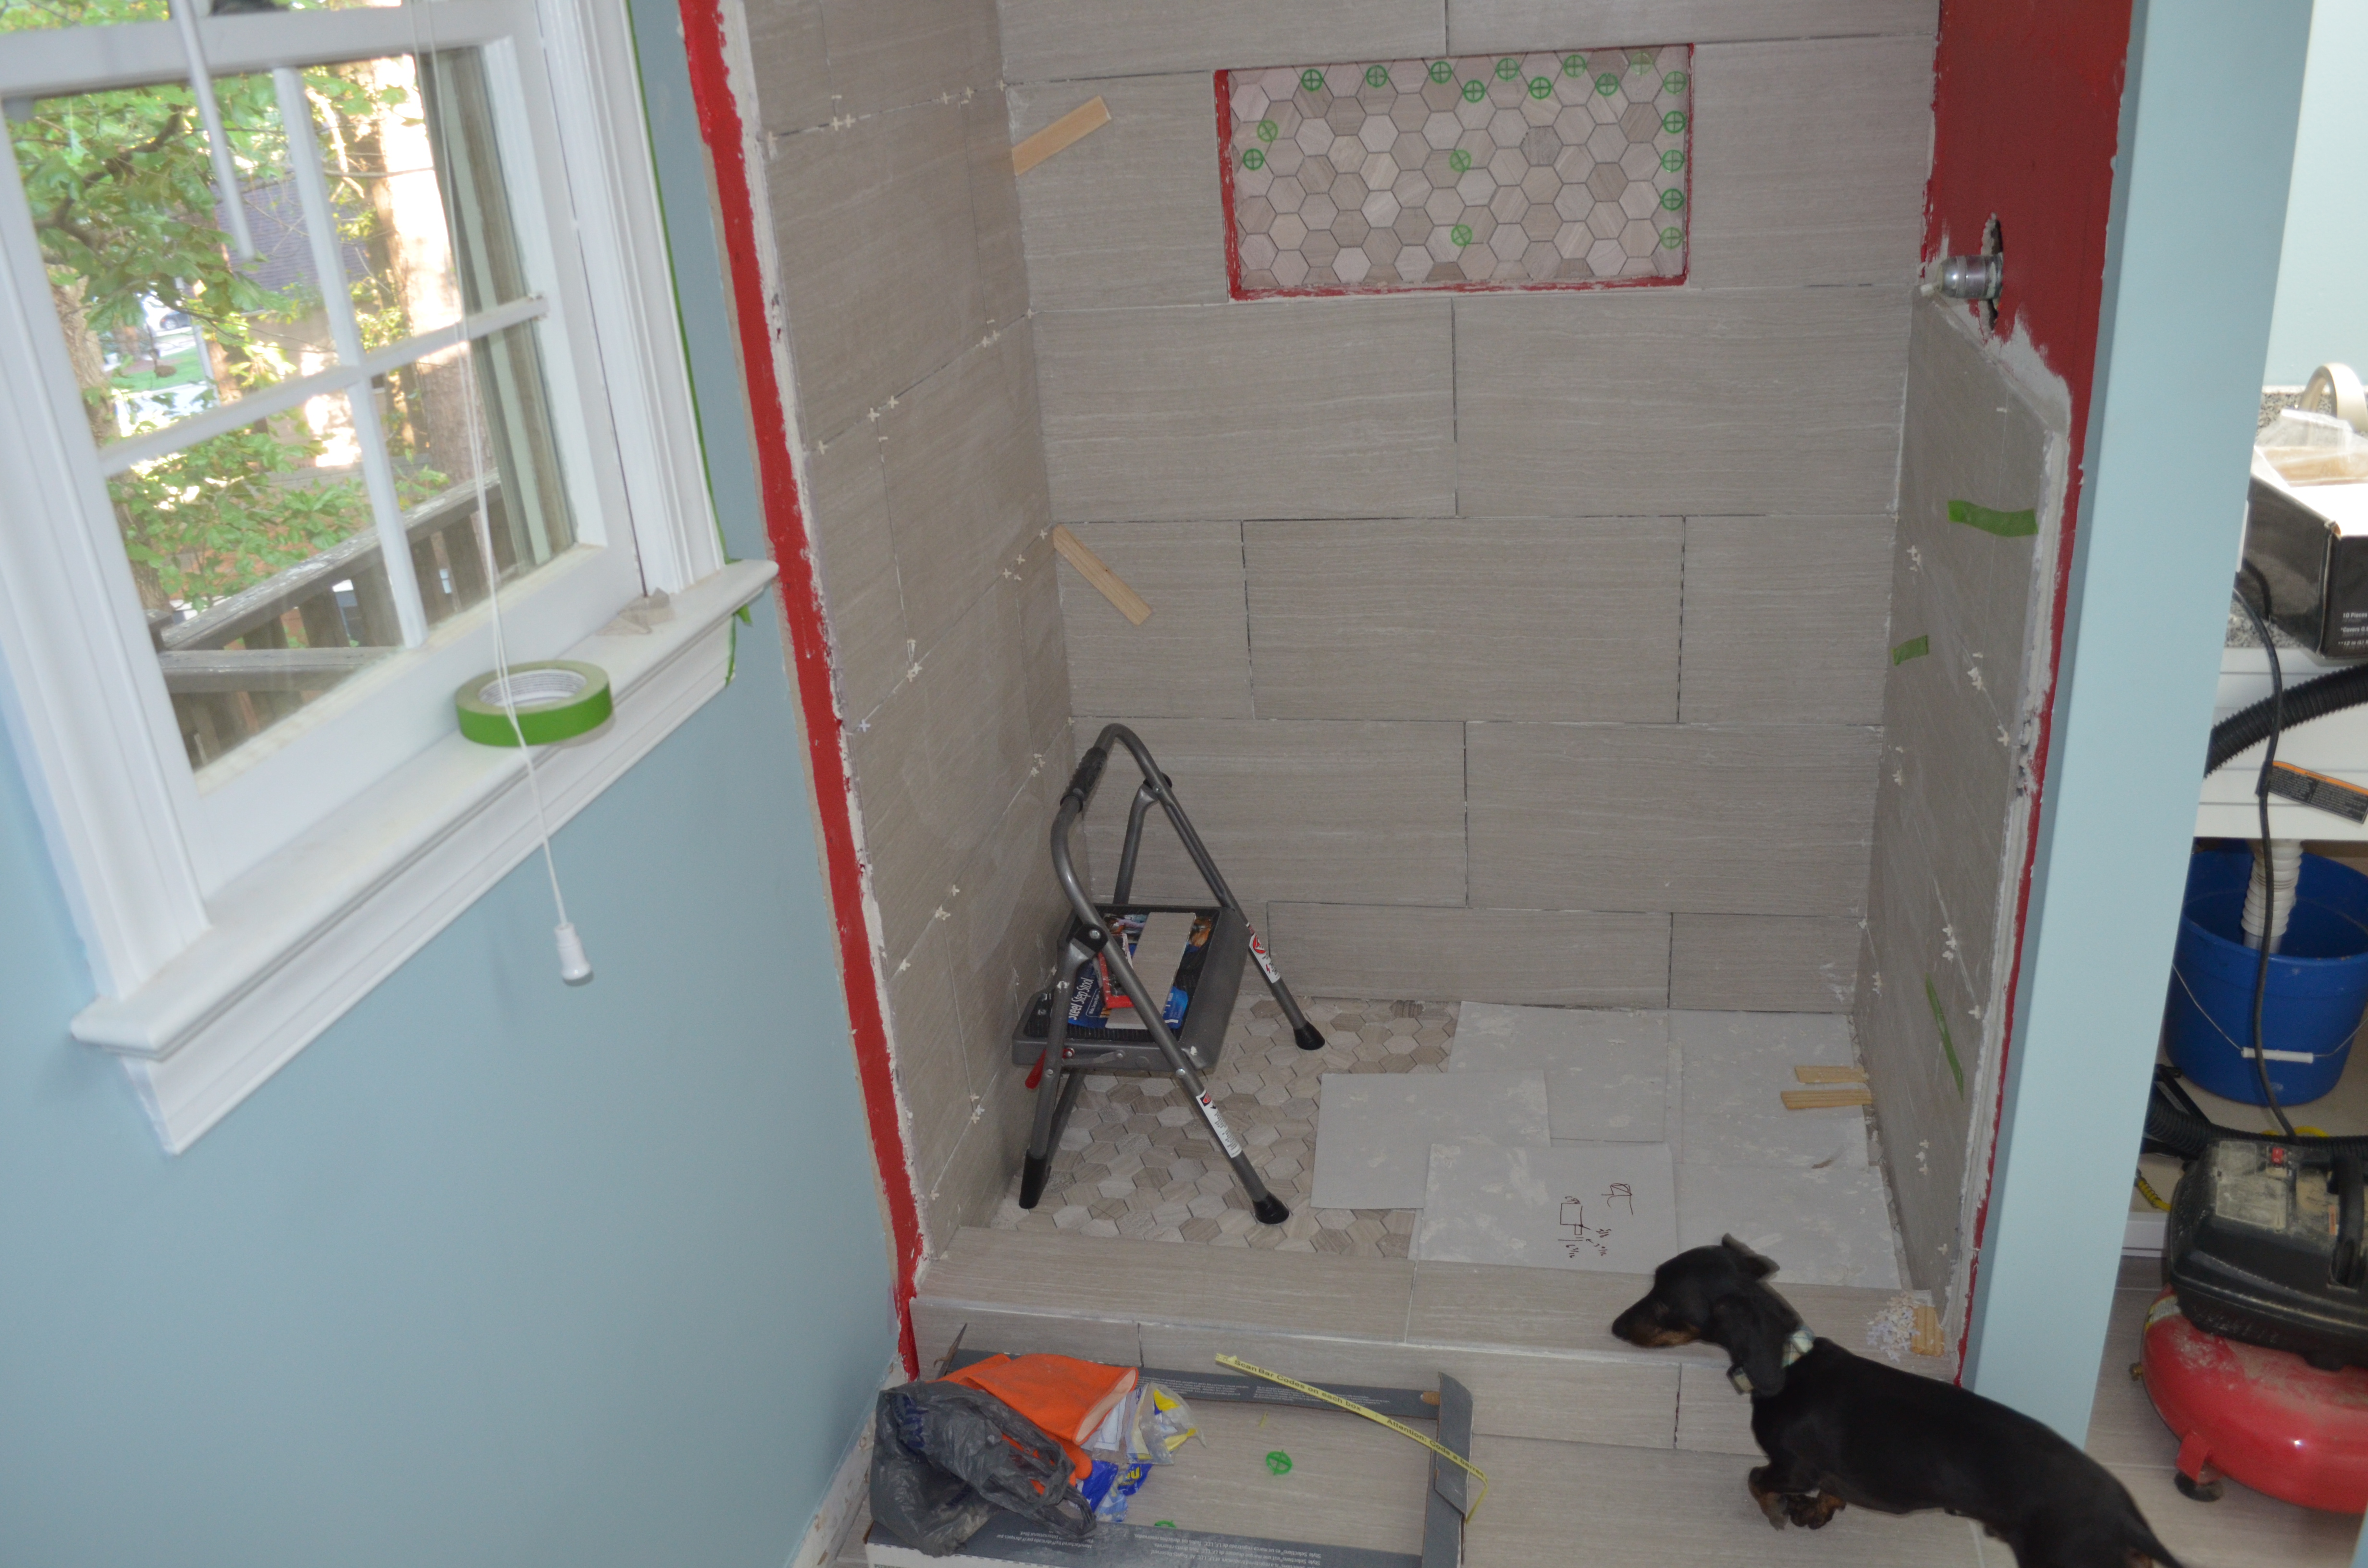
Next, we went ahead and carved out a nook for soaps and shampoos, and then put up new cement board.
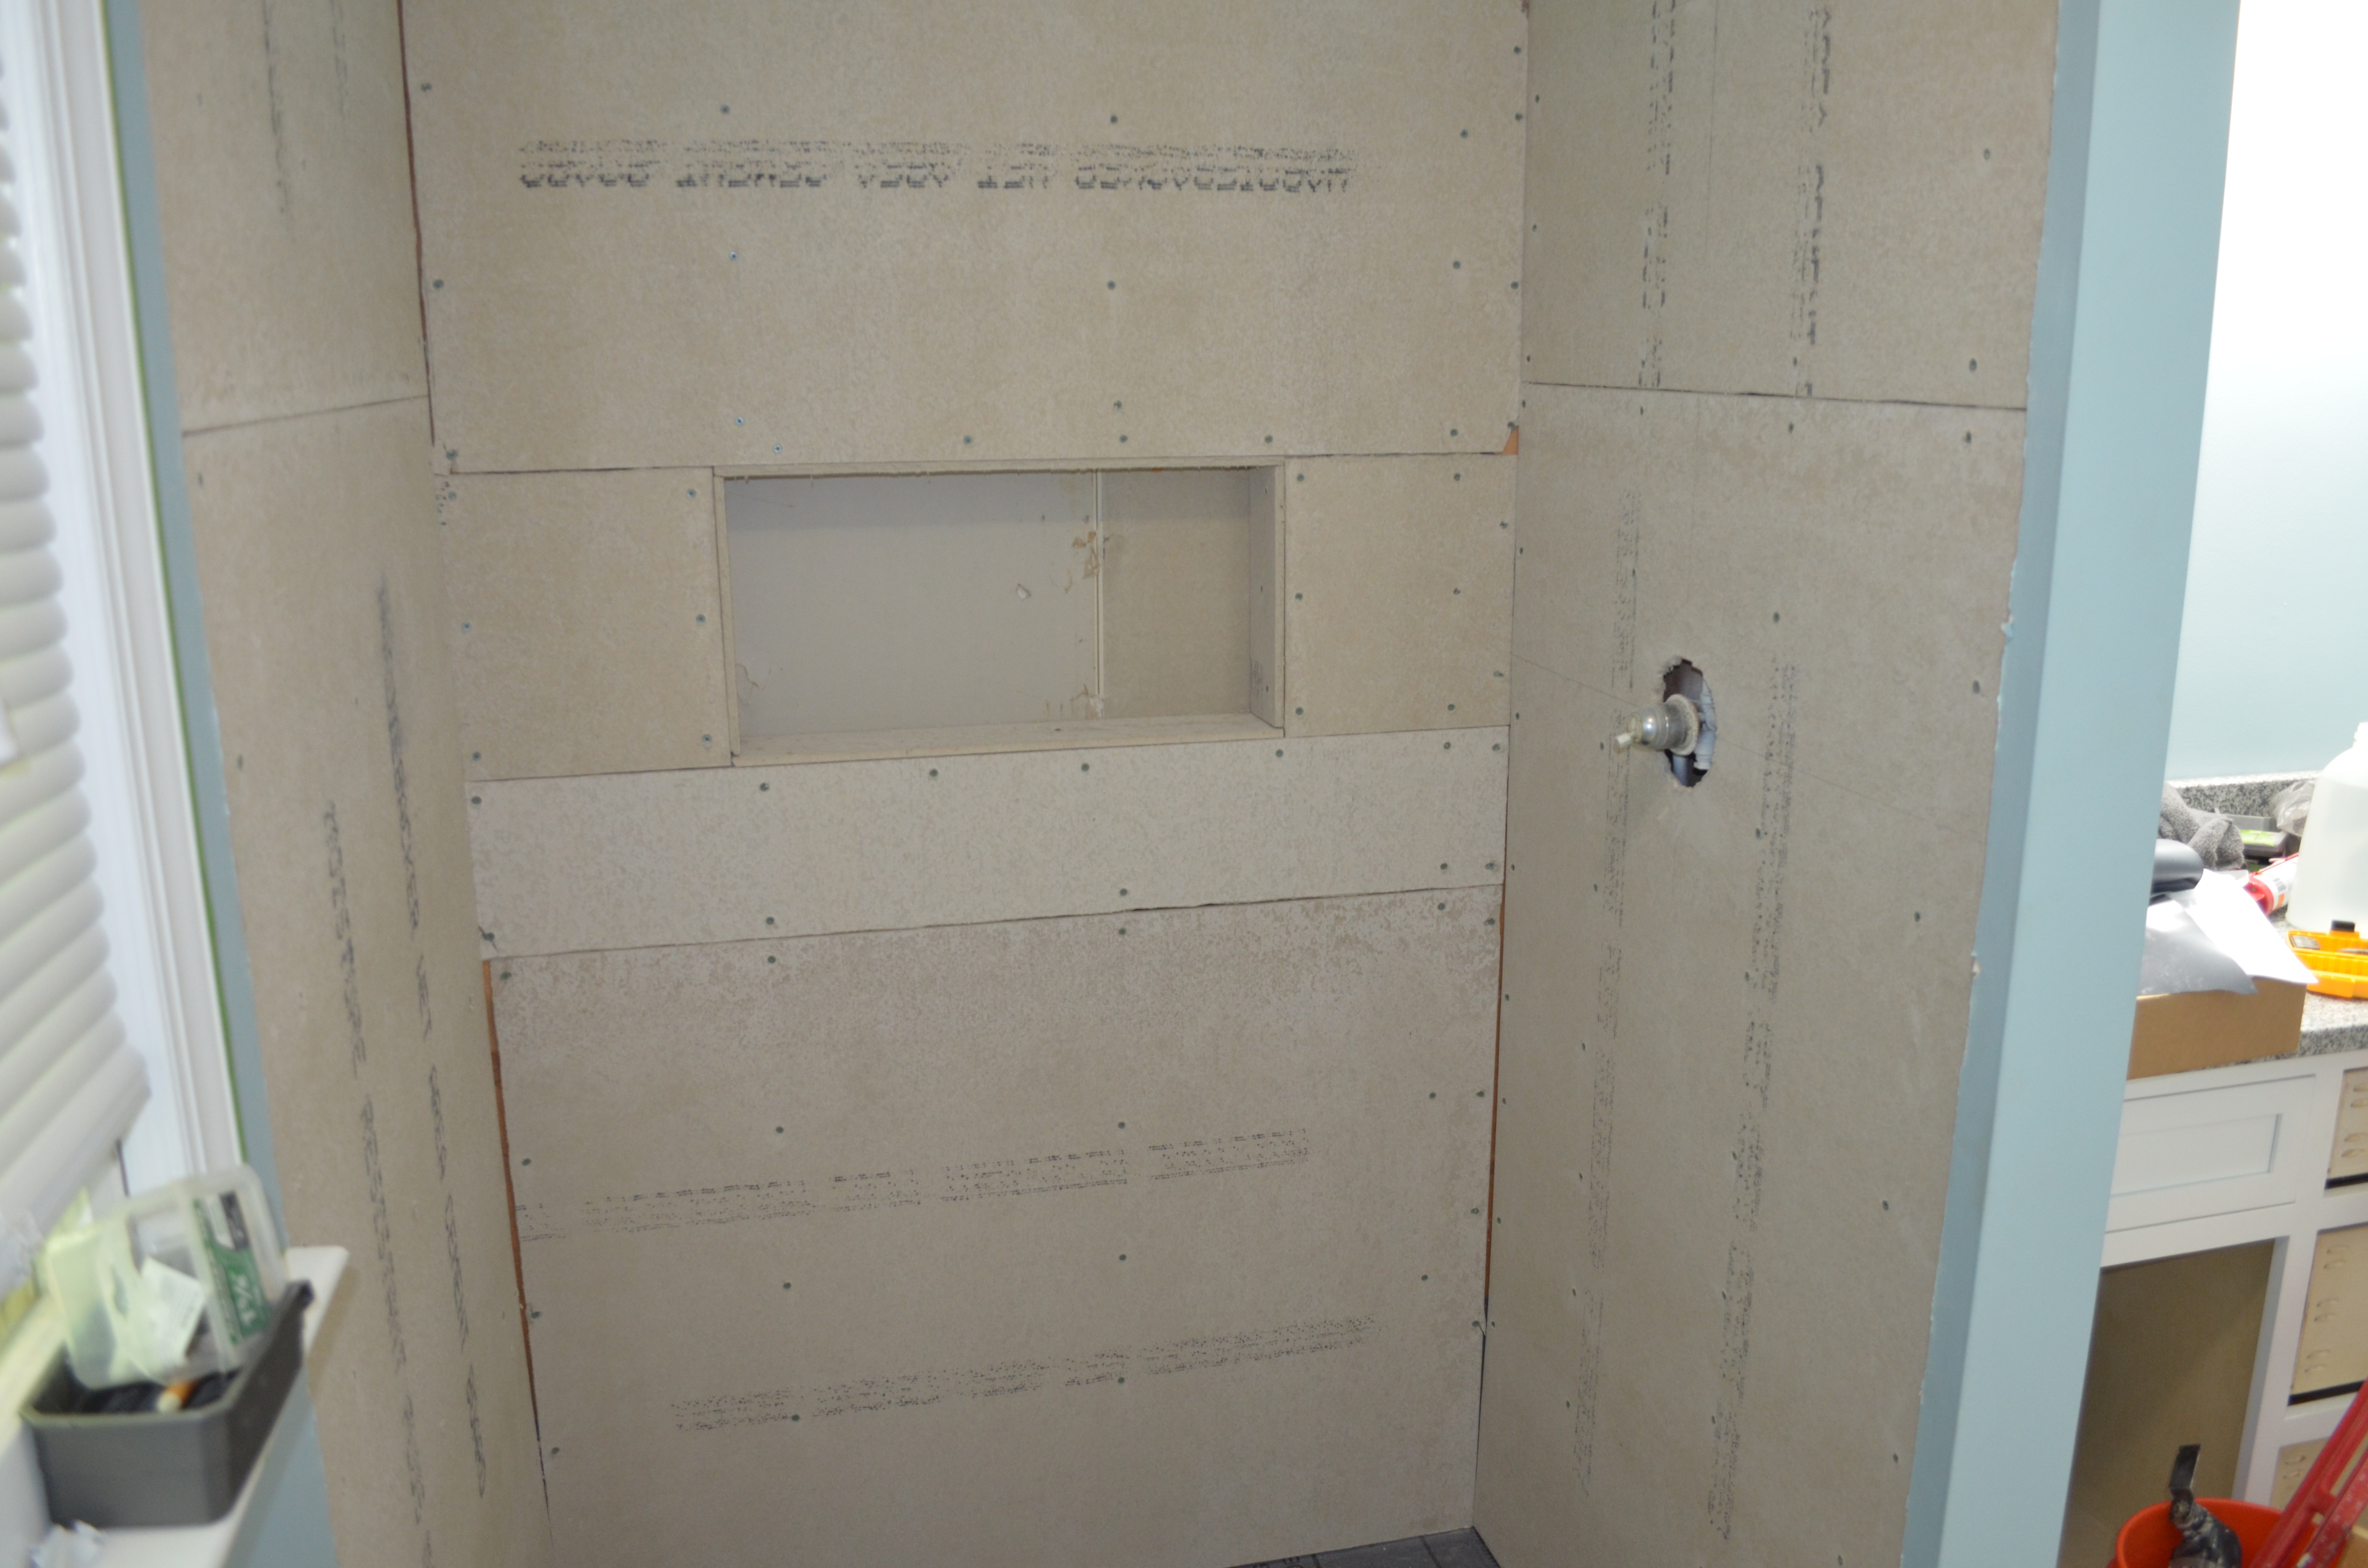
Shower enclosed by cement board (final piece in nook missing in this picture).
Unfortunately, I don’t have any pictures of the next step, but we laid another, deeper layer of concrete on top of the liner and up past the base of the concrete board. Again, we did this with the assistance of a different set of “Goof-Proof” guides, meant for the deeper layer. Once that dried, we were ready to make more progress. After the concrete board was up and concrete was laid down, we painted everything with two coats of RedGuard to protect from any moisture that gets behind the tiles.
Applying RedGuard.
After we waited for the RedGuard to dry, we started on the tile. We started with the mosaic tile on the floor, and behind the nook. Afterwards, we moved on to the large-format tile – the same thing we used downstairs. The tough part here was getting the tile to line up with the nook. I had created the nook in the exact same size as a tile, so that it would fit in without needing weird cuts to fit the tile around it. However, because of that, we ended up starting the tiling at the nook and working our way down. The tiles slid throughout the process, and until we had the bottom 4 rows done, we had a few issues. Once we got past that, that wall was actually pretty easy. Even the side walls weren’t as bad as downstairs, because we learned from some of our past mistakes.
Tile going up in the shower.
Happily adding the final tile.
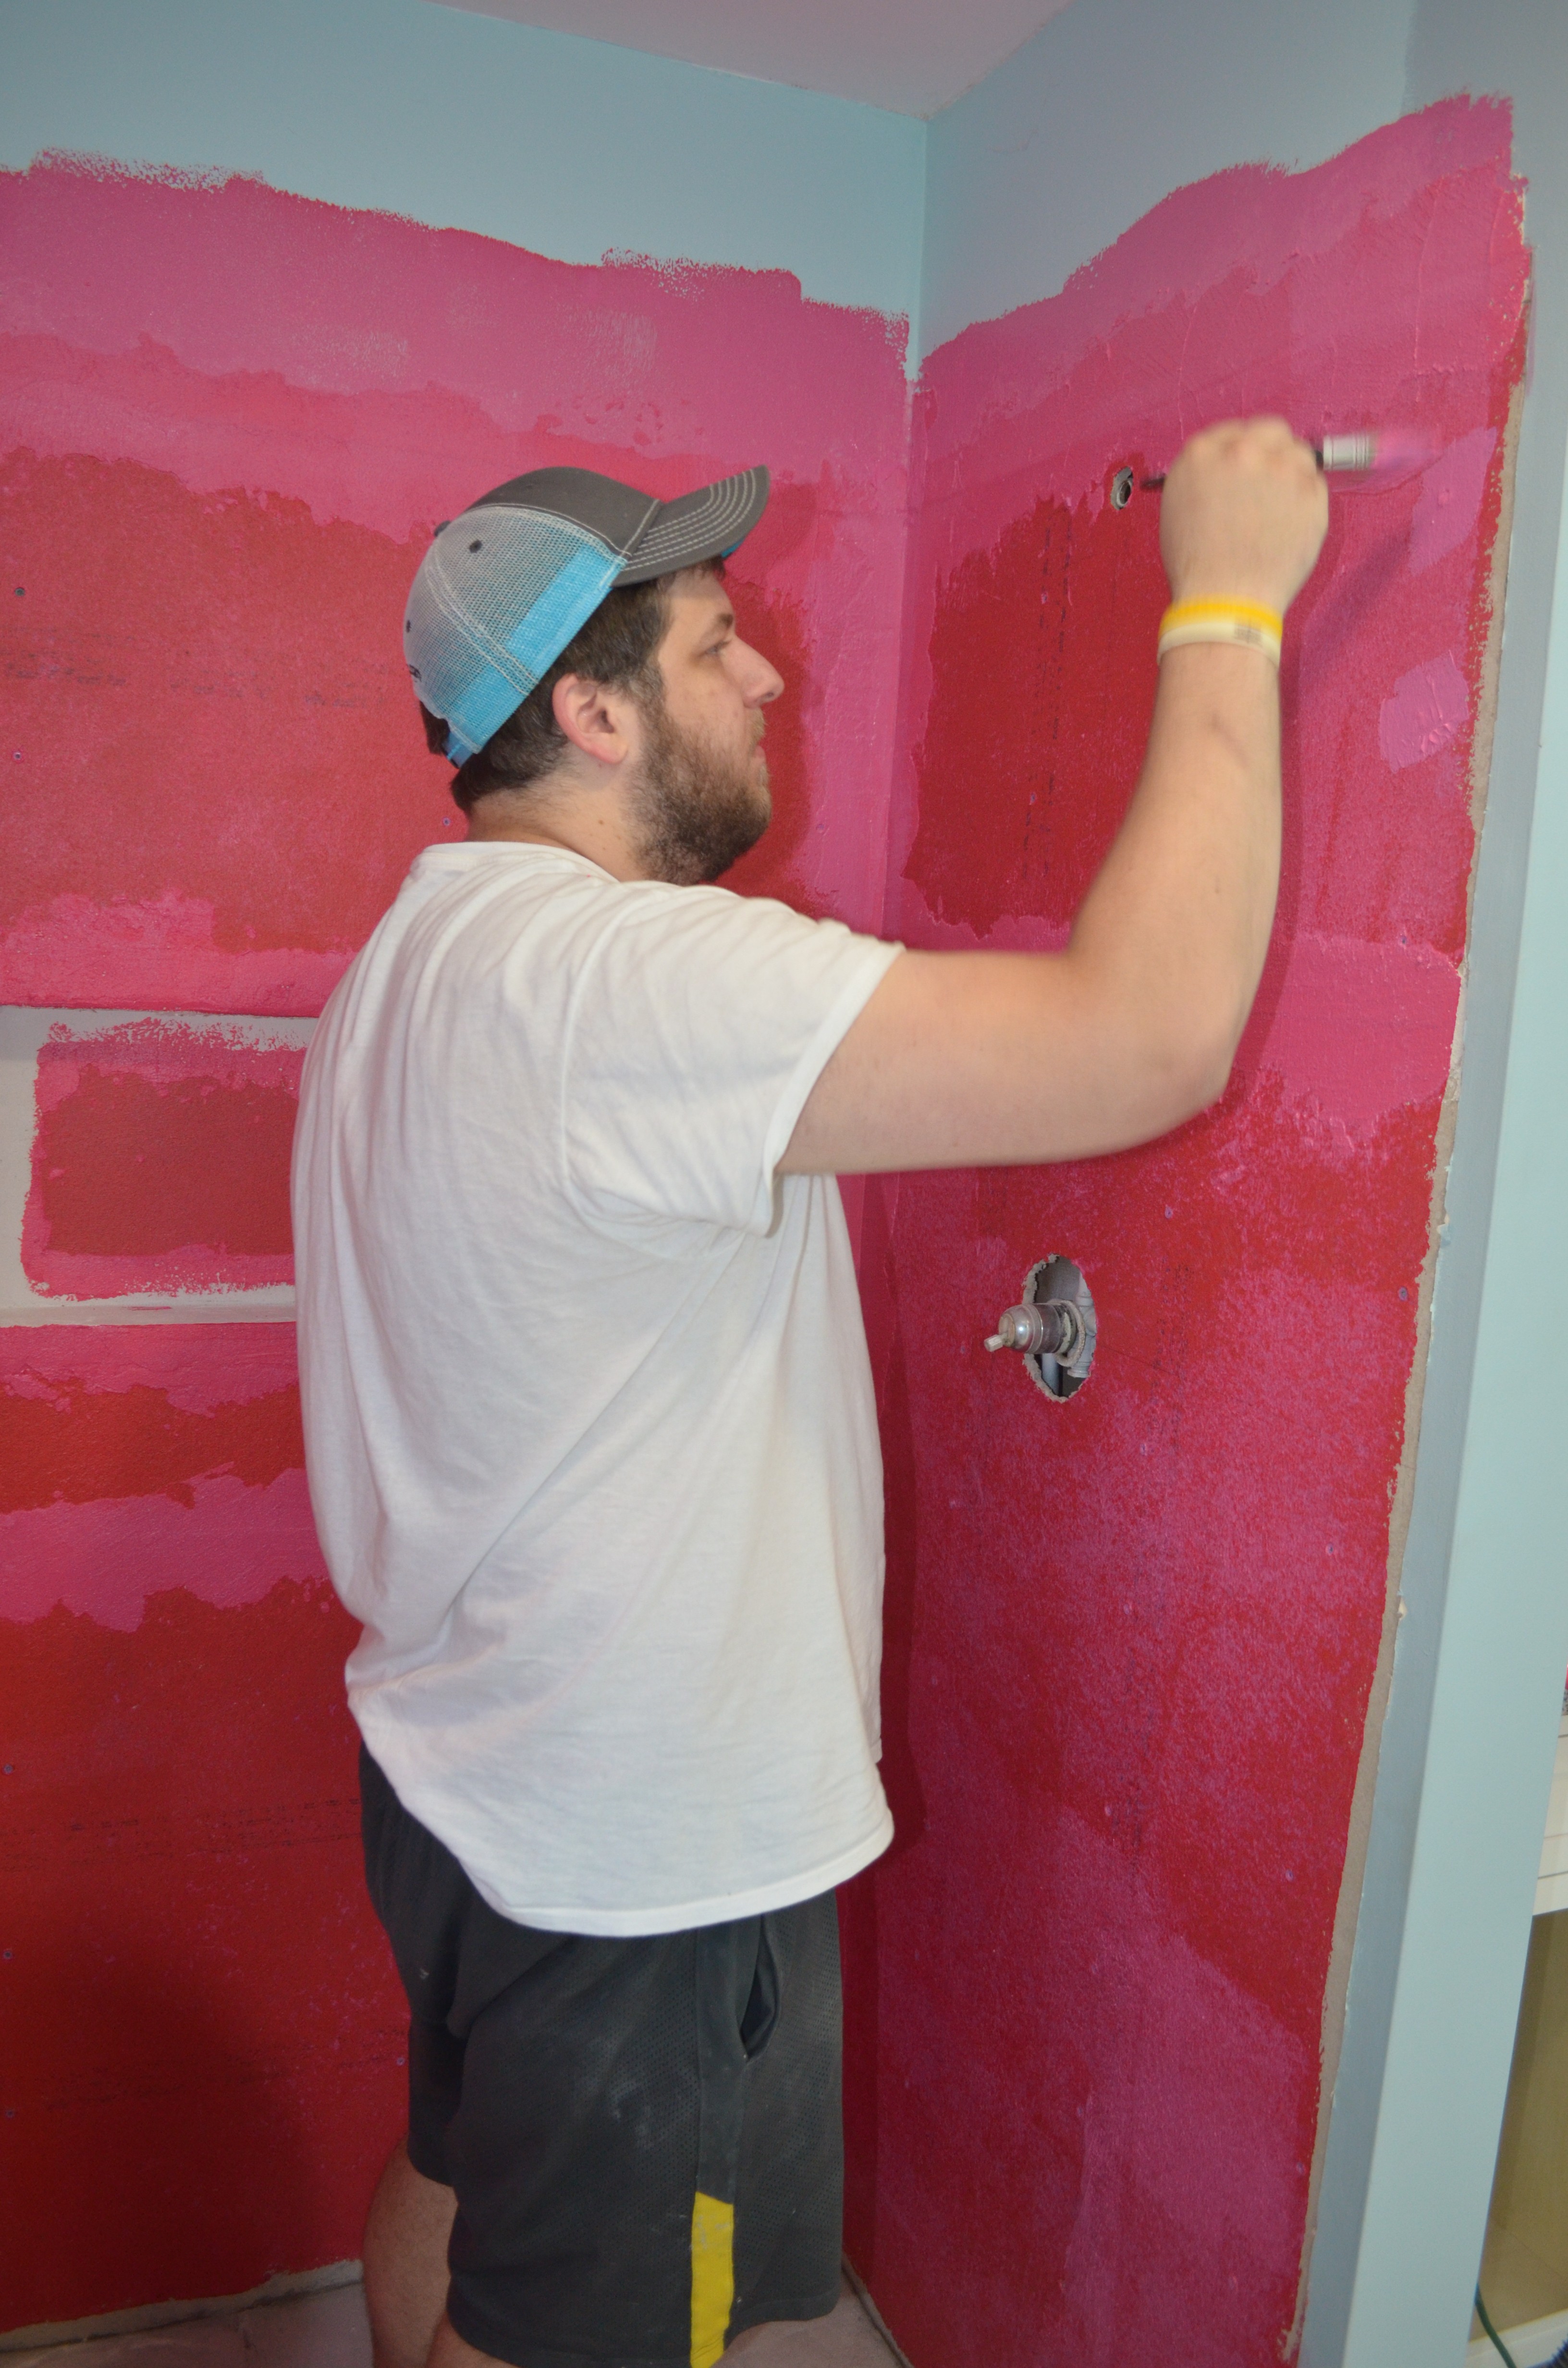
Once the tile was done, we caulked all the corners, and grouted the rest.

Cleaning up the caulk line.
The next part was where it really took some time, and I guess I can’t say this part was our fault. It was more just an annoyance because we were still without an upstairs shower and it had been over a month. We bought a glass shower door from Lowe’s at the beginning of this project, because it was on sale. Originally we planned on installing it ourselves, but I got more worried about having to drill through the tile, and we ended up going to Lowe’s to see how much it would cost for them to install it. They rung us up for $225, which I thought was fairly reasonable and gave us peace of mind that our newly tiled shower wouldn’t be messed up by a mistake we made.
The contractor came out and was very nice – asked us how we wanted it mounted, took all the measurements, and told us Lowe’s would contact us. He did ask us, however, how much we paid. He said it wasn’t nearly enough and that Lowe’s had undercharged us, but he said that usually Lowe’s eats the cost when they make these kinds of mistakes. A few days later, Lowe’s called me saying I had to pay another $400 to have the door installed. Somehow, their mistake became our problem. $625 wasn’t worth me paying to have it installed, but now we had wasted a week waiting and planning on having them install it. I was especially frustrated since I showed them the brochure of the exact door we purchased when I was paying for the installation, so they should have gotten it right. Apparently, they charge three times as much for 3/8″ glass vs. 1/4″ glass, because of the added support that is required. I was also frustrated to learn this, since I added the additional support myself, so I had already done the work that apparently cost the extra money.
Out of principle, I “returned” the installation, and we were going to do it ourselves. I felt bad for the contractor, because it wasted his time too, and apparently Lowe’s never told him I returned it, so he was left in the dark as well (he called me about a week later to see when we were proceeding).
So, we installed the door ourselves, after losing an extra week due to Lowe’s. The swinging door went in first – and like I was expecting, drilling was the hardest part. I marked the 4 holes for each hinge, but even with my hammer drill and diamond blades, I went through a few blades (some of which broke off while drilling and got stuck in the hole). Placement was actually pretty easy. The door had plastic guides that helped us hold it in place while we marked for the holes. Once the holes were drilled, it was easy to just screw in the door hinges.
First half of the glass enclosure is up.
The next half had similar issues with drilling holes, but the real problem was when we were putting the glass in place, it cracked. We got VERY lucky that it was in the corner, which was covered by the metal channel that the glass sits in, so you can’t even see it now that the panel is in place (and it’s not dangerous, either).

Shower glass is finished.
After the glass was finished, we just had to complete the finishing touches, like finishing the baseboard. I also hadn’t finished putting the doors and drawer faces in the vanity, since I was still in the process of building and painting them when we weren’t working on the shower.

Finishing the vanity.
Once that was all complete, we were ready for the final reveal: Ashley’s family came down to visit for Thanksgiving, so we needed to have our 2nd fully-functional bathroom ready by then. And we managed to complete it just in time.
Before.
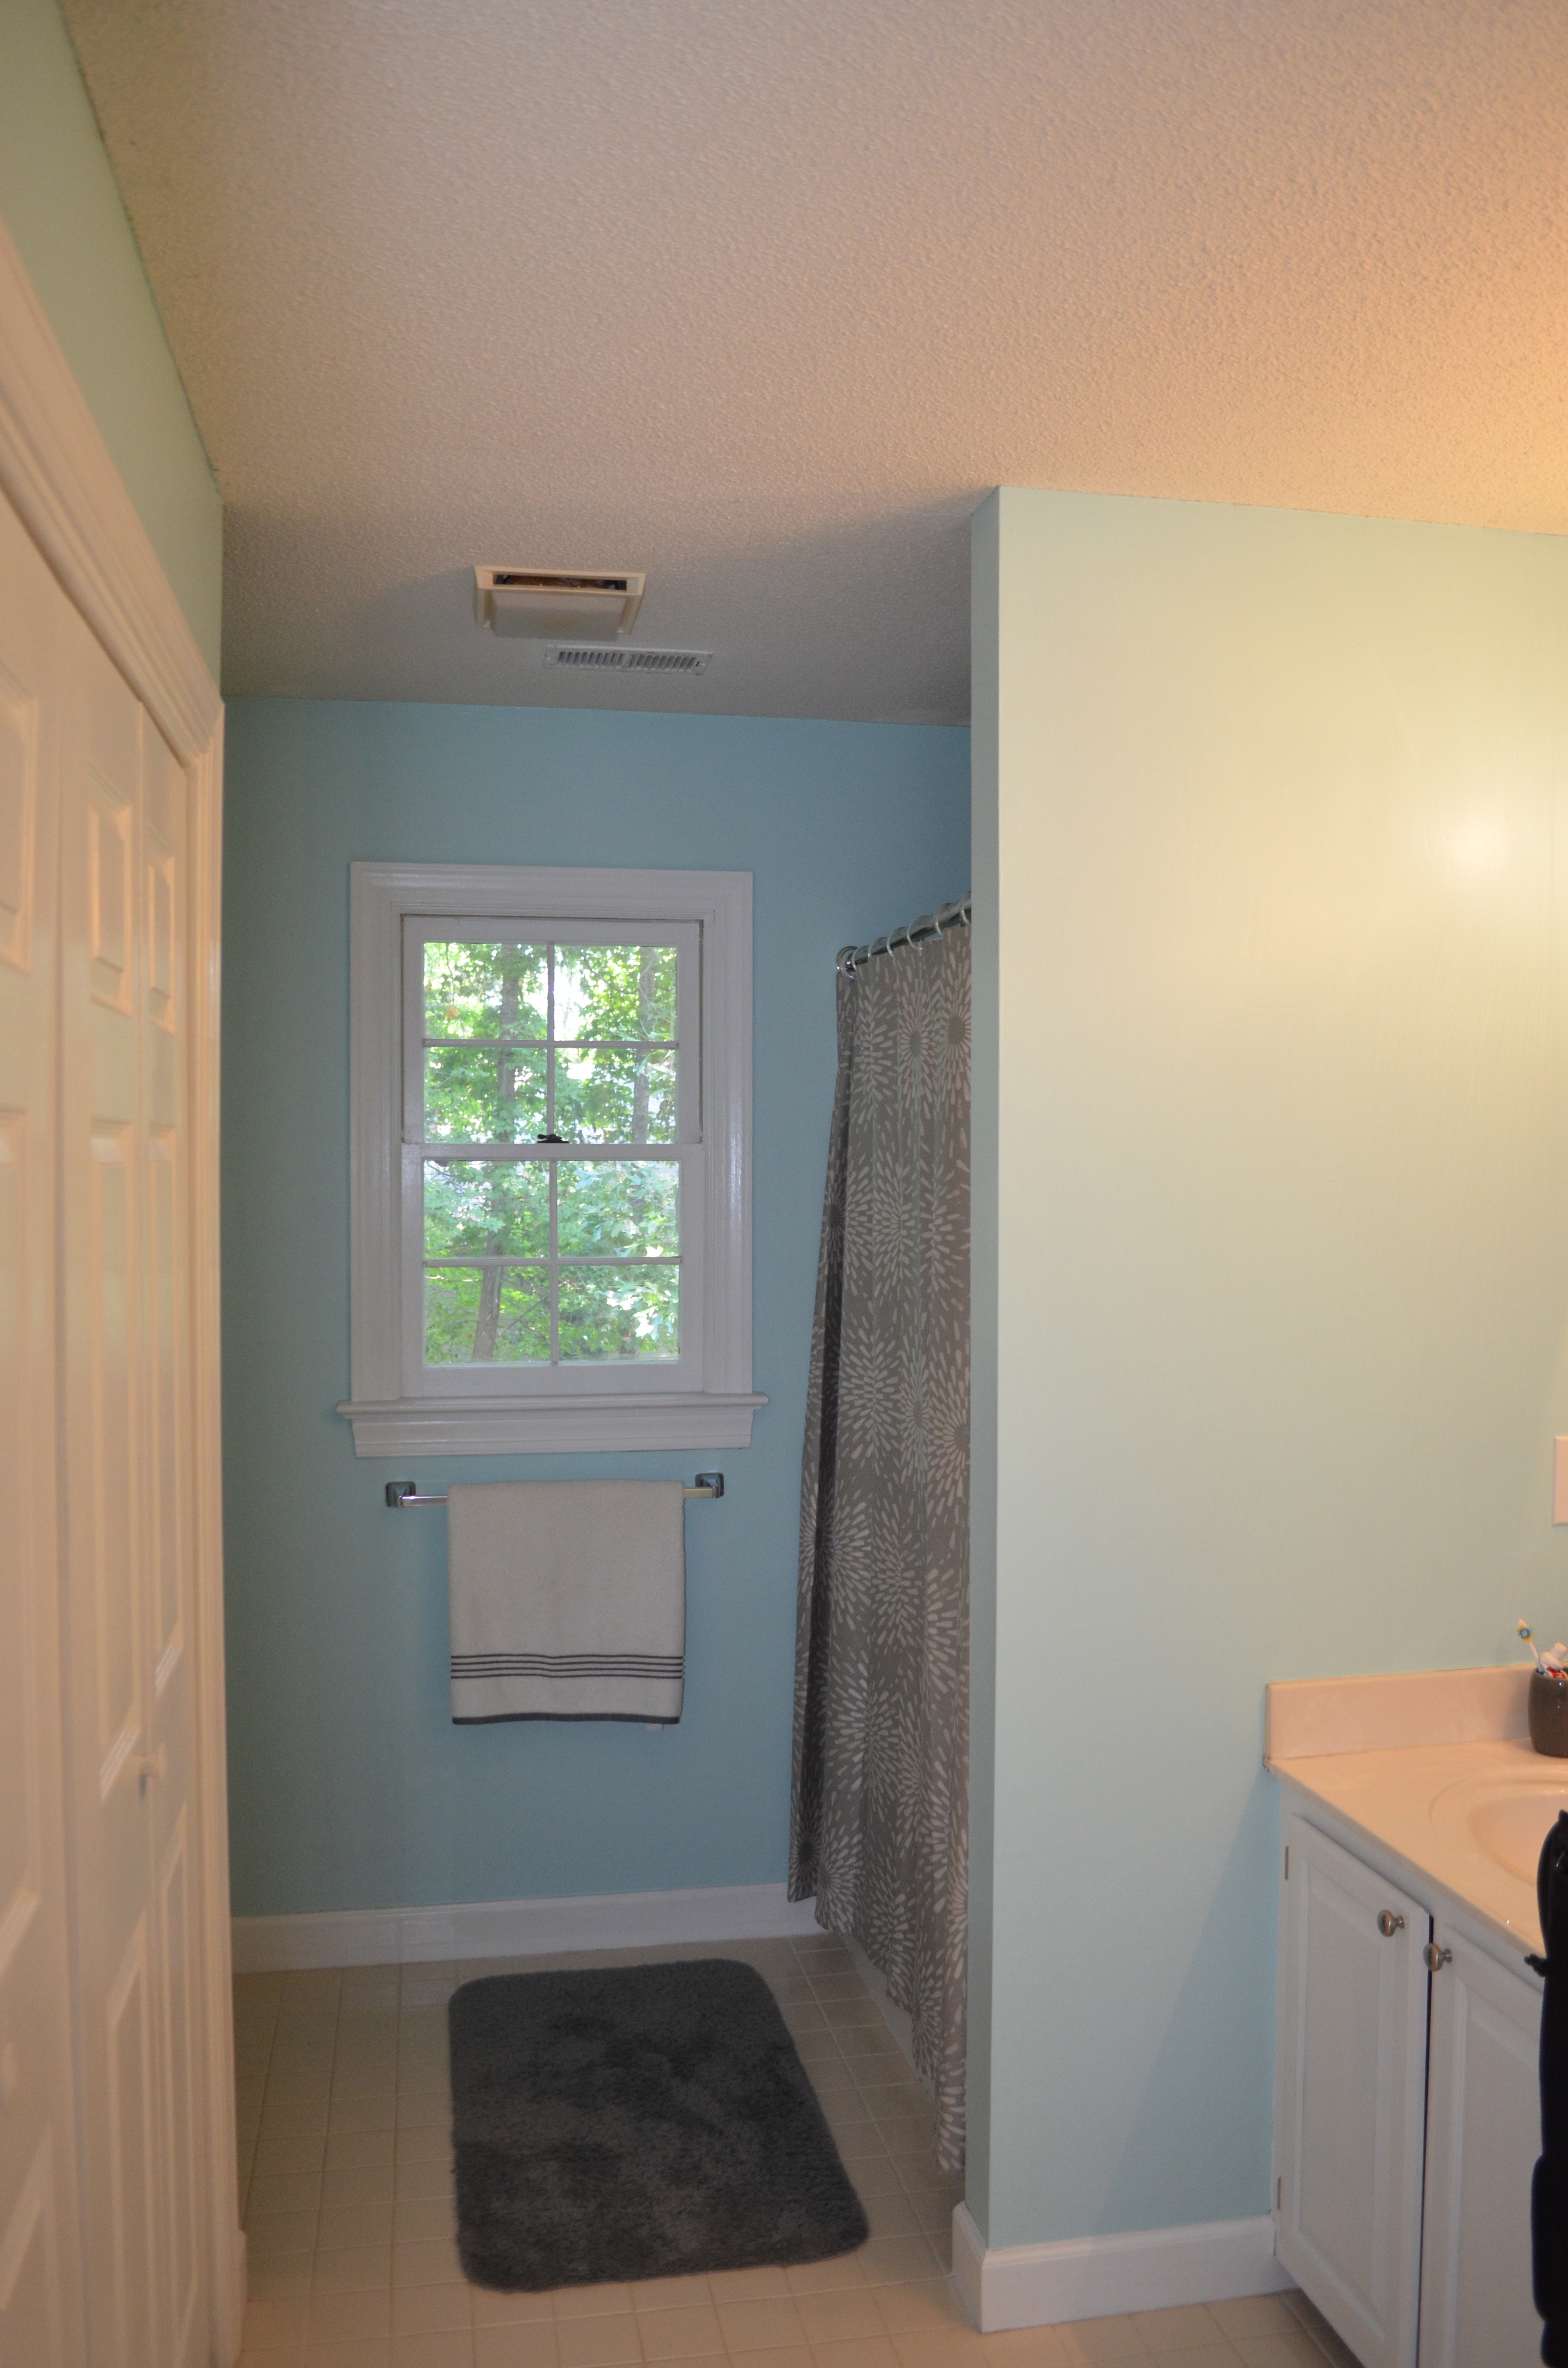
Before.

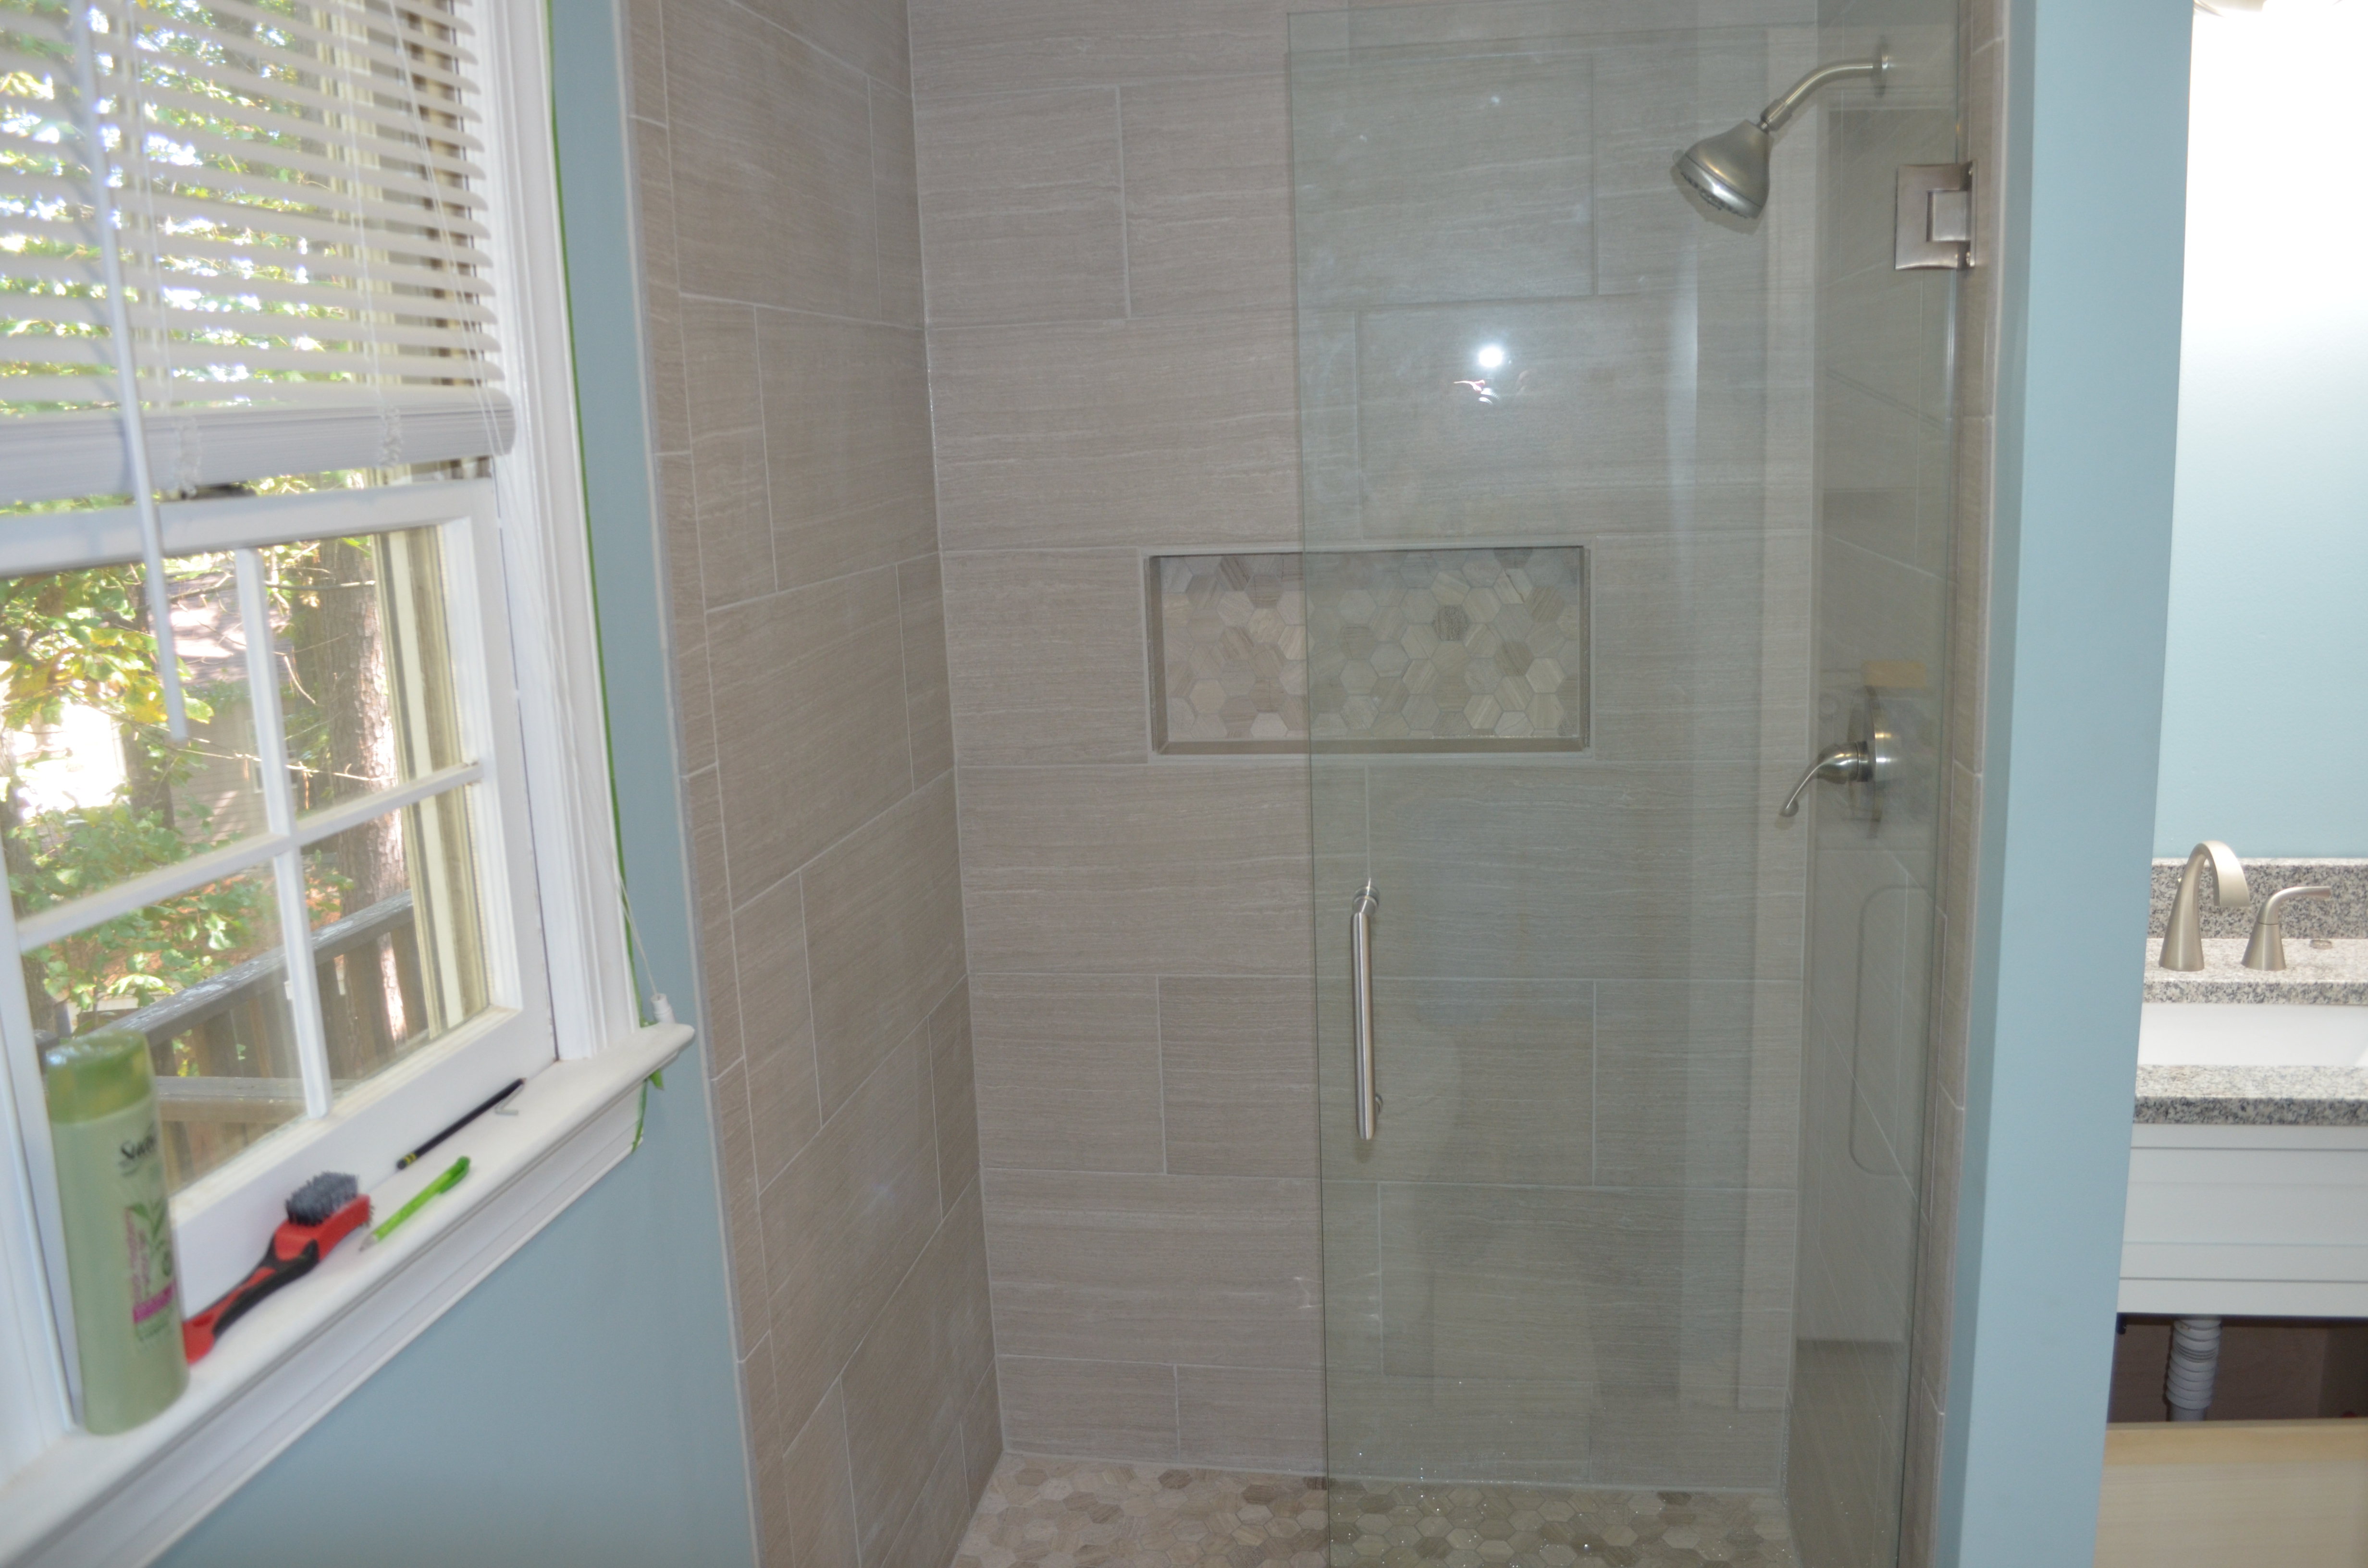
Finished shower.
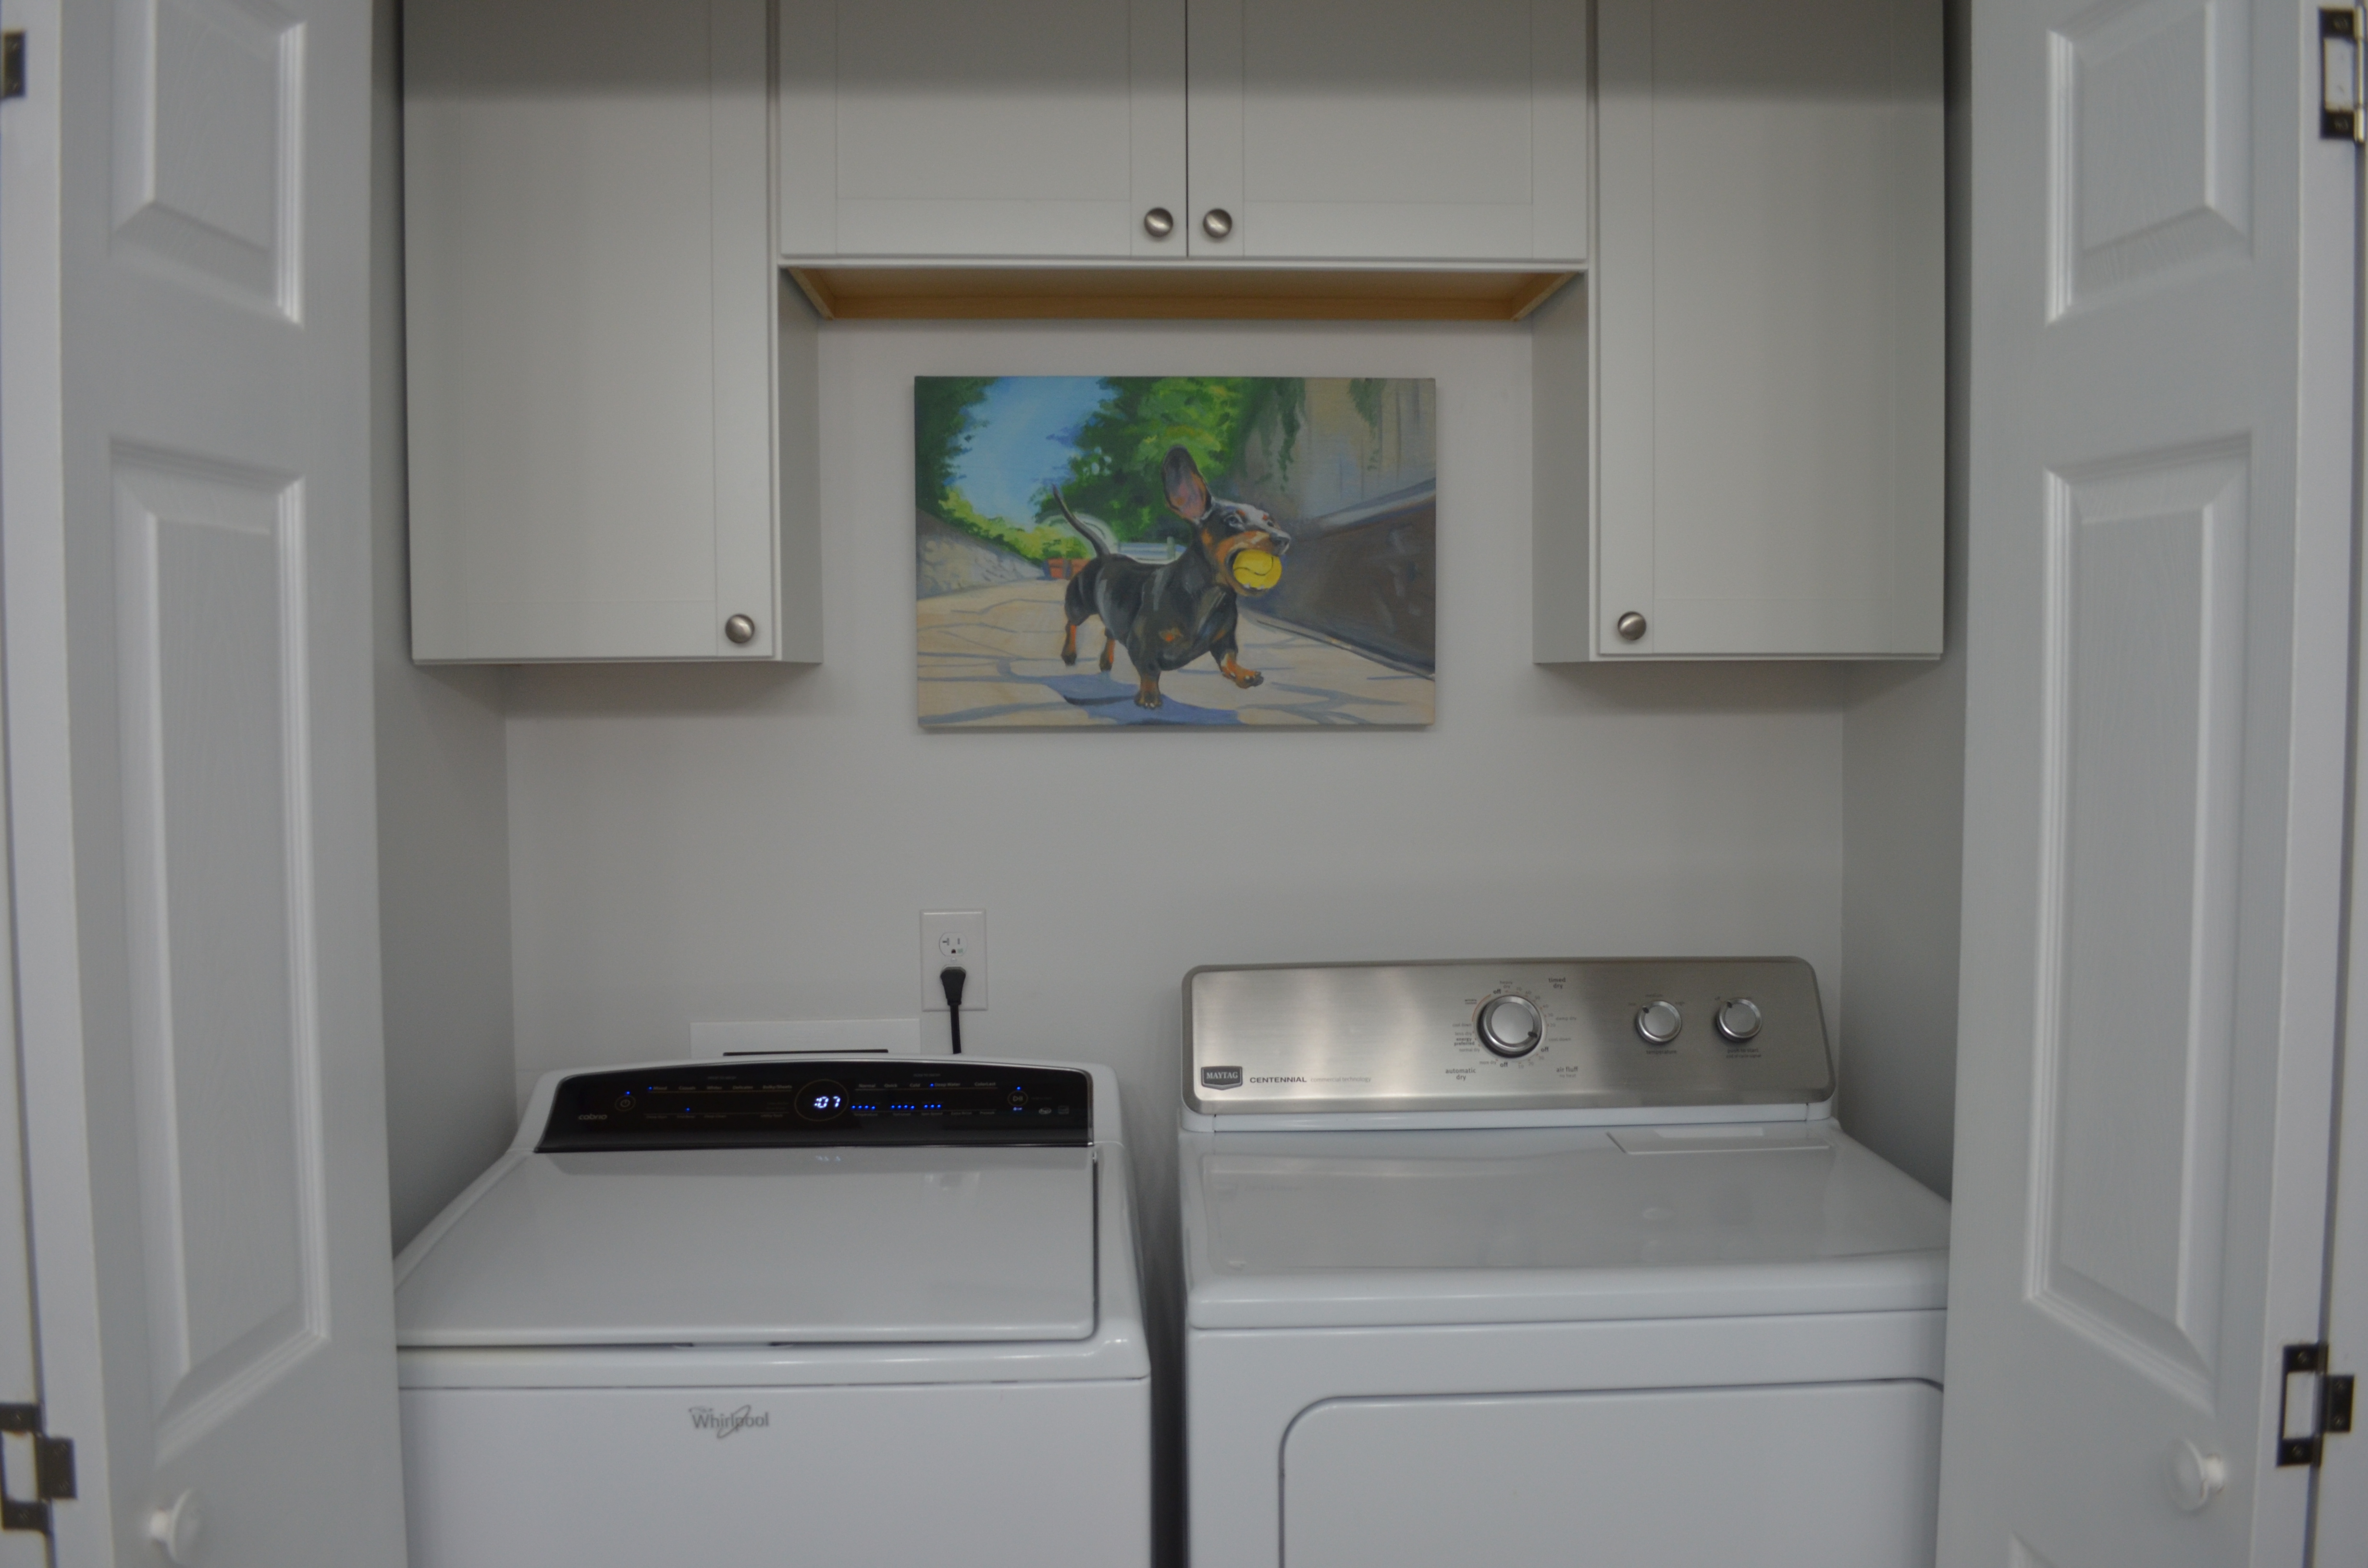
Finished laundry area. We added cabinets above the washer and dryer.
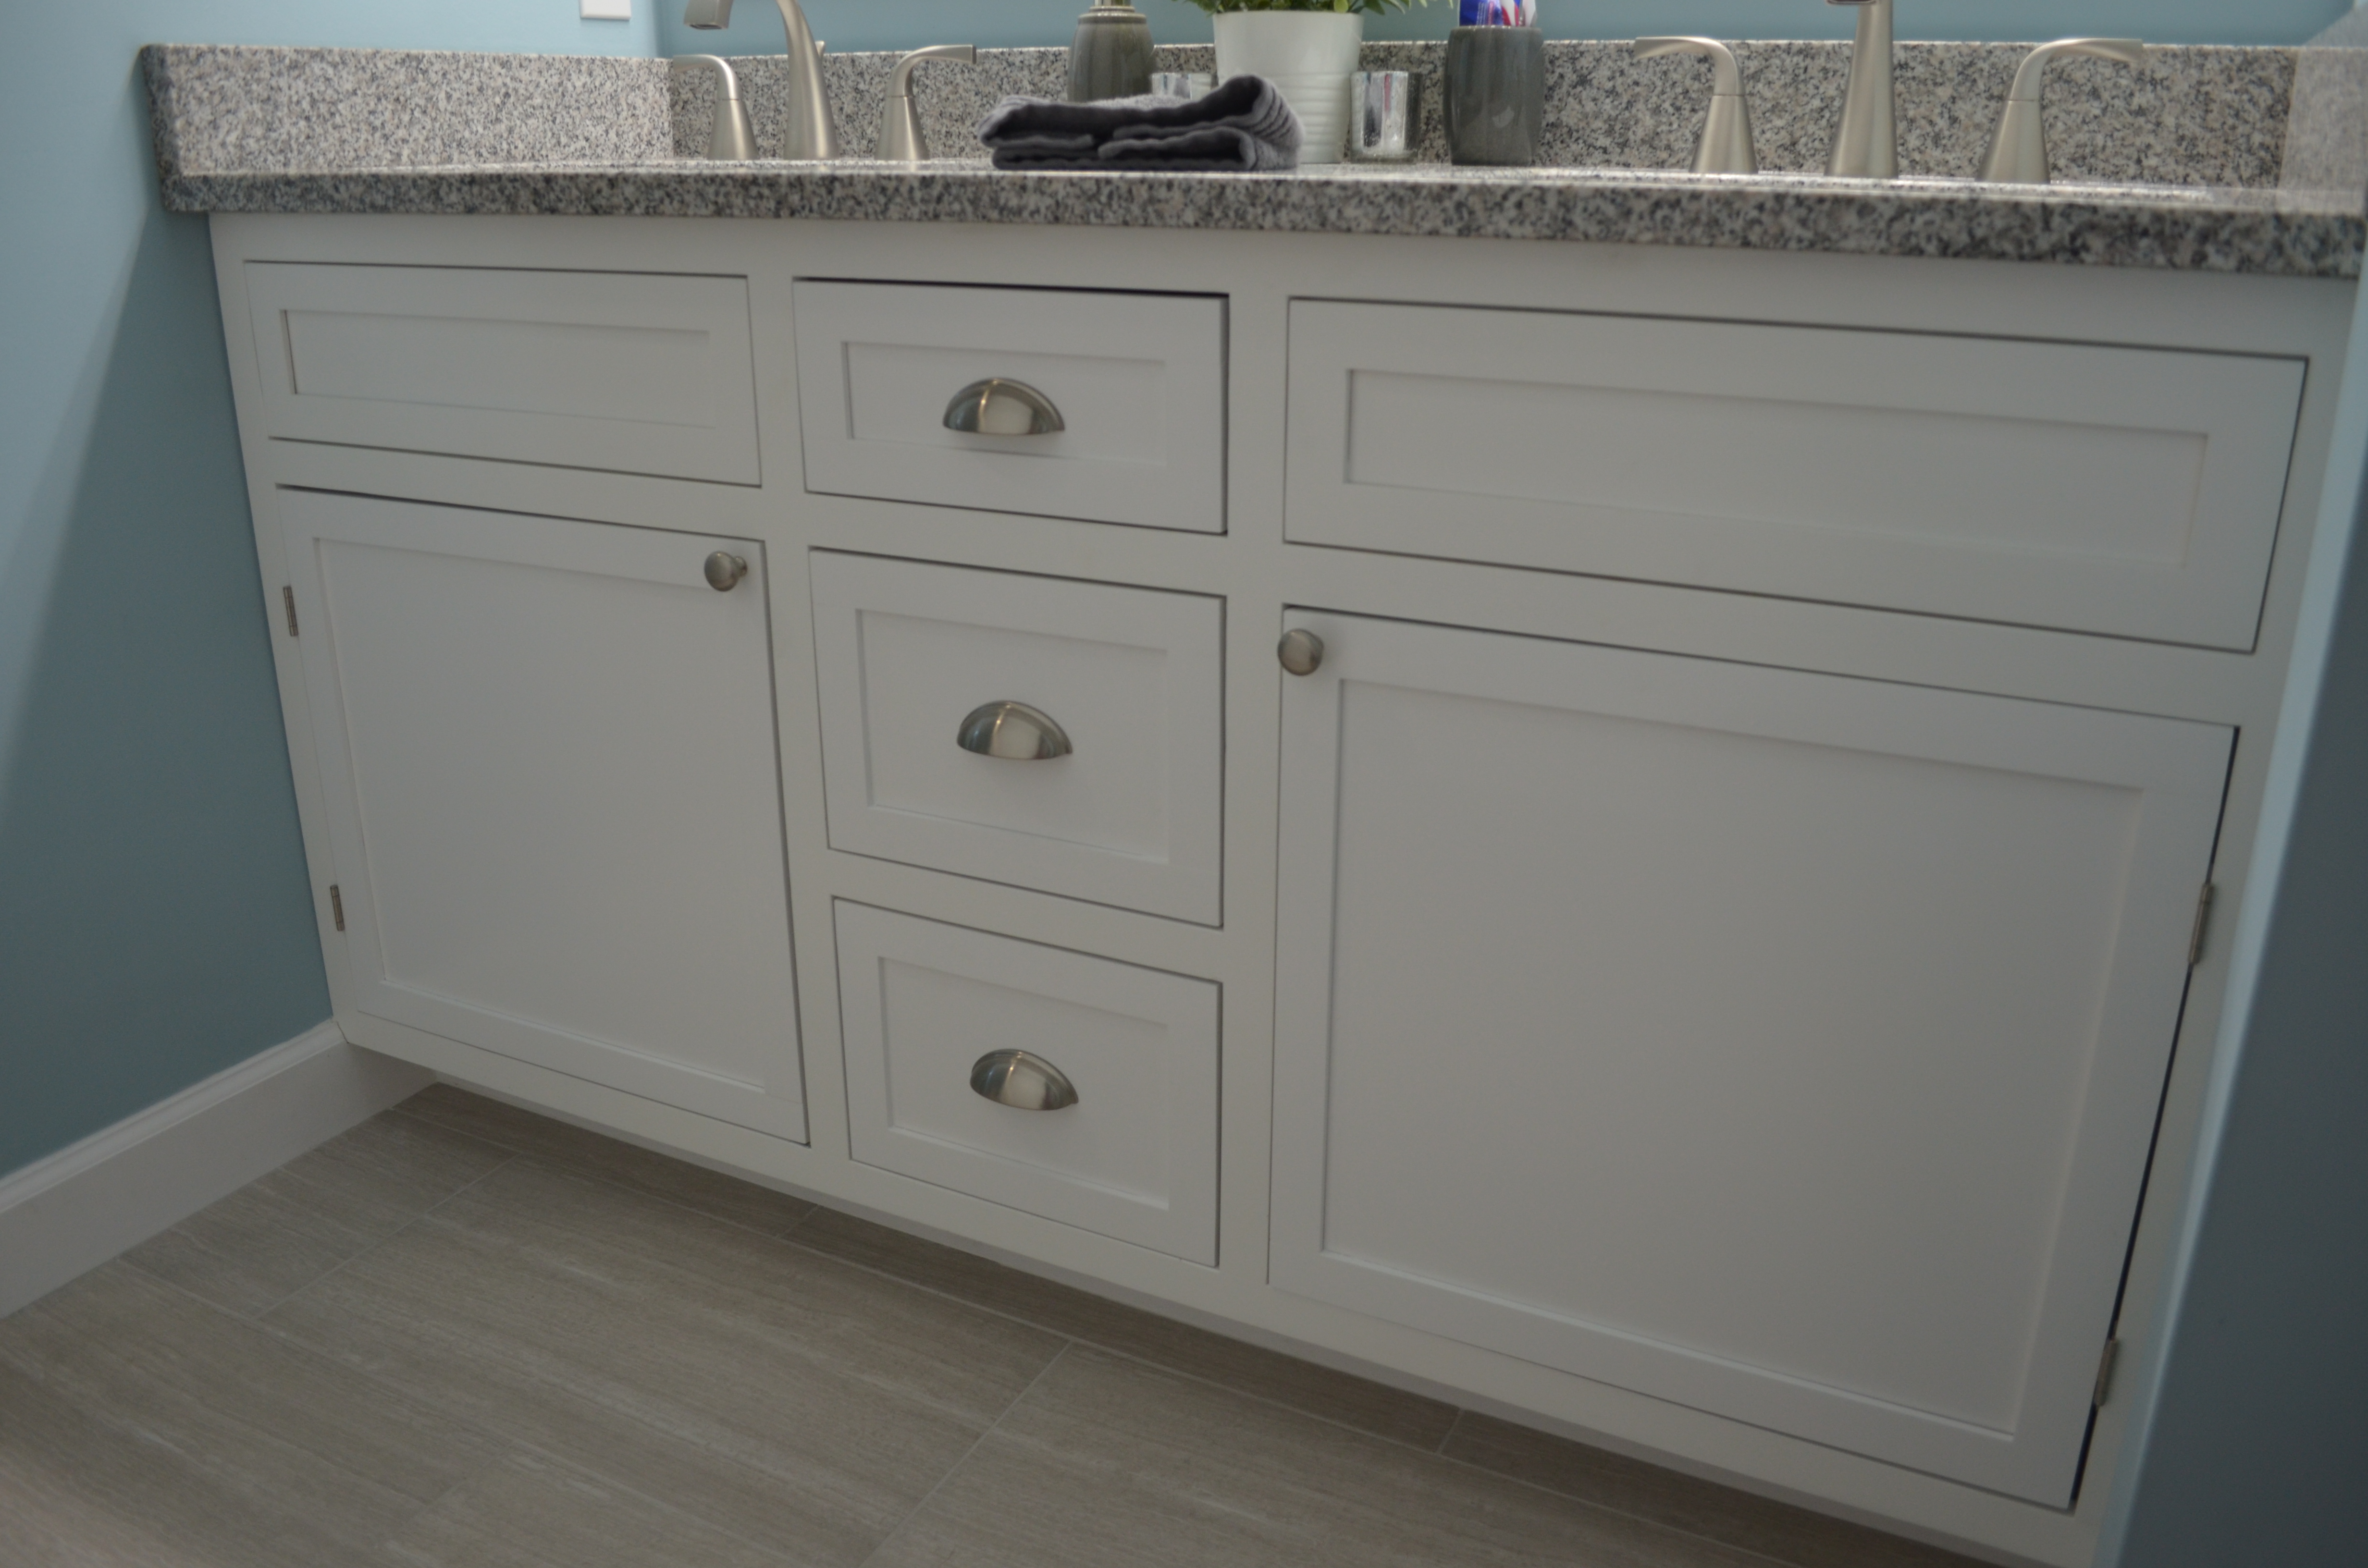
Finished custom vanity.
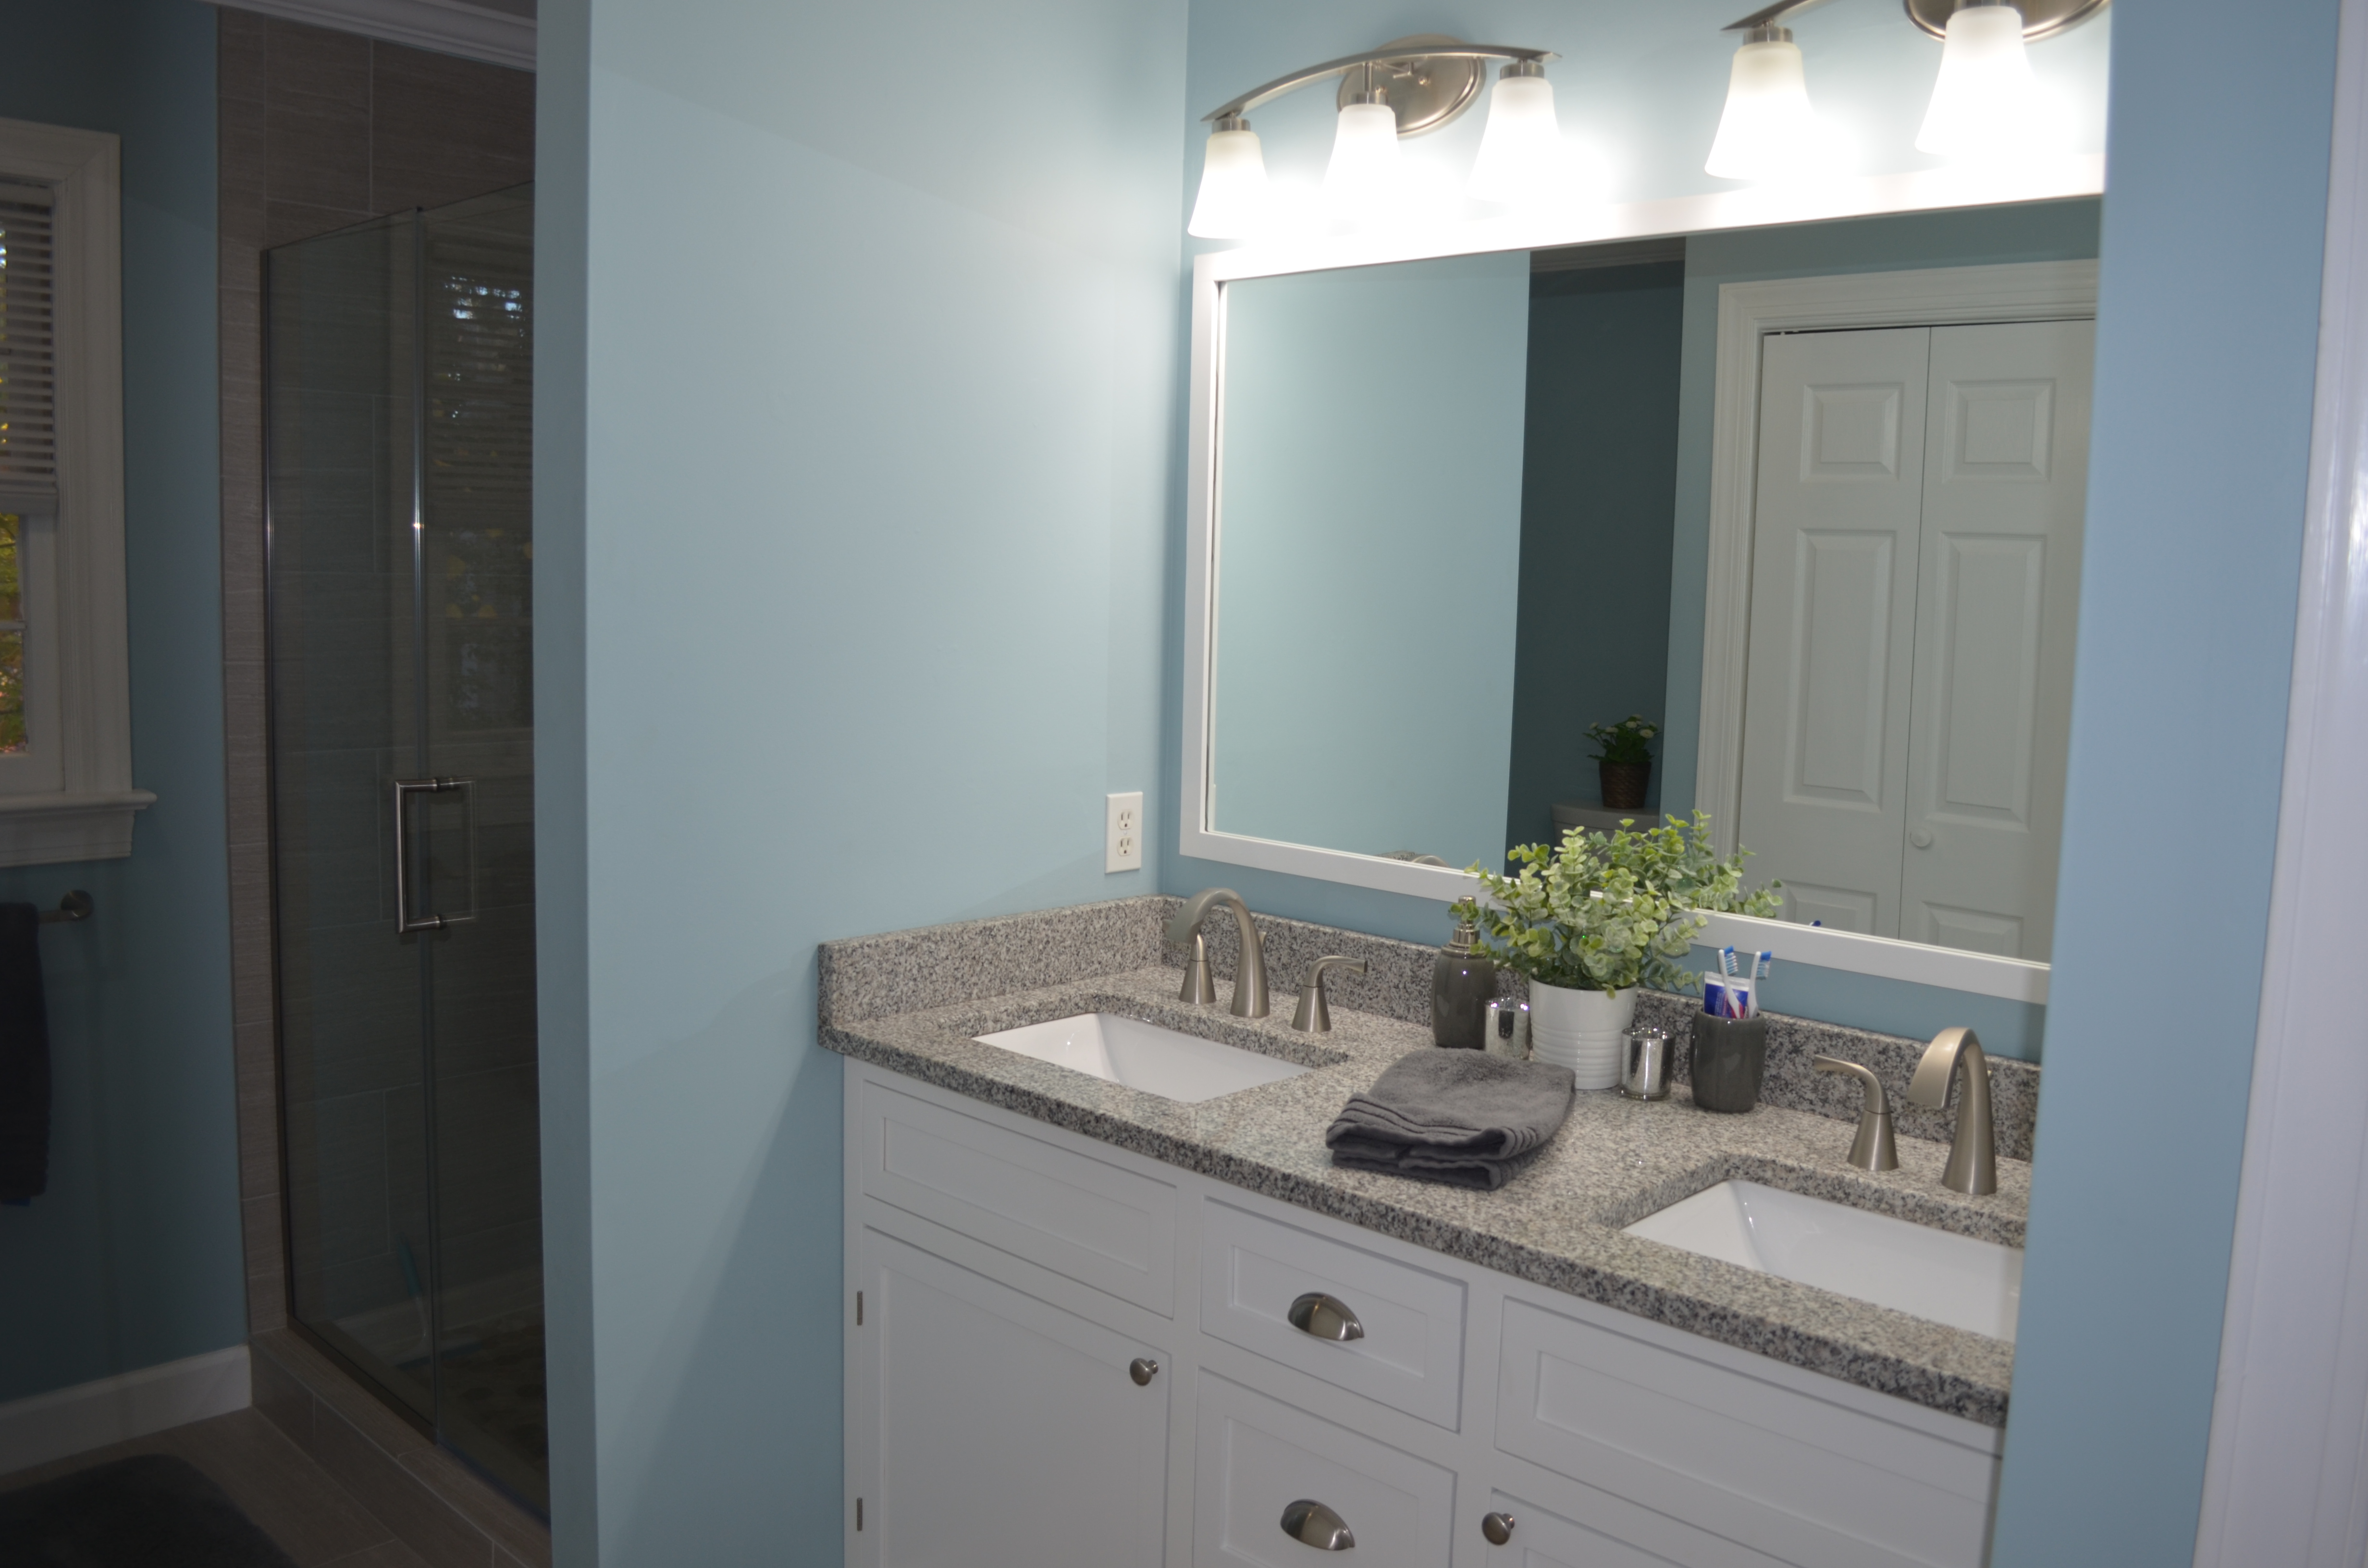
Finished bathroom.
I have a feeling this will be our last major renovation at Twilight Court, mainly because there’s not much left to do. At the same time, we’re looking for a large plot of land to start our next BIG project, which we’re both excited to get rolling on. This past year was big, especially with our wedding, and also the renovation of our master bathroom. I think the year ahead of us is going to be pretty big too.